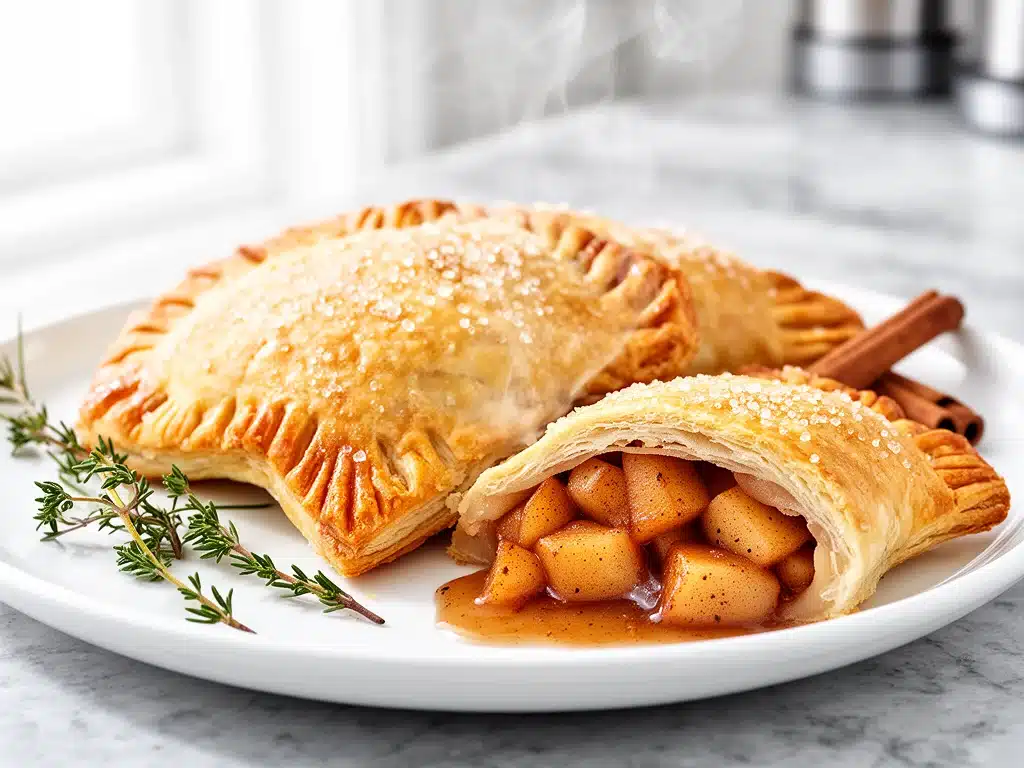
There is a specific kind of magic that happens when the air turns crisp and the leaves start to turn that deep, burnt orange color. For me, it’s the smell of cinnamon hitting warm butter that signals the true start of fall. It’s a smell that takes me straight back to being seven years old, standing on a stool in my grandmother’s kitchen, watching her fold dough over fruit with hands that moved faster than I could follow. She didn’t use recipes. She used instinct. I, on the other hand, have spent the last three years trying to reverse-engineer that instinct into something my own clumsy hands can actually pull off.
That’s how these Fall Cinnamon Apple Hand Pies came to be. I was tired of the store-bought kind that tasted like cardboard and artificial flavoring, and I was even more tired of whole pies that sat in my fridge for a week, getting soggy and sad. I wanted something portable. Something I could throw in a lunchbox or eat with my hands while walking around the farmer’s market. Something that felt like a hug in pastry form.
After about six failed attempts (RIP to the soggy bottoms and the filling that exploded out the sides), I finally nailed the balance. The dough is flaky but sturdy enough to hold a juicy apple filling without leaking. The filling is spiced just right—cinnamon, nutmeg, and a hint of vanilla—sweetened with brown sugar that caramelizes slightly in the oven. These Fall Cinnamon Apple Hand Pies are now my non-negotiable weekend baking project. They’re the kind of dessert that makes your house smell like autumn, even if it’s still 70 degrees outside. And trust me, by the time they cool, your family is going to be asking for them every single day.
Why You’ll Love This Recipe
I’ve made these hand pies for everything from backyard BBQs to last-minute school bake sales, and they always disappear before I can even take a photo. There are a few reasons why this recipe has earned a permanent spot in my rotation, and honestly, it’s mostly because it solves the biggest problem with fruit desserts: mess and waste.
- Zero Waste, Maximum Flavor — Whole pies are great, but they’re a commitment. These hand pies let you make exactly what you need. Want six for the week? Make six. Want twenty for a party? Easy. Plus, the leftovers are actually better than the fresh ones. They get softer and the flavors meld together overnight.
- Uses Up Any Apple — I don’t care if you have a bag of Honeycrisp, a few bruised Granny Smiths, or a mix of whatever is on sale at the grocery store. These pies are forgiving. They turn any apple into something special. I once made a batch with a weirdly shaped, slightly mealy apple from the bottom of my fridge, and it was delicious.
- Portable Comfort Food — This isn’t just a dessert; it’s a snack. It’s a breakfast-with-a-side-of-sugar. It’s a lunchbox treat. I pack these for hiking trips because they hold up better than granola bars and taste way better than sandwiches. They’re sturdy enough to survive in a backpack but tender enough to melt in your mouth.
- Feels Fancy, Actually Easy — There’s no rolling out perfect circles or worrying about lattice work. You just cut squares, fill them, and seal them. If you can fold a piece of paper, you can make these. The result looks like something you bought at a high-end bakery, but it costs a fraction of the price and tastes infinitely better.
- Make-Ahead Friendly — You can make the dough ahead, store it in the fridge for three days, or freeze the unbaked pies for later. I often make the dough on Sunday, fill them on Wednesday, and bake them Thursday night. It breaks the work up so it never feels like a chore.
Real talk? This recipe has saved me more times than I can count. When I don’t know what to bring to a potluck, or when I need to bribe my kids into doing chores, or when I just need a quiet moment with a cup of coffee and something sweet, these hand pies are my go-to. They’re reliable, delicious, and completely worth the effort.
Ingredients You’ll Need
One of the best things about this recipe is that you probably already have most of these ingredients in your pantry. It’s not a complex list with exotic spices you’ll only use once a year. It’s simple, honest food. Here’s exactly what you need and why I’m particular about each item.
For the Flaky Dough
All-purpose flour (2 ½ cups / 315g) — This is your base. Don’t try to swap in whole wheat here unless you want dense, tough pies. All-purpose gives you that tender, flaky texture. I use King Arthur Flour because it’s consistent, but any standard brand works fine.
Unsalted butter (1 cup / 226g, very cold) — This is non-negotiable. The butter must be cold. If it’s soft, it’ll melt into the flour before it hits the oven, and you won’t get those flaky layers. I grate frozen butter into the flour—it’s the easiest way to keep it cold and distribute it evenly. If you don’t have a grater, just cube it and put it back in the freezer for 10 minutes before mixing.
Vegetable oil (2 tablespoons / 30ml) — This is my secret weapon. Most pie doughs use only butter, but adding a little oil helps keep the dough tender and prevents it from becoming tough. It also helps the dough hold together better when you’re folding it. I’ve tested this with just butter, and the oil version is just better.
Ice water (6-8 tablespoons / 90-120ml) — You need enough water to bring the dough together, but not so much that it becomes sticky. Use ice water to keep the butter cold. Add it one tablespoon at a time. Stop when the dough looks like shaggy crumbs and holds together when you pinch it.
Salt (1 teaspoon / 6g) — Salt enhances the flavor of the butter and dough. Don’t skip it. It makes the sweetness of the filling pop.
Sugar (2 tablespoons / 25g) — Just a little bit to help with browning and a hint of sweetness in the crust.
For the Cinnamon Apple Filling
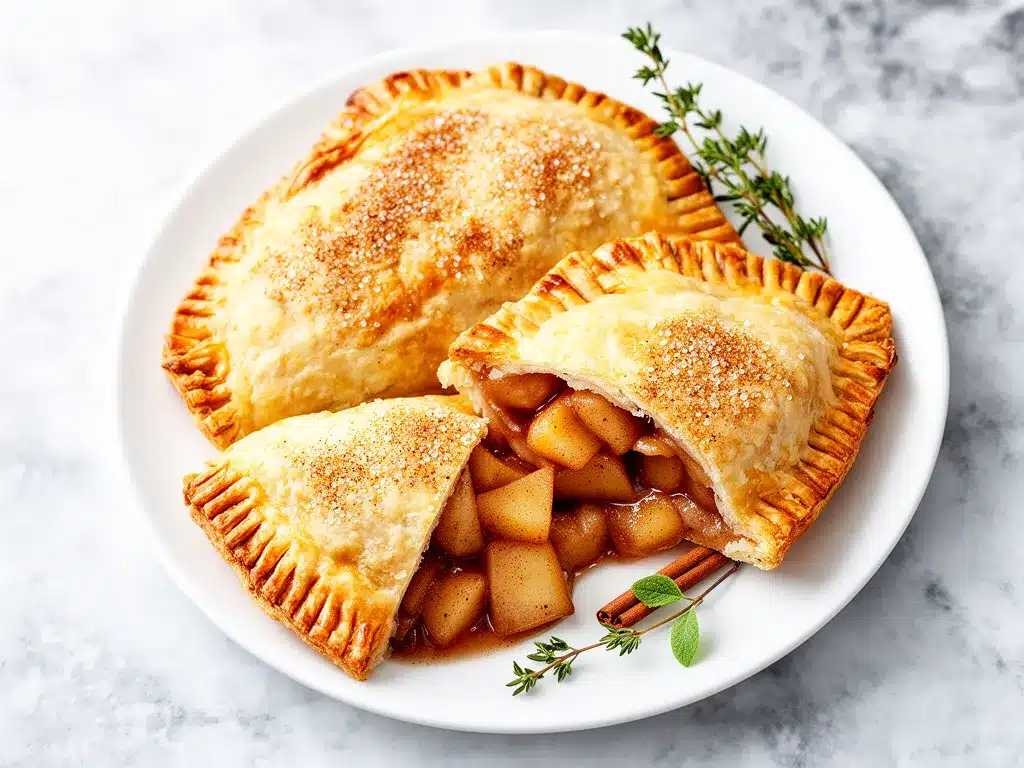
Apples (4 medium / about 1.2kg) — I recommend a mix of tart and sweet. Granny Smith for structure and tartness, and Honeycrisp or Fuji for sweetness. If you use only tart apples, add a bit more sugar. If you use only sweet apples, reduce the sugar slightly. The key is to avoid apples that turn to mush, like Red Delicious.
Brown sugar (½ cup / 100g, packed) — Brown sugar adds moisture and a caramel-like depth that white sugar just doesn’t have. It helps the filling get that jammy consistency.
Granulated sugar (2 tablespoons / 25g) — Just a touch to balance the tartness of the apples.
Ground cinnamon (1 ½ teaspoons) — The star of the show. Use good quality cinnamon; it makes a huge difference. If your cinnamon is old and dusty, buy new. It’s worth it.
Ground nutmeg (¼ teaspoon) — Just a pinch. It adds warmth and complexity. Don’t overdo it, or it’ll taste like Christmas morning.
Lemon juice (1 tablespoon / 15ml) — Lemon juice prevents the apples from browning and adds a bright acidity that cuts through the sweetness. Fresh is best.
Cornstarch (2 tablespoons / 16g) — This thickens the juices released by the apples as they bake. Without it, you’ll have a pool of syrup at the bottom of the pie. Cornstarch creates a gel-like texture that holds the filling together.
Butter (1 tablespoon / 14g, cubed) — Tossing the apple mixture with a little cubed butter before filling the pies adds richness and helps the apples caramelize slightly.
For the Finish
Egg wash (1 egg beaten with 1 tablespoon water) — This gives the pies that golden, bakery-quality shine. Don’t skip it.
Coarse sugar (for sprinkling) — Adds a nice crunch and sparkle. You can use regular granulated sugar if you don’t have coarse, but coarse is prettier.
Equipment Needed
You don’t need a fancy kitchen to make these. Here’s what I actually use.
Large mixing bowl — For combining the dough. A glass or ceramic bowl is nice because it keeps the dough cool.
Pastry cutter or food processor — I use a pastry cutter to cut the butter into the flour. It’s satisfying and quick. A food processor works too, but be careful not to over-process. You want pea-sized bits of butter, not a uniform paste.
Rolling pin — Any standard rolling pin works. I like a wooden one because it doesn’t stick.
Sharp knife or pizza cutter — For cutting the dough into squares. A pizza cutter is easier because it doesn’t drag the dough.
Fork — For crimping the edges. A fork gives a classic look, but you can also just press with your fingers.
Baking sheets — Two standard baking sheets. Line them with parchment paper for easy cleanup. I never bake directly on the pan because the sugar drips and burns.
Pastry brush — For applying the egg wash. A silicone brush is easier to clean.
Wire cooling rack — Essential for cooling the pies so the bottoms don’t get soggy.
How to Make It: Step-by-Step
Alright, let’s make these! I’m walking you through exactly how I do it, including the little tricks I’ve picked up so you don’t end up with a sticky mess.
Step 1: Make the Dough (10 minutes)
In a large bowl, whisk together the flour, salt, and sugar. Add the cold, cubed butter. Use a pastry cutter to cut the butter into the flour until the mixture looks like coarse crumbs with some pea-sized pieces of butter remaining. This is crucial for flakiness. Don’t blend it until it’s fine.
Drizzle in the vegetable oil and 6 tablespoons of ice water. Mix gently with a spatula or your hands until the dough just starts to come together. If it’s too dry, add more water, one teaspoon at a time. Do not overwork the dough. Divide the dough into two disks, wrap them in plastic wrap, and refrigerate for at least 30 minutes. This relaxes the gluten and re-chills the butter.
Step 2: Prepare the Filling (10 minutes)
While the dough chills, peel and dice the apples into small, uniform cubes (about ½ inch). This ensures they cook evenly and fit nicely into the hand pies. In a large bowl, toss the diced apples with the brown sugar, granulated sugar, cinnamon, nutmeg, lemon juice, and cornstarch. Add the cubed butter and toss again. Let this sit for 10 minutes while you roll out the dough. The apples will release some juice, which is good—it means flavor.
Step 3: Roll and Cut the Dough (10 minutes)
Preheat your oven to 375°F (190°C). Line two baking sheets with parchment paper. Take one disk of dough out of the fridge. On a lightly floured surface, roll it out into a large rectangle, about ¼ inch thick. Use a pizza cutter or sharp knife to cut the dough into 4-inch squares. You should get about 8-10 squares from each disk, depending on your rolling technique.
Step 4: Assemble the Hand Pies (15 minutes)
Place a spoonful of the apple filling (about 2-3 tablespoons) in the center of each square. Be careful not to overfill, or they’ll burst. Fold the dough over the filling to create a triangle. Press the edges together firmly to seal. Use a fork to crimp the edges, or press with your fingers. Trim any excess dough from the corners if you want a neat look, but it’s not necessary.
Place the assembled hand pies on the prepared baking sheets, leaving about 2 inches between them. Repeat with the second disk of dough.
Step 5: Bake Until Golden (25-30 minutes)
Brush the tops of the hand pies with egg wash and sprinkle with coarse sugar. This gives them that shiny, crunchy finish. Bake for 25-30 minutes, or until the crust is deep golden brown and the filling is bubbling slightly at the edges. If the edges are browning too fast, cover them with a strip of aluminum foil.
Step 6: Cool and Serve
Let the hand pies cool on the baking sheet for 10 minutes, then transfer to a wire rack to cool completely. The filling will be extremely hot when you first take them out, so be patient. Let them cool for at least 20 minutes before eating, or you’ll burn your tongue. Serve warm or at room temperature.
Expert Tips & Tricks
Here’s everything I’ve learned from making these dozens of times. These tips will save you from my mistakes.
Keep Everything Cold
This is the #1 rule for pie dough. If the butter melts before it hits the oven, you lose the flaky layers. Keep your butter cold, your water icy, and your hands cool. If the dough gets warm while you’re working, pop it back in the fridge for 10 minutes. I’ve ruined so many pies by being impatient here.
Don’t Skip the Cornstarch
Apples release a lot of juice. Without cornstarch, your hand pies will leak all over the baking sheet, creating a sticky mess that’s hard to clean and results in a soggy bottom. The cornstarch absorbs the juice and turns it into a thick, jammy filling that stays inside the crust.
Cut the Apples Uniformly
If your apple pieces are different sizes, some will be mushy while others are still raw. Dice them all to about ½ inch. This ensures even cooking and a better texture in every bite.
Seal Tight
Make sure you press the edges firmly. If air escapes during baking, the pie can burst. Crimping with a fork helps, but also press the edges with your fingers to ensure a tight seal. I’ve had a few explode, and while they still tasted good, they looked messy.
Brush with Egg Wash
This isn’t just for looks. The egg wash helps the coarse sugar stick and gives the crust a rich, golden color. Without it, the pies look pale and dull. It’s a small step that makes a big difference.
Variations & Substitutions
Once you’ve nailed the basic version, here’s how you can mix it up. I’ve tried all of these.
Pear and Ginger Hand Pies
Swap the apples for pears and add 1 teaspoon of ground ginger to the filling. Pear and ginger is a classic fall combination. Use Bosc pears for better structure.
Maple Walnut Hand Pies
Add ½ cup of chopped walnuts to the filling. Swap the brown sugar for maple sugar or reduce the brown sugar and add 1 tablespoon of pure maple syrup. It’s nutty and deeply flavorful.
Cherry Almond Hand Pies
Use dried cherries instead of apples. Add ½ teaspoon of almond extract to the filling. Sprinkle sliced almonds on top before baking. It’s a sophisticated twist.
Gluten-Free Option
Use a 1:1 gluten-free flour blend for the dough. The texture will be slightly more tender and less flaky, but it still works. Make sure your filling is thickened well, as GF flour can absorb moisture differently.
Vegan Option
Use vegan butter in the dough and skip the egg wash (use coconut milk or apple juice instead). The filling is naturally vegan. The crust won’t be as flaky as with dairy butter, but it’s still delicious.
Other Fruit Options
You can use peaches, berries, or even pumpkin puree (with a little extra thickener). For pumpkin, mix 1 cup pumpkin puree with ½ cup brown sugar, 1 teaspoon cinnamon, and 2 tablespoons cornstarch.
Serving & Storage
These hand pies are versatile and easy to store. Here’s how to enjoy them best.
How to Serve
I serve these warm, right out of the oven. They’re perfect with a cup of coffee or tea. For a fancy touch, serve them with a dollop of whipped cream or a scoop of vanilla ice cream. The hot pie and cold ice cream combo is unbeatable.
Storage
Room Temperature: Store leftovers in an airtight container at room temperature for up to 2 days. They’re best eaten within 24 hours, as the crust can get soft.
Refrigerator: Store in the fridge for up to 5 days. Reheat in the oven at 350°F for 10 minutes to crisp up the crust. Microwave reheating makes the crust chewy, so avoid it if you can.
Freezer: You can freeze the unbaked hand pies. Place them on a baking sheet and freeze until solid, then transfer to a freezer bag. Bake from frozen, adding 5-10 minutes to the baking time. You can also freeze baked hand pies for up to 3 months. Reheat in the oven to thaw and crisp.
Reheating Tips
If you’re reheating from the fridge, the oven is your best friend. 350°F for 10-15 minutes brings back the crispness. If you’re in a rush, microwave for 30 seconds, but expect a softer crust.
Nutrition Information
I’m not a nutritionist, but here’s the breakdown if you’re tracking. Keep in mind that these are indulgent treats, so portion control is key.
Per Hand Pie (based on 16 pies):
- Calories: 220
- Protein: 3g
- Carbs: 32g
- Fiber: 2g
- Sugar: 14g
- Fat: 10g
- Saturated Fat: 5g
- Sodium: 150mg
These pies are higher in carbs and sugar due to the fruit and added sweeteners, but they also provide fiber from the apples. They’re a great source of Vitamin C. If you’re watching your sugar, reduce the brown sugar in the filling or use a sugar substitute.
Final Thoughts
So that’s my take on Fall Cinnamon Apple Hand Pies. I’ve probably talked your ear off at this point, but when you make a recipe this often, you have a lot to say about it. These pies have become my autumn ritual. There’s something comforting about the process—cutting the butter, rolling the dough, filling the pies—that slows me down and reminds me to enjoy the season.
I hope you make these and they become part of your family’s routine too. Whether you eat them for breakfast, lunch, or dessert, they’re sure to bring a little bit of warmth and sweetness to your days. Make them yours! Try different apples, add nuts, or swap the spices. The best recipes are the ones you adapt to your tastes.
If you make these, drop a comment and let me know how they turned out! I love hearing how recipes work in your kitchen. And if something doesn’t work, tell me that too—I’m here to help troubleshoot. Happy baking, and I hope your kitchen smells as good as mine does right now.
Frequently Asked Questions
Can I use frozen apples?
You can, but thawed frozen apples tend to be softer and release more water. If you use frozen apples, thaw them first and drain off the excess liquid. You may need to add an extra tablespoon of cornstarch to the filling to account for the extra moisture. Fresh apples are definitely better for texture, but frozen works in a pinch.
Why did my hand pies leak?
Leaking usually happens for two reasons: either the filling was too thin (not enough cornstarch) or the edges weren’t sealed properly. Make sure you’re using 2 tablespoons of cornstarch per 4 apples. Also, press the edges firmly and crimp with a fork to create a tight seal. If you see leaking, it’s still edible, but the bottom of the crust might get soggy.
Can I make the dough ahead?
Yes! The dough can be made up to 3 days in advance and stored in the fridge. You can also freeze the dough disks for up to 3 months. Thaw in the fridge overnight before using. This is great for meal prep.
How do I prevent the crust from getting soggy?
Make sure your filling is thickened with cornstarch so it doesn’t release too much juice. Also, let the hand pies cool completely before storing them. Trapped steam in an airtight container can make the crust soft. If you’re storing them, leave the lid slightly ajar for the first hour to let steam escape.
Can I use puff pastry instead of homemade dough?
Absolutely. Store-bought puff pastry is a great shortcut. It’s flakier and easier to work with, though it lacks the buttery depth of homemade dough. If you use puff pastry, follow the same assembly steps but be careful not to overfill, as puff pastry can be delicate. Brush with egg wash and sprinkle with sugar for the best finish.
What’s the best apple for this recipe?
I recommend a mix of tart and sweet apples. Granny Smith provides structure and tartness, while Honeycrisp or Fuji adds sweetness. Avoid Red Delicious or McIntosh, as they tend to turn mushy when baked. If you can find them, Pink Lady apples are also excellent for their balance of sweet and tart.
Can I freeze the baked hand pies?
Yes, but they’re best eaten fresh. If you freeze baked hand pies, thaw them in the fridge overnight and reheat in the oven at 350°F for 10-15 minutes to restore crispness. They won’t be quite as flaky as fresh, but they’re still tasty. I usually freeze the unbaked pies for better results.
Pin This Recipe!


Fall Cinnamon Apple Hand Pies: Easy Homemade Dessert
- Total Time: 75 minutes
- Yield: 16 servings 1x
Description
Portable, flaky homemade hand pies filled with spiced cinnamon apples. These easy-to-make treats are perfect for fall, offering a zero-waste solution that uses any type of apple and can be prepared ahead of time.
Ingredients
- 2 ½ cups all-purpose flour
- 1 cup unsalted butter, very cold
- 2 tablespoons vegetable oil
- 6–8 tablespoons ice water
- 1 teaspoon salt
- 2 tablespoons sugar
- 4 medium apples (mix of tart and sweet, e.g., Granny Smith and Honeycrisp)
- ½ cup brown sugar, packed
- 2 tablespoons granulated sugar
- 1 ½ teaspoons ground cinnamon
- ¼ teaspoon ground nutmeg
- 1 tablespoon lemon juice
- 2 tablespoons cornstarch
- 1 tablespoon butter, cubed
- 1 egg beaten with 1 tablespoon water (for egg wash)
- Coarse sugar for sprinkling
Instructions
- In a large bowl, whisk together flour, salt, and sugar. Cut in cold butter using a pastry cutter until the mixture resembles coarse crumbs with pea-sized butter pieces.
- Drizzle in vegetable oil and 6 tablespoons of ice water. Mix gently until dough comes together. Divide into two disks, wrap in plastic, and refrigerate for at least 30 minutes.
- While dough chills, peel and dice apples into ½-inch cubes. Toss with brown sugar, granulated sugar, cinnamon, nutmeg, lemon juice, cornstarch, and cubed butter. Let sit for 10 minutes.
- Preheat oven to 375°F (190°C) and line two baking sheets with parchment paper.
- Roll out one dough disk on a floured surface to ¼ inch thickness. Cut into 4-inch squares (approx. 8-10 per disk).
- Place 2-3 tablespoons of apple filling in the center of each square. Fold dough over to form a triangle, press edges to seal, and crimp with a fork.
- Place pies on baking sheets, leaving 2 inches between them. Brush tops with egg wash and sprinkle with coarse sugar.
- Bake for 25-30 minutes until crust is deep golden brown and filling is bubbling. Cover edges with foil if browning too quickly.
- Cool on baking sheet for 10 minutes, then transfer to a wire rack to cool completely before serving.
Notes
Keep all ingredients cold to ensure flaky crust. Do not overwork the dough. Ensure apples are cut uniformly for even cooking. Seal edges tightly to prevent leaking. Cornstarch is essential to thicken apple juices. Dough can be made 3 days ahead or frozen. Unbaked pies can be frozen for later baking.
- Prep Time: 45 minutes
- Cook Time: 30 minutes
- Category: Dessert
- Cuisine: American
Nutrition
- Serving Size: 1 hand pie
- Calories: 220
- Sugar: 14
- Sodium: 150
- Fat: 10
- Saturated Fat: 5
- Carbohydrates: 32
- Fiber: 2
- Protein: 3
Keywords: fall dessert, apple hand pies, cinnamon apples, homemade pastry, portable dessert, easy baking, autumn recipes



