It started as a “let’s just try one batch” situation. I had a craving that hit me on a rainy Tuesday afternoon—something rich, something chocolate, and definitely something that didn’t require a trip to the store. I rummaged through my pantry, found a half-empty jar of peanut butter, a bag of brown sugar, and some cocoa powder, and decided to throw something together. I wasn’t aiming for gourmet. I was aiming for comfort.
But here’s the thing about fudgy peanut butter swirl brownies made with simple ingredients: once you taste them, you don’t just eat one. You eat the whole pan. Or at least, my family did.
I made them again the next weekend for a movie night. Then again on Monday because the craving returned. By Wednesday, I was wondering if I had a problem. But honestly? I don’t think I do. These brownies have become my secret weapon for when I need to impress guests without spending hours in the kitchen, or when I just need a hug in dessert form.
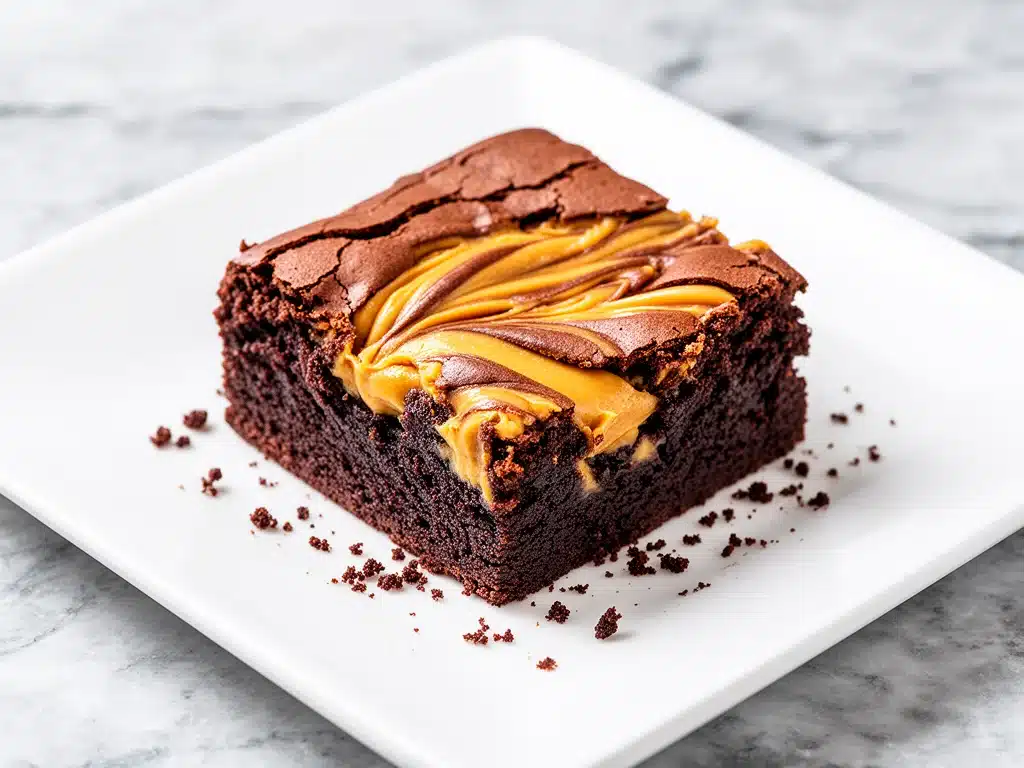
What makes these special isn’t fancy technique or obscure ingredients. It’s the contrast. You get that deep, intense chocolate flavor from the cocoa, the chewy, caramel-like sweetness from the brown sugar, and then this creamy, salty ribbon of peanut butter swirling through the middle. It’s the kind of dessert that feels indulgent but actually comes together faster than ordering takeout. I’ve tested this recipe at least a dozen times, tweaking the ratios until I got that perfect balance of fudgy and fluffy. And I’m pretty sure I’ve cracked the code.
Why You’ll Love This 4-Ingredient Dessert
There are about ten reasons I keep making these fudgy peanut butter swirl brownies, but here are the big ones that keep me coming back to this simple recipe.
Stupid Simple — Seriously, if you can melt butter and stir, you can make this. I’ve walked my teenage daughter through it over FaceTime while she was at college. She didn’t even burn them (a first for her).
Lightning Fast — 20 minutes from start to finish, with only 10 minutes of active prep. I make these on weeknights when I’m tired but still want something sweet. The oven does the heavy lifting.
Pantry-Friendly — You probably have all four ingredients already. Flour, sugar, cocoa, and peanut butter. If you don’t, they’re cheap staples you’ll use for other things too, like Greek yogurt blueberry muffins or even as a dip for fruit.
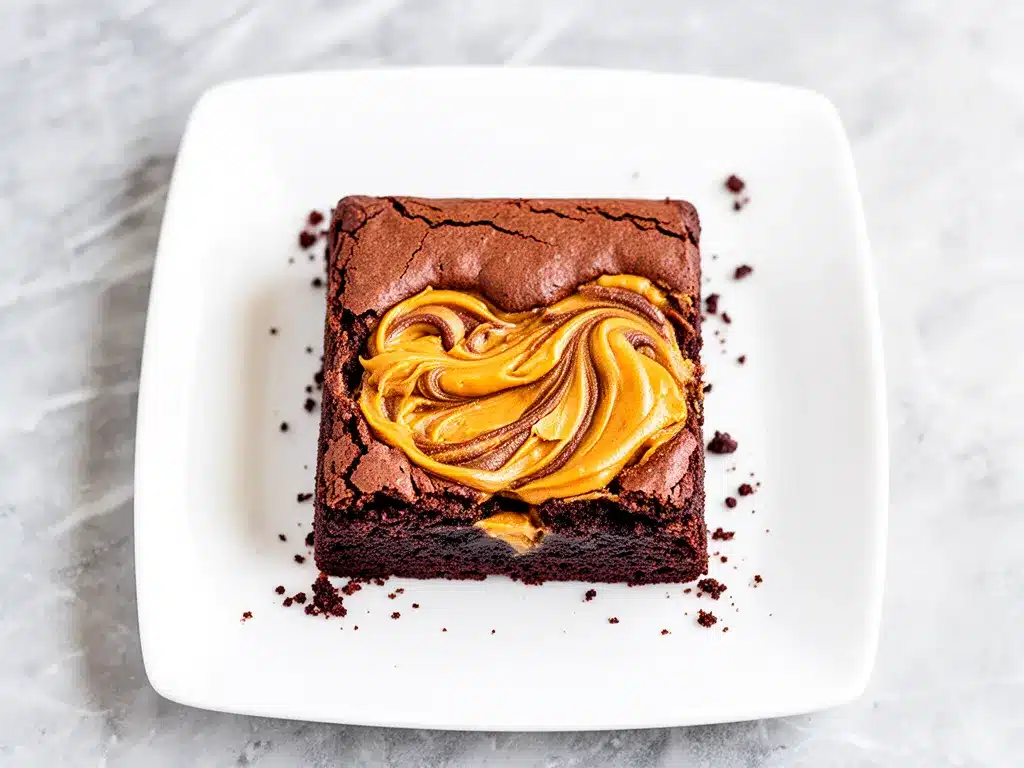
Texture Paradise — I’m obsessed with the contrast between the dense, fudgy chocolate base and the soft, gooey peanut butter ribbons. It’s not cakey. It’s not dry. It’s that perfect middle ground that makes people close their eyes when they take a bite.
Makes Amazing Leftovers — These actually taste better the next day. The flavors meld together, and the peanut butter swirls get even more pronounced. I deliberately make extra for lunch snacks or late-night cravings.
Budget-Smart — Feeds 9-12 people for under $10. That’s less than a dollar a serving. It’s luxury dessert pricing on a grocery budget.
This is my go-to when I need dessert to just work. No complicated techniques, no weird ingredients, just reliable, delicious food that makes everyone happy. Even my picky eater husband asks for seconds.
Ingredients You’ll Need
Here’s the best part: you probably have most of this already. I’m particular about three ingredients here, and I’ll tell you exactly why they matter. This looks like a short list, but each component plays a huge role in the final texture and flavor.
For the Chocolate Base
Unsalted butter (½ cup / 115g) — I use unsalted so I can control the saltiness, especially since peanut butter can be salty. Melted butter gives you that dense, fudgy texture. Don’t use oil; it changes the mouthfeel entirely.
Granulated sugar (1 cup / 200g) — This provides structure and crispiness on the edges. I use white sugar for that classic brownie snap. You can use brown sugar for a chewier texture, but I prefer the contrast.
Large eggs (2 large) — Room temperature eggs incorporate better into the batter. They provide the lift and the richness. Don’t skip them; they’re the binder.
Vanilla extract (1 teaspoon) — Pure vanilla, not imitation. It rounds out the chocolate flavor. If you don’t have any, it’s okay, but it makes a difference.
For the Dry Mix
All-purpose flour (¾ cup / 95g) — This is the base. I don’t use cake flour or bread flour; all-purpose gives the right amount of structure without making them tough. Sift it if you can—it removes lumps and ensures even mixing.
Cocoa powder (½ cup / 50g) — Use natural cocoa powder, not Dutch-processed. Natural cocoa has a sharper, more intense chocolate flavor that stands up to the peanut butter. I use Hershey’s or Ghirardelli. Avoid anything labeled “sweetened.”
Salt (¼ teaspoon) — Even though the butter is unsalted, a pinch of salt enhances the chocolate flavor. It’s non-negotiable.
For the Swirl
Creamy peanut butter (½ cup / 125g) — This is the star. Use standard creamy peanut butter like Jif or Skippy. Natural peanut butter with separated oil doesn’t work well here because it’s too runny and won’t hold the swirl. You want something stable and smooth. This is the one ingredient I refuse to compromise on.
Extra granulated sugar (1 tablespoon) — Just a sprinkle on top of the peanut butter before swirling helps create those beautiful, defined ribbons and adds a tiny crunch.
Optional: Chocolate chips (½ cup) — I sometimes add these for extra chocolatey bites, but the base recipe is perfect without them. If you’re a chocolate purist, skip them.
Personal Tips
Brand recommendations: I always use Ghirardelli cocoa powder—it’s consistent and has a rich flavor. For peanut butter, Jif is my go-to for its smooth texture and stability.
Shopping shortcuts: If you’re in a rush, pre-melted butter isn’t a thing, but you can microwave your butter in 15-second bursts to save time. Just don’t let it boil.
Substitutions: No cocoa powder? You can use melted chocolate, but you’ll need to adjust the butter and sugar amounts. It’s trickier, so stick to cocoa for simplicity. No peanut butter? Sunflower seed butter works in a pinch, but the flavor profile changes significantly.
Equipment Needed
You don’t need fancy equipment for this. Here’s what I actually use.
9×9-inch baking pan — This is the standard size for these brownies. It gives the right thickness. A 9×13 pan will make them too thin and dry. If you only have a 9×13, double the recipe.
Microwave-safe bowl or small saucepan — For melting the butter. I use a glass bowl in the microwave for speed. A saucepan on the stove works too but takes longer.
Mixing bowls — One medium bowl for the wet ingredients, one large bowl for the dry. I use plastic bowls because they’re light and don’t slide around.
Whisk — A regular balloon whisk works fine. I prefer it over a spoon because it incorporates the eggs better.
Fork or knife — For creating the swirl pattern. I use a butter knife for precise lines, but a fork creates a more rustic look. Your choice.
Parchment paper — Essential for easy removal. I line the pan and leave overhangs on the sides so I can lift the whole batch out once cooled. Cleanup is a breeze.
Measuring cups and spoons — Pretty standard stuff. Dollar store versions work fine. Just make sure they’re accurate.
Optional but nice:
Offset spatula — Makes spreading the batter super easy. A regular spatula works too.
Cooling rack — Lets air circulate under the pan. I don’t always use one, but it helps prevent soggy bottoms.
Tool Tips:
Don’t have a 9×9 pan? A square cake pan works. Just don’t use a rectangular one unless you double the recipe.
I’m obsessed with my parchment paper liners — They’re like $5 for a roll and save you from scrubbing pans. Worth every penny.
How to Make It: Step-by-Step
Alright, let’s make this! I’m walking you through exactly how I do it, including the little tricks I’ve picked up. This fudgy peanut butter swirl brownies recipe is straightforward, but attention to detail makes the difference between good and amazing.
Step 1: Prep Your Pan and Oven (5 minutes)
Preheat your oven to 350°F (175°C). Line your 9×9-inch baking pan with parchment paper, leaving a slight overhang on the long sides. This is crucial for lifting the brownies out later. Grease the parchment lightly with butter or cooking spray to keep it in place.
Step 2: Melt the Butter (2 minutes)
Melt the butter in a microwave-safe bowl in 30-second intervals, stirring in between, until completely liquid. Alternatively, melt it in a small saucepan over low heat. Let it cool for a minute so it doesn’t cook the eggs when you add them.
Step 3: Mix the Wet Ingredients (3 minutes)
In a medium bowl, whisk the melted butter, granulated sugar, eggs, and vanilla extract together. Whisk vigorously for about 1-2 minutes. You want the mixture to look glossy and slightly emulsified. This step incorporates air and gives the brownies their chewy texture. Don’t rush this.
Step 4: Add the Dry Ingredients (2 minutes)
In a separate bowl, whisk together the flour, cocoa powder, and salt. Then, gently fold the dry ingredients into the wet mixture using a spatula. Mix until just combined. Do not overmix! Overmixing develops gluten and makes the brownies tough. The batter will be thick and dark. Stop mixing as soon as you no longer see streaks of flour.
Step 5: Spread the Batter (2 minutes)
Pour the batter into your prepared pan. Use a spatula to spread it evenly into the corners. The batter will be thick, so you might need to press it down. Make sure it’s level so the brownies bake evenly.
Step 6: Add the Peanut Butter Swirl (5 minutes)
This is the fun part. Drop spoonfuls of creamy peanut butter over the batter. Don’t try to cover the entire surface; just random dollops are fine. Then, take a knife or fork and drag it through the peanut butter and batter in a zigzag or circular motion. You don’t need to be artistic—just create some swirls. The goal is to have visible ribbons of peanut butter throughout.
Step 7: Bake (25-30 minutes)
Place the pan in the preheated oven. Bake for 25-30 minutes. The brownies are done when the edges are set and pulling away from the sides, and the center is just barely set. A toothpick inserted into the center should come out with moist crumbs, not wet batter. If it comes out clean, you’ve overbaked them. I pull mine out at 25 minutes for extra fudginess.
Step 8: Cool and Serve
Let the brownies cool in the pan for at least 20 minutes. This is the hardest part, but it’s necessary for clean cuts. If you cut them hot, they’ll be a mess. Use the parchment overhang to lift the whole batch out, then slice into squares. Dust with powdered sugar or sea salt if you want to get fancy.
Total Time: About 45 minutes (10 minutes prep, 30 minutes bake, 20 minutes cool)
Built-in Troubleshooting:
Brownies are too cakey? You likely overmixed the batter or overbaked them. Next time, mix less and pull them out a minute earlier.
Brownies are too dense? You might have packed the flour too tightly. Spoon and level your flour for accurate measurement.
Peanut butter sank? Make sure the peanut butter dollops aren’t too large. Smaller dollops stay suspended better.
Expert Tips & Tricks
Here’s everything I’ve learned from making this dozens of times. These tips will save you from my mistakes.
Don’t Overmix the Batter
This is the #1 mistake people make. Once you add the flour, mix only until it disappears. Overmixing creates gluten, which leads to tough, cakey brownies instead of fudgy ones. I’ve ruined batches this way before—don’t be me.
Room Temperature Eggs Matter
Cold eggs can cause the melted butter to seize up slightly, creating little curds. Let your eggs sit out for 15-20 minutes before starting. If you forget, place them in a bowl of warm water for 5 minutes.
Use the Right Peanut Butter
I can’t stress this enough. Do not use natural peanut butter with separated oil. It’s too runny and won’t hold the swirl. Use standard commercial creamy peanut butter. It has stabilizers that keep the swirl distinct. My husband can tell the difference, and he’s not even a peanut butter snob.
Cool Completely for Clean Cuts
I know you want to eat them now. Resist. Warm brownies are fragile. Let them cool in the pan for at least 20 minutes. For even cleaner cuts, chill them in the fridge for an hour. They’ll slice like butter.
Pro Tricks I’ve Learned:
For Restaurant-Quality Finish
Sprinkle flaky sea salt (like Maldon) on top immediately after baking. The salt enhances the chocolate and peanut butter flavors incredibly. It’s the difference between home-style and bakery-style.
For Extra Richness
Add ½ cup of chocolate chips to the batter before swirling. It adds pockets of melted chocolate that contrast with the peanut butter.
For Better Texture
Let the batter rest for 10 minutes after mixing before baking. This allows the flour to hydrate fully, resulting in a more tender crumb.
Make-Ahead Strategy
These store well at room temperature for up to 4 days in an airtight container. They actually taste better on day 2. I make them on Sunday for the week.
Variations & Substitutions
Once you’ve nailed the basic version, here’s how you can mix it up. I’ve tried all of these.
Double Chocolate Version
Add ½ cup mini chocolate chips to the batter. Swirl chocolate peanut butter (like Reese’s) instead of regular for an extra chocolatey hit. My kids love this version.
Gluten-Free
Use a 1:1 gluten-free flour blend. Everything else is naturally gluten-free. I’ve used Bob’s Red Mill and it works great. The texture might be slightly more crumbly, but still delicious.
Dairy-Free
Replace butter with coconut oil or a dairy-free butter alternative. Use dairy-free chocolate chips if adding them. Note: Coconut oil changes the flavor slightly, so use refined coconut oil for neutrality.
Nut-Free
Use sunflower seed butter or soy nut butter instead of peanut butter. Sunflower seed butter is the closest in texture and flavor. It’s a bit earthier, but still good. I make this for my nut-allergic friend.
Low-Sugar
Use a granulated sugar substitute like Erythritol. Note: Sugar provides structure, so the brownies might be more crumbly. Add an extra egg white to help bind. It’s not as fudgy, but still tasty.
Different Flavors:
Marshmallow Swirl
Swirl in marshmallow fluff instead of peanut butter for a S’mores vibe. Add chocolate chips on top before baking.
Caramel Drizzle
Drizzle caramel sauce over the baked brownies. Or swirl in dulce de leche for a richer flavor.
Espresso Boost
Add 1 teaspoon of instant espresso powder to the dry ingredients. It intensifies the chocolate flavor without making it taste like coffee.
Serving & Storage
I usually serve these straight from the pan at a party—they’re finger food and disappear fast. But here are other ways I’ve enjoyed them:
How to Serve:
Cut into 12 squares for standard servings. For a dessert plate, serve one square with a scoop of vanilla ice cream or a dollop of whipped cream. The cold cream contrasts beautifully with the warm, fudgy brownie.
Side Dishes:
These are rich, so they don’t need much. Maybe a simple green salad if you’re balancing a heavy meal. Or serve with a glass of cold milk or a creamy coconut lime mocktail for a refreshing contrast.
Toppings Bar:
When I have guests, I put out: powdered sugar, flaky sea salt, chocolate shavings, crushed peanuts. Everyone customizes their square.
Wine Pairing:
Not a wine expert, but a bold red like Cabernet Sauvignon or a sweet dessert wine like Port works great with chocolate and peanut butter.
Storage Instructions:
Refrigerator:
Store in an airtight container at room temperature for up to 4 days. If it’s hot outside, refrigerate them. They’ll firm up, but bring to room temperature before eating for best texture.
Freezing:
Yes, these freeze well! Wrap individual squares in plastic wrap, then place in a freezer bag. Freeze for up to 3 months. Thaw at room temperature for 30 minutes. They taste almost as good as fresh.
Reheating:
Microwave a square for 10-15 seconds to soften it up. The peanut butter swirl will become gooey and delicious. I do this for late-night cravings.
Meal Prep:
Make a batch on Sunday, cut into squares, and store in the fridge. Grab one for a midweek snack. They keep well and satisfy the sweet tooth without guilt.
Pro tip: If leftovers are drying out, place a slice of bread in the container with the brownies. The bread releases moisture and keeps the brownies soft.
Nutrition Information
I’m not a nutritionist, but here’s the breakdown if you’re tracking. Remember, these are indulgent treats, so enjoy in moderation.
Per Serving (based on 12 servings):
- Calories: 280
- Protein: 6g
- Carbs: 32g
- Fiber: 2g
- Sugar: 22g
- Fat: 16g
- Saturated Fat: 5g
- Cholesterol: 35mg
- Sodium: 150mg
What’s Good:
- Decent protein from peanut butter and eggs
- Iron from cocoa powder
- Healthy fats from peanut butter (if using standard PB)
What to Know:
- Higher in sugar and calories due to chocolate and peanut butter
- Contains dairy (butter) and gluten
- Moderate sodium (peanut butter adds salt)
My Take:
Look, this is comfort food with chocolate and peanut butter. It’s not a diet recipe. But it’s way better than store-bought brownies, costs less, and I know exactly what’s in it. When I want to make it lighter, I use half the sugar and add more nuts. But usually? I just eat one square and enjoy it.
Dietary Notes:
- Contains: gluten, dairy, peanuts
- Can be made: gluten-free, nut-free, dairy-free (with substitutions)
Final Thoughts
So that’s my go-to fudgy peanut butter swirl brownies! I’ve probably talked your ear off at this point, but when you make a recipe this often, you have a lot to say about it.
This has saved dessert time more times than I can count. It’s my answer to “what’s for dessert” when I’m tired, don’t want to bake a cake, and still want something that tastes really good. My kids are happy, my husband’s happy, and I’m happy because I’m not stressed about cooking.
Make it yours! Try different add-ins, swap in your favorite nut butter, or adjust the swirl pattern. The best recipes are the ones you adapt to your family’s tastes. And if you want to pair these with a savory dinner, check out my honey garlic butter chicken for a complete meal.
If you make this, drop a comment and let me know what you think! I love hearing how recipes turn out in your kitchen. And if something doesn’t work, tell me that too—I’m here to help troubleshoot.
Happy baking! And I hope your kitchen smells half as good as mine does right now.
Frequently Asked Questions
Can I use natural peanut butter?
I don’t recommend it. Natural peanut butter has separated oil, which makes it too runny. It won’t hold the swirl and might sink to the bottom. Use standard creamy peanut butter like Jif or Skippy for the best results. If you must use natural, stir it very well and chill it slightly before dolloping.
Why did my brownies turn out cakey?
This usually happens from overmixing the batter or using too much flour. Make sure you spoon and level your flour, not pack it down. Also, mix the dry ingredients into the wet only until combined. Overmixing develops gluten, which leads to a cake-like texture instead of fudgy.
Can I double this recipe?
Yes, but you’ll need a larger pan. Double the ingredients and use a 9×13-inch baking pan. Increase the baking time by 5-10 minutes. Check for doneness with a toothpick. The center of a 9×13 pan takes longer to bake than a 9×9.
How do I store leftovers?
Store in an airtight container at room temperature for up to 4 days. If it’s hot, refrigerate them. They freeze well for up to 3 months. Wrap individual squares in plastic wrap for easy thawing.
Can I make these ahead of time?
Absolutely. Bake them, cool completely, and store in the fridge or freezer. They taste almost as good as fresh. For best texture, bring refrigerated brownies to room temperature before eating.
Can I use almond butter instead?
Yes, almond butter works great. It has a slightly different flavor, but the texture is similar. Just make sure it’s creamy and not too runny. It’s a bit more expensive, but delicious.
Why did my peanut butter swirl disappear?
If you mixed the peanut butter into the batter too much, it will disappear. Drop dollops on top and use a knife to create gentle swirls. Don’t over-swirl. Also, make sure the peanut butter isn’t too warm; slightly chilled peanut butter holds its shape better.
Pin This Recipe!
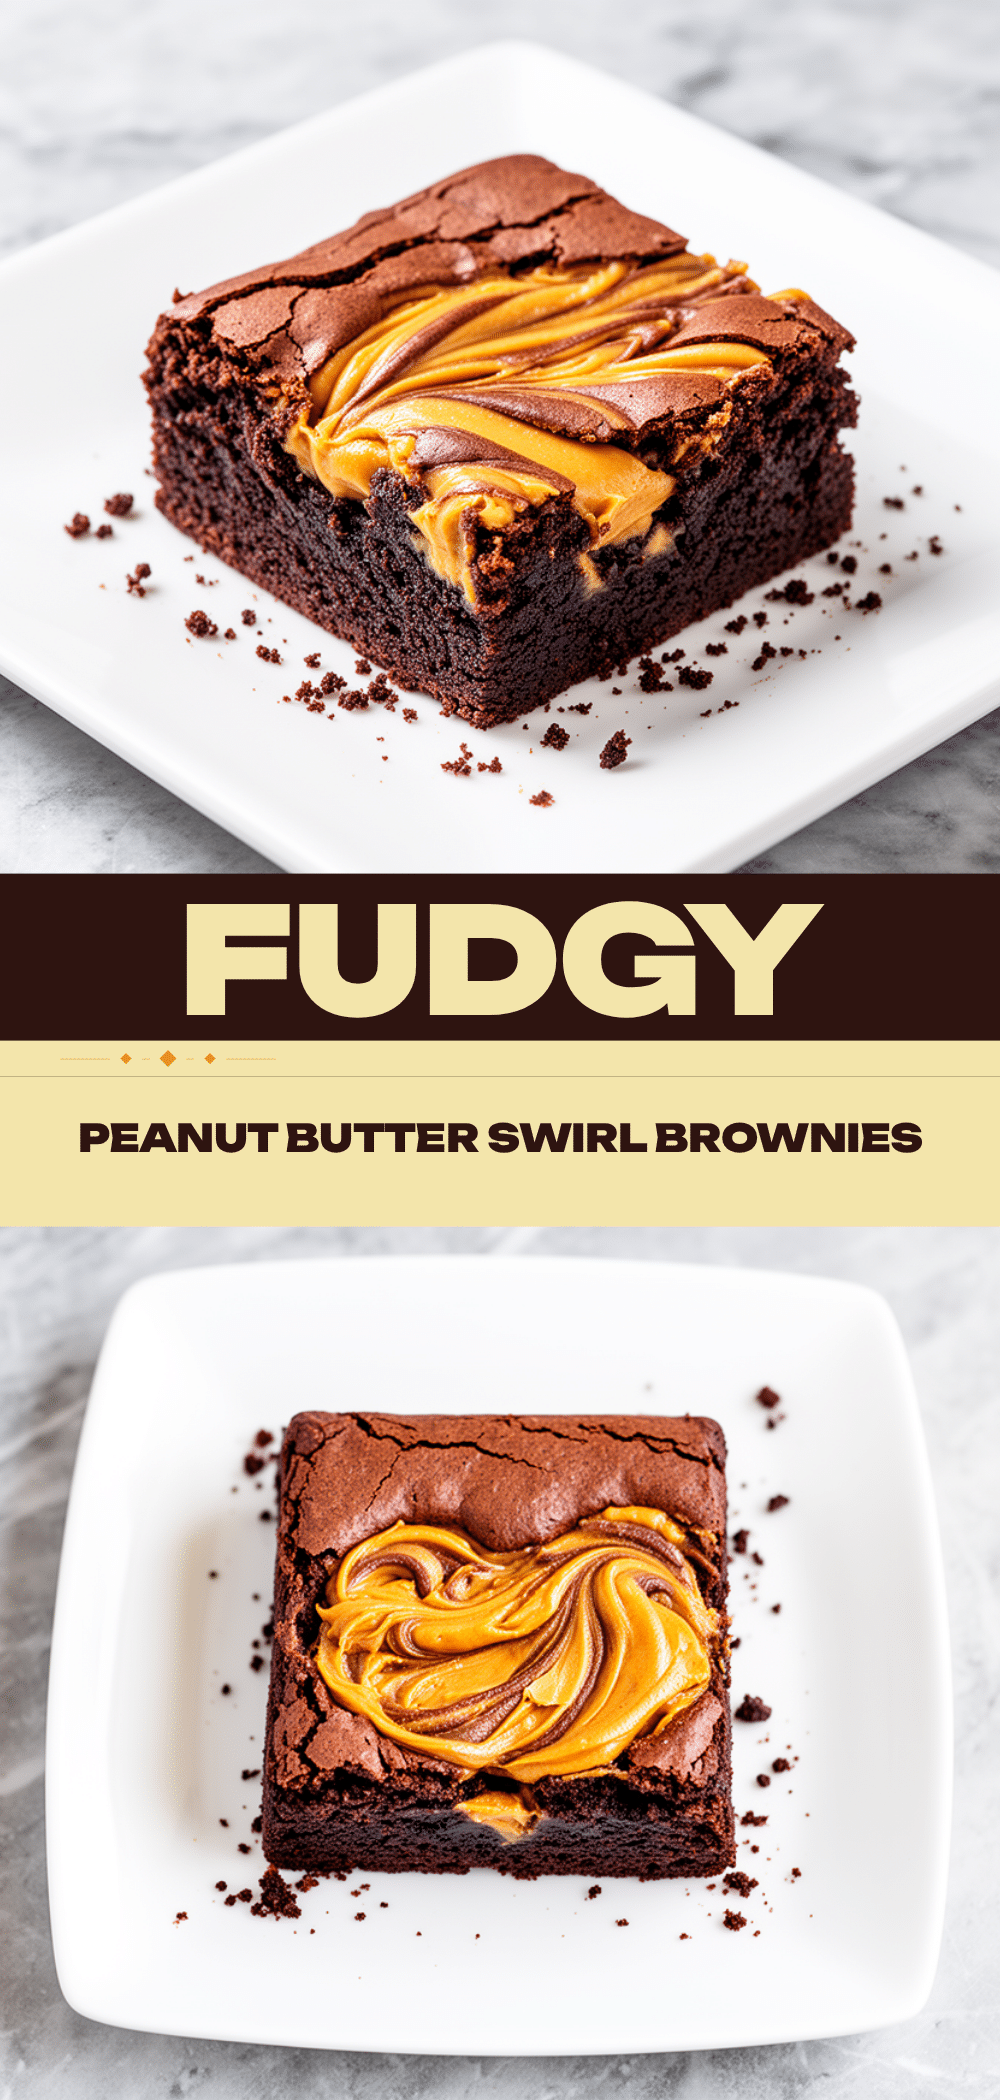
Fudgy Peanut Butter Swirl Brownies: 4-Ingredient Dessert
- Total Time: 45 minutes
- Yield: 12 servings 1x
Description
Rich, fudgy brownies with a creamy peanut butter swirl, made with simple pantry ingredients in under 45 minutes.
Ingredients
- 1/2 cup unsalted butter, melted
- 1 cup granulated sugar
- 2 large eggs, room temperature
- 1 teaspoon vanilla extract
- 3/4 cup all-purpose flour
- 1/2 cup cocoa powder (natural)
- 1/4 teaspoon salt
- 1/2 cup creamy peanut butter
- 1 tablespoon granulated sugar (for topping)
- 1/2 cup chocolate chips (optional)
Instructions
- Preheat oven to 350°F (175°C). Line a 9×9-inch baking pan with parchment paper, leaving an overhang on the long sides, and grease lightly.
- Melt the butter in a microwave-safe bowl in 30-second intervals, stirring until liquid. Let cool for a minute.
- In a medium bowl, whisk melted butter, 1 cup sugar, eggs, and vanilla extract vigorously for 1-2 minutes until glossy and emulsified.
- In a separate bowl, whisk together flour, cocoa powder, and salt.
- Gently fold the dry ingredients into the wet mixture using a spatula until just combined. Do not overmix.
- Pour batter into prepared pan and spread evenly.
- Drop spoonfuls of peanut butter randomly over the batter. Sprinkle with 1 tablespoon sugar.
- Drag a knife or fork through the peanut butter and batter in a zigzag or circular motion to create swirls.
- Bake for 25-30 minutes until edges are set and a toothpick inserted comes out with moist crumbs.
- Cool in the pan for at least 20 minutes before lifting out and slicing into squares.
Notes
Do not use natural peanut butter with separated oil as it is too runny for swirling. Use standard creamy peanut butter like Jif or Skippy. For cleaner cuts, chill brownies in the fridge for an hour after cooling. Sprinkle with flaky sea salt after baking for enhanced flavor.
- Prep Time: 10 minutes
- Cook Time: 30 minutes
- Category: Dessert
- Cuisine: American
Nutrition
- Serving Size: 1 square
- Calories: 280
- Sugar: 22
- Sodium: 150
- Fat: 16
- Saturated Fat: 5
- Carbohydrates: 32
- Fiber: 2
- Protein: 6
Keywords: brownies, peanut butter, fudgy, easy dessert, 4-ingredient, chocolate, baking, comfort food