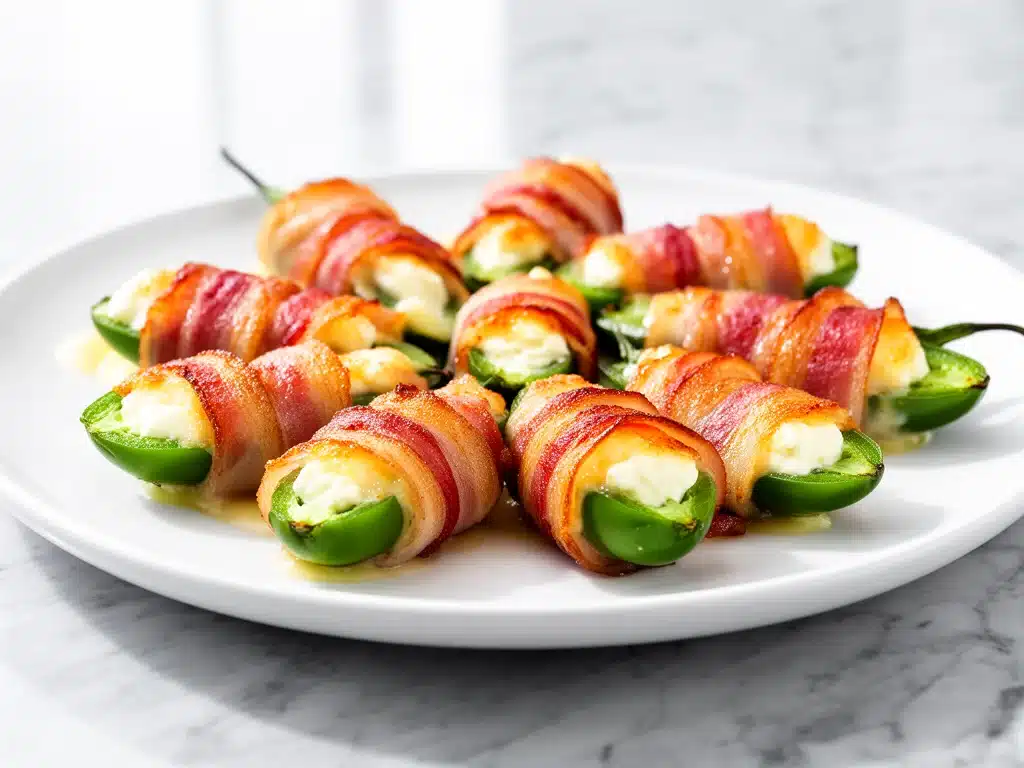
Last August, I made the classic mistake of underestimating my guests. I had planned a modest spread: a few bags of chips, a bowl of salsa, and maybe some store-bought mozzarella sticks if I felt fancy. I thought, “It’s just a casual backyard hangout. People won’t notice if I don’t go all out.” I was so wrong.
By 7:30 PM, the chip bag was empty. The salsa bowl was a sticky mess with no chips left to dip. My friends were hovering by the kitchen island, looking at me with that specific hunger-glaze in their eyes. They didn’t want more chips. They wanted something with flavor. Something with heat. Something that made them close their eyes when they took a bite.
I ran to the store, grabbed jalapeños, cream cheese, and bacon, and threw together what I thought would be a quick fix. Thirty minutes later, I placed a plate of hot, crispy, cheesy goodness on the table. The reaction was immediate. Silence. Then, “Where did you get these?” Then, “I need the recipe.” Then, “Can I have three more?”
That was the moment I realized that Baked Bacon-Wrapped Jalapeno Poppers aren’t just appetizers. They are the ultimate crowd-pleaser. They are the bridge between “I’m just snacking” and “This is my favorite thing I’ve ever eaten.” Since then, I’ve made them for housewarming parties, holiday gatherings, and lazy Sunday afternoons with the kids. And let me tell you, they work every single time.
What’s even better? I’ve spent the last two years tweaking the recipe until it’s perfect. I’ve tested the bake time, the cheese blend, and the bacon wrapping technique. I’ve learned how to keep them from leaking (the #1 popper tragedy) and how to get the bacon crispy without burning it. If you’ve never made these before, or if you’ve tried and failed, this guide is for you. It’s easy, it’s addictive, and it’s going to make you the hero of your next gathering.
Why You’ll Love This Recipe
There are a million appetizers out there. Why make these? Because they hit every single note that makes food worth the calories. Here’s why these poppers have taken over my kitchen:
- Crispy Meets Creamy — The texture contrast is insane. You bite into the smoky, salty crunch of the bacon, and then you’re hit with the cool, rich, smooth cream cheese. It’s a sensory dream. I literally get chills thinking about it.
- Spice Level Is Up to You — Not everyone handles heat the same way. With this recipe, you control the burn. Remove all the seeds? Mild and creamy. Keep half the seeds? Medium heat. Leave them all in? Fire-breathing dragon mode. I like to make half-and-half so my spice-tolerant brother doesn’t feel left out.
- Make-Ahead Friendly — This is the secret weapon for stressed hosts. You can assemble these the night before, keep them in the fridge, and bake them right before guests arrive. They taste just as good fresh out of the oven as they do 15 minutes later. I’ve prepped these while watching TV on game day, and it saved my sanity.
- Gluten-Free by Default — Bacon, jalapeños, and cheese. That’s it. No flour, no breadcrumbs, no hidden gluten. If you have guests with celiac or gluten sensitivity, these are a safe bet. (Just double-check your bacon packaging to be sure, though.)
- They Disappear Fast — Seriously. I make a dozen, and they’re gone in ten minutes. If you’re feeding a crowd, double the batch. Triple it if your guests are like my family. I once made 48 poppers for a backyard BBQ, and they were the only thing left on the table by the end of the night.
Bottom line? These are the ultimate finger food. They’re elegant enough for a dinner party but casual enough for a football game. They’re cheesy, spicy, smoky, and addictive. Once you try one, you won’t stop.
Ingredients You’ll Need
Here’s the best part: you probably have most of this already. It’s a simple list, but the quality of the ingredients matters more than you’d think. Here’s what I use and why.
For the Poppers
Jalapeño Peppers (12-16 large, fresh) — Look for firm, bright green peppers with shiny skins. Avoid any that are wrinkled or soft. I usually buy about 12-16 peppers, depending on their size. If they’re huge, 12 will do. If they’re small, grab 16. Wear gloves when handling these! I learned that the hard way after touching my eye one time. Ouch.
Cream Cheese (8 oz, softened) — Full-fat block cream cheese is non-negotiable. The tub stuff has too much air and moisture, which can make your filling runny. Let it sit on the counter for 30 minutes before you start so it’s easy to mix. Softened cream cheese blends smoothly; cold cream cheese creates lumps.
Cheddar Cheese (1 cup, shredded) — I use a sharp cheddar for that tangy punch. You can use mild if you prefer, but sharp cheddar cuts through the richness of the cream cheese beautifully. Shred your own from a block! Pre-shredded cheese is coated in cellulose (anti-caking agent), which prevents it from melting properly. You want gooey, not grainy.
Green Onions (3-4 stalks, finely chopped) — These add a fresh, oniony bite that balances the heat. Don’t skip them. They’re subtle but important. I use the white and light green parts only, saving the dark green tops for garnish.
Garlic Powder (1 teaspoon) — Fresh garlic can burn in the oven, so I stick to garlic powder for even flavor distribution. It adds depth without the risk of bitter bits.
Smoked Paprika (½ teaspoon) — This is my secret weapon. It adds a smoky note that mirrors the bacon, even before the bacon is wrapped around it. It’s not spicy, just deeply savory. If you don’t have smoked paprika, regular paprika works, but you’ll miss out on that smoky flavor.
Salt and Black Pepper (to taste) — Just a pinch of each. The bacon and cheese are salty enough, so go light.
For the Wrapping
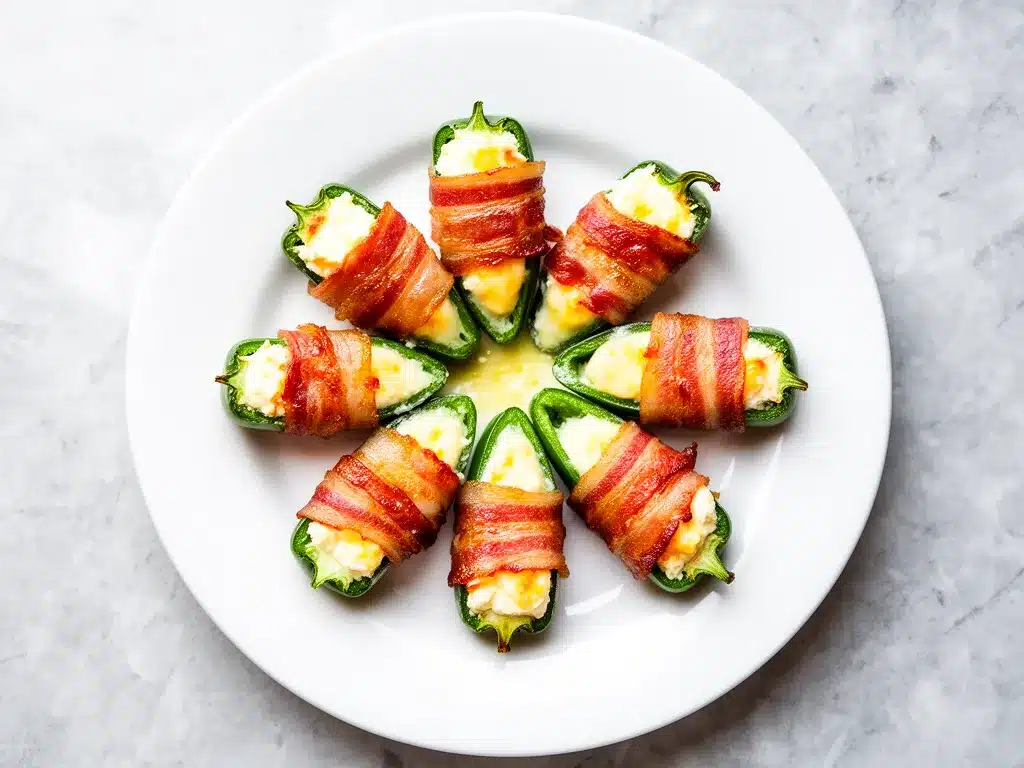
Bacon (12-16 slices) — I use regular cut, not thick cut. Thick cut bacon takes longer to crisp up and can leave the inside of the pepper undercooked. Regular cut bacon gets crispy faster and wraps easier. Look for bacon that has a good balance of meat and fat. Too lean, and it’ll be dry. Too fatty, and it’ll be greasy.
Brown Sugar (optional, 1 tablespoon) — I sprinkle a tiny bit of brown sugar on the bacon before wrapping. It helps caramelize the bacon and adds a hint of sweetness that balances the heat. If you’re keto or low-carb, skip this. It’s delicious either way.
Equipment Needed
You don’t need fancy gadgets for this. Here’s what I actually use:
Sheet Pans — Two standard 13×18 inch baking sheets. You need space between the poppers so the air circulates. If they’re touching, the bacon will steam instead of crisp. Line them with parchment paper or a silicone baking mat for easy cleanup. Grease is the enemy of easy cleanup.
Sharp Knife — A good chef’s knife makes slicing the peppers easy and safe. Dull knives slip and cause accidents. I also use a small paring knife for removing the seeds.
Paring Knife or Small Spoon — For scraping out the seeds and membranes. A small spoon works well for scooping, but a paring knife gives you more control. Be careful not to cut through the bottom of the pepper.
Mixing Bowl — Medium-sized bowl for mixing the cheese filling. A bowl with a spout makes it easier to transfer the filling into the peppers if you’re using a piping bag (more on that below).
Piping Bag or Ziploc Bag — For filling the peppers. I cut the corner off a Ziploc bag to create a makeshift piping bag. It makes filling much neater than trying to spoon it in. Messy fillings leak in the oven, and nobody wants a cheese explosion.
Oven Mitts — Because these come out of the oven hot. And sticky. And delicious. Use both hands.
How to Make It: Step-by-Step
Alright, let’s get cooking! This process is straightforward, but there are a few tricks to ensure your poppers turn out perfectly. I’m walking you through exactly how I do it.
Step 1: Prep Your Oven and Pan (5 minutes)
Preheat your oven to 400°F (200°C). Line two baking sheets with parchment paper or silicone mats. This is crucial. Bacon grease will drip, and you don’t want to scrub your pans later. Parchment paper makes cleanup a breeze. Just peel it off and toss it.
Step 2: Prep the Jalapeños (10 minutes)
Put on your gloves! Seriously. I can’t stress this enough. Capsaicin oil is potent, and you don’t want it on your hands or in your eyes.
Wash the jalapeños and pat them dry. Slice off the top stem, about ¼ inch down. Be careful not to cut too deep. Then, slice the pepper in half lengthwise. You should have 24-32 pepper halves.
Use a small spoon or paring knife to scrape out the seeds and white membranes. The seeds hold most of the heat, so removing them reduces the spice level. If you want it milder, remove all the seeds. If you want it hot, leave some in. I usually remove about half of the membranes, which gives a nice medium heat.
Place the pepper halves cut-side up on a paper towel. Pat them dry. Excess moisture can prevent the bacon from sticking and make the pepper soggy. Dry peppers = crispy bacon.
Step 3: Make the Filling (5 minutes)
In a mixing bowl, combine the softened cream cheese, shredded cheddar, chopped green onions, garlic powder, smoked paprika, salt, and pepper. Mix until smooth and well combined. If the cream cheese is still too cold, microwave it for 10-15 seconds to help it soften.
Transfer the mixture to a piping bag or a Ziploc bag with the corner cut off. If you don’t have a piping bag, you can use a spoon, but it’s messier.
Step 4: Fill the Peppers (10 minutes)
Pipe or spoon the cheese mixture into each pepper half. Don’t overfill them! Leave about ¼ inch of space at the top. If you overfill, the cheese will spill out in the oven, and you’ll have a greasy, cheesy mess on your baking sheet. Underfilling is better than overfilling. You can always add more cheese later.
Press the filling down gently to remove any air pockets. Air pockets can cause the cheese to leak out as it heats up.
Step 5: Wrap with Bacon (10 minutes)
Take a slice of bacon and wrap it around the filled pepper half. Start at the bottom and wrap towards the top, leaving a small gap at the end. The bacon should cover most of the cheese. If the pepper is large, you might need 1.5 slices of bacon. If it’s small, one slice might be enough.
Secure the end of the bacon with a toothpick. Push the toothpick through the bacon and into the pepper. This keeps the bacon from unraveling in the oven. I usually use two toothpicks per popper for extra security.
Place the wrapped poppers on the prepared baking sheet, leaving at least 1 inch of space between each one. They’ll shrink slightly as they cook, but you want room for air circulation.
Step 6: Bake (20-25 minutes)
Place the baking sheets in the preheated oven. Bake for 20-25 minutes, rotating the pans halfway through for even browning. The bacon should be crispy and golden brown, and the cheese should be bubbly.
Check at the 20-minute mark. If the bacon isn’t crispy enough, leave them in for another 2-3 minutes. If the bacon is getting too dark, cover the tops loosely with foil. You want crispy bacon, not burnt bacon.
Step 7: Cool and Serve (5 minutes)
Remove the poppers from the oven and let them cool for 5 minutes. They’ll be very hot, and the cheese will be molten lava. Letting them cool slightly allows the cheese to set a bit, making them easier to handle.
Remove the toothpicks before serving. Garnish with extra chopped green onions if you like. Serve warm. These are best eaten fresh, but they’re still good if you reheat them.
Expert Tips & Tricks
Here’s everything I’ve learned from making these dozens of times. These tips will save you from my mistakes.
Don’t Skimp on Drying the Peppers
After you slice and seed the jalapeños, pat them dry with paper towels. Any excess moisture will steam the bacon instead of letting it crisp up. I know it seems like a small step, but it makes a huge difference in texture.
Use Toothpicks Wisely
I use two toothpicks per popper. One isn’t always enough, especially if the pepper is large or the bacon is thin. Push the toothpick in at an angle for better hold. If you’re worried about toothpicks, you can use small skewers, but toothpicks are easier to remove.
Rotate the Pans
Ovens have hot spots. Rotating the pans halfway through cooking ensures that all the poppers brown evenly. I forget this sometimes, and half my poppers are darker than the others. Don’t be like me. Rotate!
Check the Bacon
Not all bacon is created equal. If your bacon is very lean, it might take longer to crisp up. If it’s very fatty, it might shrink a lot. Keep an eye on them in the oven. If the bacon is done but the cheese isn’t bubbly, cover with foil and bake for a few more minutes. If the cheese is done but the bacon isn’t crispy, broil for 1-2 minutes (watch closely!).
Make Ahead Strategy
You can assemble these up to 24 hours in advance. Wrap them, place them on the baking sheet, and cover with plastic wrap. Store in the fridge. When you’re ready to bake, let them sit at room temperature for 15 minutes before putting them in the oven. This helps them cook more evenly.
Variations & Substitutions
Once you’ve nailed the basic version, here’s how you can mix it up. I’ve tried all of these, and they’re all delicious.
Blaze It Up
Add diced habanero or serrano peppers to the cheese filling for extra heat. Or, sprinkle cayenne pepper on top before baking. I like to add a pinch of cayenne to the cheese mix for a subtle kick that builds.
Herb Garden
Add fresh cilantro or parsley to the cheese filling. It adds a fresh, bright flavor that cuts through the richness. I love adding cilantro, especially if I’m serving these with a spicy dipping sauce.
Smoked Gouda
Swap the cheddar for smoked gouda. It adds a different kind of smokiness that pairs beautifully with the bacon. It’s richer and creamier than cheddar, so it’s a luxurious twist.
Monterey Jack
Use Monterey Jack cheese for a milder, meltier filling. It’s great if you’re serving these to kids or people who don’t like strong cheese flavors.
Avocado Cream Cheese
Mix mashed avocado into the cream cheese filling for a creamy, green twist. It’s like a popper version of guacamole. Add lime juice and cilantro for extra flavor. This is a popular variation at my summer parties.
Gluten-Free
This recipe is naturally gluten-free. Just double-check your bacon and cheese labels to ensure no gluten-containing additives are present. Most bacon and cheese are safe, but it’s always good to check.
Keto/Low-Carb
Skip the brown sugar. The recipe is already low-carb, as the peppers and bacon are the main ingredients. You can use a sugar-free sweetener if you want the caramelization, but it’s not necessary.
Serving & Storage
How to Serve
I usually serve these straight from the baking sheet, warm and gooey. They’re perfect for finger food. Pair them with a cool dipping sauce like ranch, blue cheese, or a spicy crema. I love a simple sour cream and lime crema. Mix sour cream, lime juice, and a pinch of salt for a quick dip.
Side Dishes
These poppers are a great appetizer, so they don’t need much else. But if you’re serving them as part of a larger meal, they pair well with grilled meats, corn on the cob, and a fresh salad. I often serve them alongside creamy crockpot sausage and peppers for a pepper-themed feast.
Storage
Store leftovers in an airtight container in the fridge for up to 3 days. The bacon will soften in the fridge, which is normal. To reheat, place them on a baking sheet and bake at 350°F for 10-15 minutes, or until heated through and crispy. You can also reheat them in an air fryer at 350°F for 5-7 minutes. This helps restore the crispiness of the bacon.
Freezing
You can freeze these, but the texture of the cheese might change slightly after thawing. I recommend freezing them unbaked. Wrap them in plastic wrap and store in a freezer bag for up to 2 months. Thaw in the fridge overnight, then bake as directed. I haven’t tried freezing baked poppers, and I don’t recommend it. The bacon gets soggy, and the cheese gets grainy.
Nutrition Information
I’m not a nutritionist, but here’s the breakdown if you’re tracking. Keep in mind that these are rich, so portion control is key.
Per Serving (2 poppers):
- Calories: 250
- Protein: 12g
- Carbs: 4g
- Fiber: 1g
- Sugar: 2g
- Fat: 22g
- Saturated Fat: 10g
- Cholesterol: 45mg
- Sodium: 350mg
What’s Good:
Low in carbs, high in protein and fat. Great for keto or low-carb diets. The jalapeños add some vitamins and antioxidants.
What to Know:
High in saturated fat and sodium due to the bacon and cheese. Enjoy in moderation. If you’re watching your sodium, use low-sodium bacon.
My Take:
Look, these are indulgent. They’re not health food. But they’re better than processed snacks, and they’re made with real ingredients. When I want to make them lighter, I use turkey bacon and reduced-fat cream cheese. It’s not the same, but it’s better for you. Usually? I just eat two and enjoy the hell out of them.
Final Thoughts
So that’s my go-to Baked Bacon-Wrapped Jalapeno Poppers! I’ve probably talked your ear off at this point, but when you make a recipe this often, you have a lot to say about it.
This has saved my barbecues more times than I can count. It’s my answer to “what’s for appetizers” when I’m tired, don’t want takeout, and still want something that tastes really good. My guests are happy, my family is happy, and I’m happy because I’m not stressed about cooking.
Make it yours! Try different cheeses, adjust the spice level, add some herbs. The best recipes are the ones you adapt to your family’s tastes. If you make this, drop a comment and let me know what you think! I love hearing how recipes turn out in your kitchen. And if something doesn’t work, tell me that too—I’m here to help troubleshoot.
Happy cooking! And I hope your kitchen smells half as good as mine does right now.
Frequently Asked Questions
Can I use thick-cut bacon?
You can, but it will take longer to cook. Thick-cut bacon is meatier but doesn’t crisp up as quickly as regular cut. If you use thick-cut, you might need to increase the baking time by 5-10 minutes. Keep an eye on them so the bacon doesn’t burn. I prefer regular cut because it gets crispy faster and wraps easier.
Why did my poppers leak cheese?
This usually happens if you overfilled the peppers or didn’t dry them enough before filling. Make sure you don’t overfill them, leaving a little space at the top. Also, pat the peppers dry after slicing to remove excess moisture. If the cheese spills out, it’s not the end of the world, but it can make a mess in your oven.
Can I make these ahead of time?
Yes! Assemble the poppers, wrap them with bacon, and secure with toothpicks. Place them on a baking sheet, cover with plastic wrap, and refrigerate for up to 24 hours. When you’re ready to bake, let them sit at room temperature for 15 minutes, then bake as directed. This is perfect for party prep.
How do I reheat leftovers?
The best way to reheat them is in the oven or air fryer. Place them on a baking sheet and bake at 350°F for 10-15 minutes, or until heated through and crispy. You can also use a microwave, but the bacon will get soft. If you use a microwave, do it in short bursts and let them sit for a minute to crisp up slightly.
Are these spicy?
It depends on how you prepare them. If you remove all the seeds and membranes, they’re mild. If you leave some seeds in, they’re medium. If you leave all the seeds and membranes, they’re hot. I usually remove about half the membranes for a medium heat. You can always add extra heat with cayenne pepper or hot sauce.
Can I use other peppers?
Yes! You can use poblano peppers for a milder version, or serrano peppers for a hotter version. Poblano peppers are larger, so you might need more filling. Serrano peppers are smaller, so you’ll need more of them. The method is the same for all peppers.
Do I need to parboil the bacon?
No, you don’t need to parboil the bacon. Just wrap it around the pepper and bake. Parboiling can make the bacon limp and harder to crisp up. If you want the bacon extra crispy, you can cook it for 2-3 minutes in the oven before wrapping, but it’s not necessary. I usually just wrap it raw and bake it with the peppers.
Pin This Recipe!
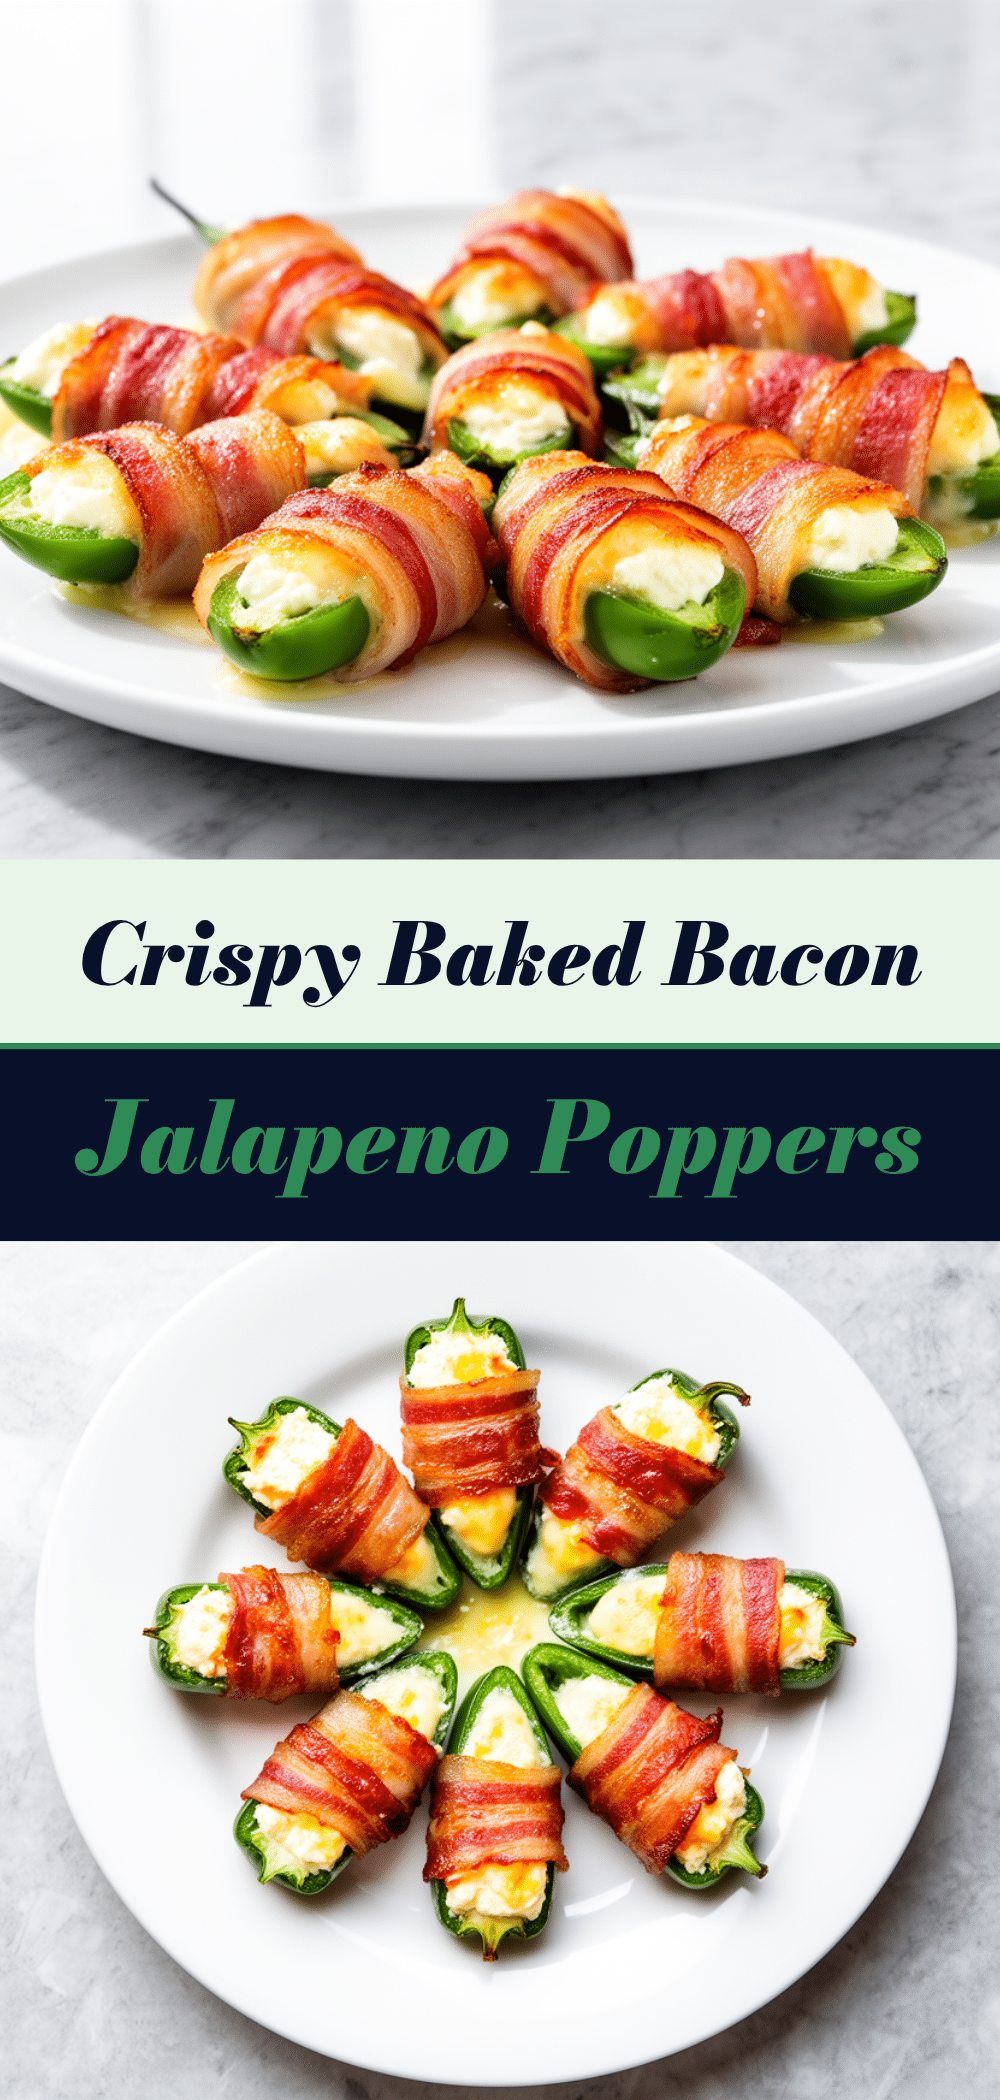
Baked Bacon-Wrapped Jalapeno Poppers: Easy Appetizer
- Total Time: 55 minutes
- Yield: 24 poppers (12 servings) 1x
Description
Crispy, smoky, and cheesy baked jalapeno poppers wrapped in bacon. These gluten-free appetizers are easy to make, customizable in spice level, and perfect for any gathering.
Ingredients
- 12–16 large fresh jalapeño peppers
- 8 oz full-fat block cream cheese, softened
- 1 cup sharp cheddar cheese, shredded
- 3–4 stalks green onions, finely chopped
- 1 teaspoon garlic powder
- ½ teaspoon smoked paprika
- Salt and black pepper, to taste
- 12–16 slices regular cut bacon
- 1 tablespoon brown sugar (optional)
- Toothpicks (for securing bacon)
Instructions
- Preheat oven to 400°F (200°C). Line two 13×18 inch baking sheets with parchment paper or silicone mats.
- Wear gloves. Wash jalapeños, pat dry, and slice off the top stem. Slice peppers in half lengthwise.
- Scrape out seeds and white membranes using a spoon or paring knife. Pat pepper halves dry with paper towels.
- In a mixing bowl, combine softened cream cheese, shredded cheddar, green onions, garlic powder, smoked paprika, salt, and pepper. Mix until smooth.
- Transfer cheese mixture to a piping bag or Ziploc bag with the corner cut off.
- Pipe or spoon the filling into each pepper half, leaving ¼ inch of space at the top. Press down gently to remove air pockets.
- Wrap each filled pepper half with a slice of bacon. If using brown sugar, sprinkle it on the bacon before wrapping.
- Secure the end of the bacon with one or two toothpicks.
- Place poppers on baking sheets, leaving 1 inch of space between each.
- Bake for 20-25 minutes, rotating pans halfway through, until bacon is crispy and cheese is bubbly.
- Remove from oven and let cool for 5 minutes before removing toothpicks and serving.
Notes
[‘Wear gloves when handling jalapeños to avoid skin irritation.’, ‘Pat peppers dry thoroughly to ensure bacon crisps up instead of steaming.’, ‘Do not overfill peppers to prevent cheese leakage.’, ‘Can be assembled up to 24 hours in advance and refrigerated.’, ‘Rotate pans halfway through baking for even browning.’, ‘Use regular cut bacon for best results; thick cut takes longer to crisp.’]
- Prep Time: 30 minutes
- Cook Time: 25 minutes
- Category: Appetizer
- Cuisine: American
Nutrition
- Serving Size: 2 poppers
- Calories: 250
- Sugar: 2
- Sodium: 350
- Fat: 22
- Saturated Fat: 10
- Carbohydrates: 4
- Fiber: 1
- Protein: 12
Keywords: jalapeno poppers, bacon wrapped jalapenos, baked appetizer, gluten free appetizer, party food, spicy snacks, cream cheese filling



