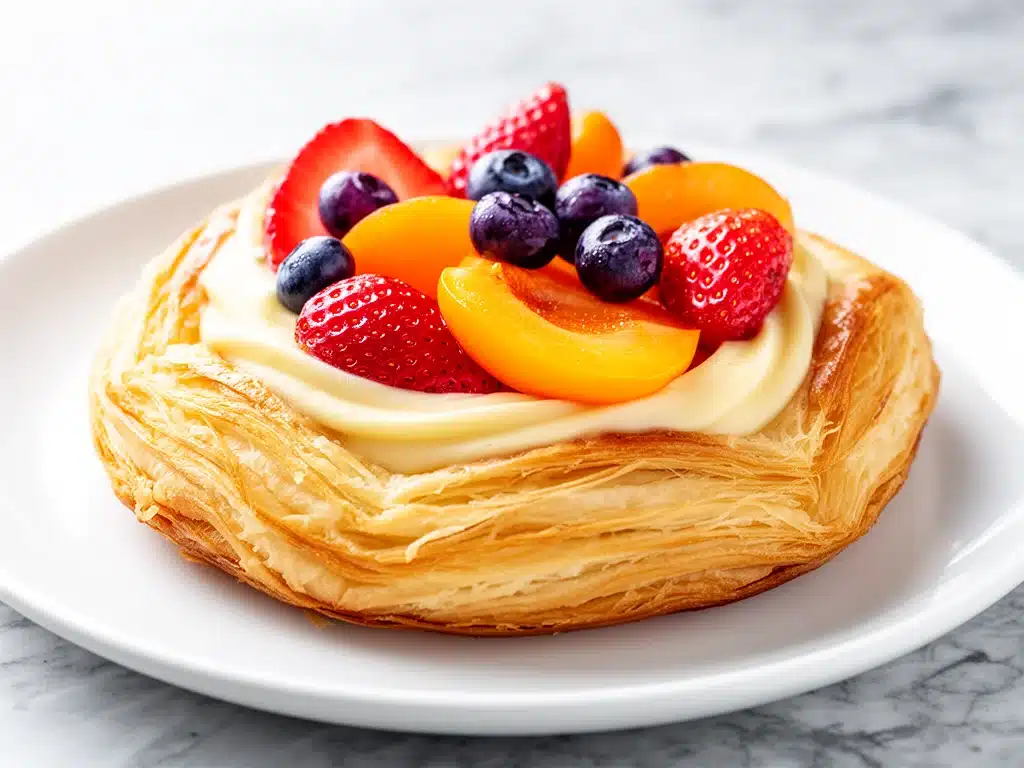
Last Saturday morning, I woke up with a sudden, overwhelming craving for something sweet but not *too* sweet. You know that feeling? It’s 10 a.m., the sun is streaming through the kitchen window, and you’re thinking about hosting a small brunch. The problem? I didn’t have any store-bought pastries, and I definitely didn’t have the patience to wait four hours for dough to rise properly. I wanted that flaky, buttery, cream cheese-filled perfection without the hassle.
So, I did what any desperate, caffeine-deprived home cook does: I improvised. I grabbed a sheet of puff pastry from the freezer, some cream cheese, a handful of strawberries, and a jar of apricot jam. I threw it together in what I thought would be a rushed, messy fifteen minutes. But when I pulled those golden, puffed-up Danish out of the oven, the smell alone made my husband stop scrolling through his phone and ask, “Did you buy these from that fancy bakery downtown?”
That was the moment I realized that homemade cream cheese fruit Danish doesn’t have to be complicated. In fact, it’s one of the easiest, most impressive brunch recipes you can make. I’ve tested this version countless times—sometimes with blueberries, sometimes with peaches, sometimes with just lemon curd—and the result is always the same: flaky layers, tangy creamy filling, and a sweet fruit topping that tastes like a weekend morning should.
This recipe is my go-to when I want to look like a pastry pro without actually being one. It’s forgiving, it’s fast (thanks to store-bought puff pastry), and it’s incredibly satisfying to eat warm with a cup of coffee. Whether you’re feeding a crowd or just treating yourself to a lazy weekend breakfast, these Danish are the answer. I’ve refined the technique over the last six months, tweaking the filling ratios and baking times until I landed on the perfect balance of crisp and creamy. Trust me, once you make these, you’ll never buy frozen pastries again.
Why You’ll Love This Recipe
There are about ten reasons I keep making these cream cheese fruit Danish, but here are the big ones that keep them in my regular rotation.
Stupid Simple — Seriously, if you can spread cream cheese and arrange fruit, you can make this. I’ve walked my teenage niece through it over FaceTime, and she nailed it on the first try. There’s no kneading, no complex lamination, and no waiting for sourdough starter to bubble.
Lightning Fast — From fridge to table in about 30 minutes. The puff pastry does all the heavy lifting. I make this on weekends when I want to sleep in but still have something homemade ready by 10 a.m. It’s the perfect balance of effort and reward.
Impressive but Cheap — You can buy a single pastry at a café for $5 or $6. This recipe makes 8-10 large Danish for less than $10 total. That’s less than the cost of a single latte at a trendy coffee shop. Your guests will have no idea how budget-friendly this is.
Perfectly Tangy — The secret isn’t just the fruit; it’s the cream cheese filling. It adds a savory, tangy counterpoint to the sweet berries and apricot glaze. It keeps the pastry from being too sugary. It’s the kind of balance that makes you take another bite before you realize you’re still holding the first one.
Makes Amazing Leftovers — Okay, real talk: leftovers rarely last more than an hour. But if they do, they reheat beautifully in a toaster oven. The pastry stays flaky, and the cream cheese filling stays soft. I deliberately make extra on Sunday so I can have a quick snack on Monday morning.
This is my answer to “what’s for brunch?” when I want something special but don’t want to spend all morning in the kitchen. No complicated techniques, no weird ingredients, just reliable, delicious food that makes everyone happy.
Ingredients You’ll Need
Here’s the best part: you probably have most of this already in your fridge or pantry. The beauty of this recipe is its simplicity. You don’t need fancy pastry tools or hard-to-find specialty items. Just good quality basics.
For the Pastry:
Puff Pastry Sheets (2 sheets, thawed / about 400g) — This is the star. I always use Pepperidge Farm or a similar high-quality brand. Make sure it’s thawed according to package directions. If it’s still frozen solid, it won’t puff properly. If it’s too warm and sticky, pop it back in the fridge for 10 minutes. You want it pliable but cool.
Egg Wash (1 large egg + 1 tablespoon water) — This is non-negotiable for that golden, shiny finish. Whisk it until it’s completely uniform. No streaks of white yolk. This helps the sugar stick and gives the pastry that bakery-style gloss.
Coarse Sugar (for sprinkling) — I use turbinado sugar or demerara sugar. It adds a nice crunch and sparkle. Regular granulated sugar works, but it melts into a flat sweetness. The coarse sugar gives it texture.
For the Cream Cheese Filling:
Cream Cheese (8 oz / 225g, full-fat) — Do not use low-fat or light cream cheese. It won’t hold its shape and will turn runny. Block cream cheese is better than tub cream cheese because it has less moisture. Let it come to room temperature before mixing so it’s smooth and easy to spread.
Granulated Sugar (3 tablespoons) — Just enough to sweeten the tang. You don’t want it cloying. The fruit provides plenty of sweetness, so keep this moderate.
Vanilla Extract (1 teaspoon) — Pure vanilla makes a huge difference. Skip the imitation stuff. It adds warmth and depth to the cream cheese.
For the Fruit and Glaze:
Mixed Berries (1.5 cups / about 200g) — I love a mix of strawberries (hulled and sliced), blueberries, and raspberries. Strawberries are my favorite because they don’t get too juicy and soggy. If you use blueberries, just toss them in whole. Avoid canned fruit; it’s too wet and will make the pastry soggy.
Apricot Jam (¼ cup / 60g) — This is the secret weapon. It creates a shiny, sticky glaze that tastes like apricot and honey. If you can’t find apricot jam, peach or apple jelly works too. You can also strain it through a sieve if it has big chunks, but it’s not necessary.
Lemon Juice (1 teaspoon) — Just a splash to cut through the sweetness of the jam and brighten the fruit.
Pro Tip: I keep a bag of frozen mixed berries in the freezer at all times. They work perfectly fine for this recipe and are often cheaper than fresh out-of-season berries. Just thaw them slightly and pat them dry with a paper towel to remove excess moisture.
Equipment Needed
You don’t need fancy equipment for this. Here’s what I actually use in my home kitchen.
Baking Sheet — A standard 13×18 inch sheet pan. I line it with parchment paper. This prevents sticking and makes cleanup a breeze. I’ve burned cookies on unlined sheets before; don’t make that mistake.
Parchment Paper — Essential for easy removal and cleanup. It also helps the pastry bake evenly.
Rolling Pin — To roll out the puff pastry slightly. I use a wooden rolling pin, but a marble one works great too. Just make sure it’s clean and dry.
Pastry Brush — For the egg wash and the glaze. A silicone brush is easier to clean, but a natural bristle brush works fine too. Just make sure it’s dedicated to baking.
Sharp Knife — For slicing the strawberries and cutting the pastry. A serrated knife is good for the berries if they’re soft.
Small Saucepan or Microwave-Safe Bowl — For heating the apricot jam. I prefer the microwave for speed. 15-20 seconds is usually enough.
Whisk — For the egg wash and mixing the cream cheese filling. A small whisk works best for getting lumps out of the cream cheese.
Cheese Grater — Not needed for this recipe, but handy if you want to add a little nutmeg to the cream cheese. I sometimes grate fresh nutmeg into the filling for extra warmth.
How to Make It: Step-by-Step
Alright, let’s make this! I’m walking you through exactly how I do it, including the little tricks I’ve picked up. It’s straightforward, but timing matters.
Step 1: Prep Your Oven and Pan (5 minutes)
Preheat your oven to 400°F (200°C). This needs to be hot to get the puff pastry to rise properly. Line your baking sheet with parchment paper. If your parchment is smaller than your pan, use two sheets, but make sure they’re flat and smooth. Any wrinkles will transfer to the pastry.
Step 2: Prepare the Cream Cheese Filling (3 minutes)
In a small bowl, beat the room-temperature cream cheese, sugar, and vanilla extract until smooth and creamy. If there are any lumps, just keep beating. You want a smooth, spreadable consistency. If it’s too thick, add a teaspoon of milk. If it’s too thin, add a little more cream cheese. Set it aside.
Step 3: Roll Out the Puff Pastry (5 minutes)
Unroll the thawed puff pastry sheets onto your work surface. They come in rectangles, usually two per sheet. Roll each sheet out slightly to even them out and make them about 10×12 inches. Don’t roll them too thin; you want them to puff up. Use a sharp knife or pizza cutter to trim the edges so they’re neat. Cut each sheet into four squares (making 8 total squares from two sheets). Place them on the prepared baking sheet, leaving about 2 inches between each square.
Step 4: Add the Filling (3 minutes)
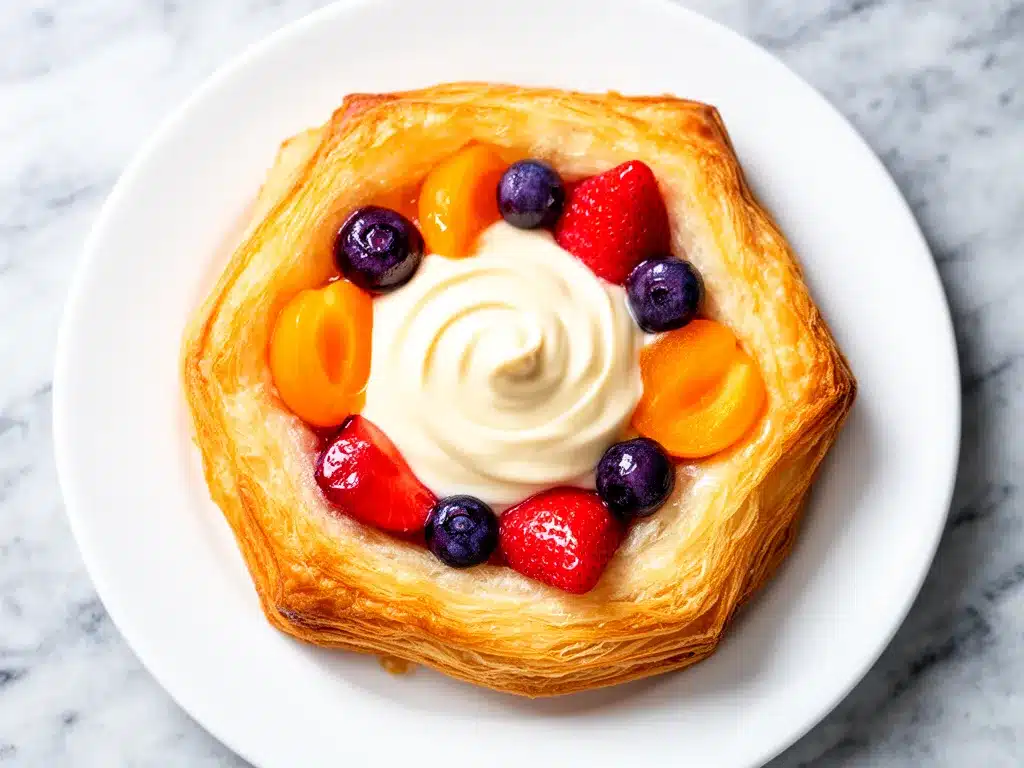
Take a spoonful of the cream cheese mixture (about 1 tablespoon) and place it in the center of each square. Spread it out, leaving a 1-inch border around the edges. This border is crucial—it’s what seals the pastry and prevents the filling from leaking out. Don’t overfill; you’ll regret it when they’re baking.
Step 5: Add the Fruit (2 minutes)
Arrange your fruit on top of the cream cheese. If using strawberries, fan the slices out. If using blueberries, just scatter them. Don’t pile them too high. You want them to sit flat so the top doesn’t collapse. I like to mix colors for a pretty presentation.
Step 6: Egg Wash and Bake (15-18 minutes)
Brush the edges of the pastry squares with the egg wash. This helps them brown. Bake in the preheated oven for 15-18 minutes, or until the pastry is puffed, golden brown, and flaky. Keep an eye on them after 12 minutes. If the edges are browning too fast, cover them loosely with foil. The centers should be cooked through and not doughy.
Step 7: Make the Glaze (2 minutes)
While the Danish bake, heat the apricot jam in a microwave-safe bowl for 15-20 seconds. Stir in the lemon juice. If it’s too thick, add a teaspoon of water. Strain it if you want it smooth, but it’s not necessary.
Step 8: Glaze and Serve
As soon as the Danish come out of the oven, brush the warm glaze over the fruit and pastry. The heat helps the glaze stick and creates a shiny finish. Let them cool for 5 minutes before eating. This allows the cream cheese to set slightly so it’s not molten hot. Serve warm.
Expert Tips & Tricks
Here’s everything I’ve learned from making these dozens of times. These tips will save you from my mistakes.
Keep the Pastry Cool
Puff pastry relies on cold butter to create steam and lift. If your kitchen is hot, the butter might melt before it bakes. If your pastry feels soft or sticky, pop it in the fridge for 10 minutes before assembling. Cold pastry = flaky pastry. I learned this the hard way with a flat, greasy Danish that tasted like fried dough.
Don’t Skip the Egg Wash
I know it’s an extra step, but the egg wash is what gives those pastries that professional, golden shine. Without it, they look pale and dull. Make sure you brush the edges well, but avoid getting egg wash on the fruit or cream cheese, or it will bubble and look messy.
Pat Dry Your Fruit
If you’re using fresh berries, especially strawberries, pat them dry with a paper towel. Excess moisture is the enemy of flaky pastry. Wet fruit steams the bottom of the Danish, making it soggy. I always do this, even if the berries look dry. Trust me.
Use Room Temperature Cream Cheese
Trying to spread cold cream cheese is a nightmare. It tears the pastry and leaves lumps. Let it sit on the counter for 20-30 minutes before you start. If you forget, microwave it for 10-second bursts until it’s soft but not melted.
Glaze While Warm
If you wait for the Danish to cool completely before glazing, the jam will sit on top like a hard shell. Glaze them while they’re still warm, and it’ll soak in slightly and create a beautiful, glossy finish.
Common Mistakes (and how to avoid them):
Mistake: Soggy bottom
Fix: This happens if the fruit is too wet or the oven isn’t hot enough. Make sure your oven is fully preheated, and always pat your fruit dry. You can also put the baking sheet on the lower rack for the last 5 minutes to crisp the bottom.
Mistake: Filling leaked out
Fix: You didn’t leave enough border. Make sure you have a full 1-inch border of plain pastry around the filling. If the filling touches the edge, it will spill out and burn.
Pro Trick: Nutmeg
Add a tiny pinch of freshly grated nutmeg to the cream cheese filling. It adds a subtle warmth that pairs beautifully with berries and vanilla. It’s a bakery secret that makes the flavor more complex.
Variations & Substitutions
Once you’ve nailed the basic version, here’s how you can mix it up. I’ve tried all of these.
Lemon Curd Danish
Skip the fruit and use 2 tablespoons of lemon curd instead. Top with a slice of lemon or a sprinkle of poppy seeds. This is my favorite for spring. The tartness is incredible.
Peach and Almond
Use sliced fresh peaches and add 1 tablespoon of sliced almonds to the cream cheese filling. Drizzle with a little honey after baking. It tastes like summer.
Chocolate Chip Cream Cheese
Add 1 tablespoon of mini chocolate chips to the cream cheese filling. Top with fresh raspberries. It’s like a dessert version. My kids love this one.
Apple Cinnamon
Use thinly sliced apples (Granny Smith works best) and add ½ teaspoon of cinnamon to the cream cheese. Toss the apples in a little sugar before adding. Bake for an extra 2-3 minutes to soften the apples.
Dietary Modifications:
Gluten-Free
Use gluten-free puff pastry. It’s widely available now. Brands like Dufour or Madein make excellent GF puff pastry that puffs up just as well. The rest of the ingredients are naturally gluten-free.
Dairy-Free
Use vegan cream cheese (like Kite Hill or Miyoko’s) and vegan puff pastry (check the label; some puff pastry contains butter). Use maple syrup instead of egg wash (it won’t brown as well, but it works). The glaze is already dairy-free.
Vegan
Combine vegan cream cheese with coconut cream for richness. Use agave nectar instead of sugar in the filling. The rest follows the dairy-free version.
Serving & Storage
How to Serve:
I usually serve these straight from the baking sheet on a nice platter. They look rustic and inviting. Pair them with fresh coffee, tea, or creamy coconut lime mocktail for a refreshing brunch drink. A side of mixed greens with a light vinaigrette balances the sweetness perfectly.
Toppings Bar:
When I have guests, I put out a small dish of powdered sugar and a drizzle of extra apricot jam. Some people like it sweeter. I also keep a bowl of fresh berries on the side for people to add more.
Storage Instructions:
Refrigerator:
Store leftovers in an airtight container for up to 2 days. The pastry will lose some crispness, but they’re still good. Reheat in a toaster oven or conventional oven at 350°F for 5-7 minutes to restore the flakiness. Don’t microwave them; it makes the pastry chewy.
Freezing:
You can freeze the assembled, unbaked Danish. Place them on the baking sheet and freeze until solid, then transfer to a freezer bag. They’ll keep for up to 2 months. Bake directly from frozen, adding 5-7 minutes to the baking time. This is great for meal prep.
Pro Tip: If you’re serving them for a brunch party, assemble them the night before and keep them covered in the fridge. In the morning, just brush with egg wash and bake. You’ll have fresh pastries in 20 minutes.
Nutrition Information
I’m not a nutritionist, but here’s the breakdown if you’re tracking. Keep in mind that puff pastry is high in fat and calories, so these are indulgent treats.
Per Danish (based on 8 servings):
- Calories: 280
- Protein: 5g
- Carbs: 32g
- Fiber: 1g
- Sugar: 12g
- Fat: 16g
- Saturated Fat: 8g
- Cholesterol: 35mg
- Sodium: 180mg
What’s Good:
- Decent protein from the cream cheese
- Calcium from the dairy
- Antioxidants from the berries
What to Know:
- High in calories due to puff pastry and cream cheese
- Contains dairy and gluten
- Can be modified for dietary restrictions (see variations)
My Take:
Look, this is a brunch treat. It’s not a health food. But it’s way better than store-bought, costs less, and you control the sugar. When I want to make it lighter, I use less cream cheese and load up on berries. But usually? I just enjoy one or two and share the rest. Moderation is key.
Final Thoughts
So that’s my homemade cream cheese fruit Danish! I’ve probably talked your ear off at this point, but when you make a recipe this often, you have a lot to say about it.
This has saved brunches more times than I can count. It’s my answer to “what’s for weekend breakfast?” when I want something special but don’t want to stress. My family loves it, my friends ask for the recipe, and I love it because it’s reliable and delicious.
Make it yours! Try different fruits, swap in different jams, or add a dash of spice. The best recipes are the ones you adapt to your tastes. If you make this, drop a comment and let me know what you think! I love hearing how recipes turn out in your kitchen. And if something doesn’t work, tell me that too—I’m here to help troubleshoot.
Happy baking! And I hope your kitchen smells half as good as mine does right now.
Frequently Asked Questions
Can I use frozen puff pastry?
Yes, absolutely. That’s what I usually use. Just make sure it’s fully thawed before you start. If it’s still frozen, it won’t roll out. If it’s too warm, chill it for 10 minutes. Thawing it in the fridge overnight is the best method.
Why did my Danish not puff up?
Usually, this means the butter in the pastry melted before it hit the oven. This happens if the pastry was too warm when you assembled it, or if the oven wasn’t hot enough. Make sure your oven is fully preheated to 400°F, and keep the pastry cool until it goes in the oven.
Can I make these ahead of time?
You can assemble them the night before and refrigerate them. Just brush with egg wash and bake in the morning. You can also freeze them unbaked. Bake from frozen, adding a few minutes to the baking time. Don’t bake them fully and then reheat, as the pastry will get soggy.
What fruit works best?
Strawberries are my favorite because they hold their shape well. Blueberries and raspberries are great too, but they can release more juice. Avoid very watery fruits like peaches or nectararies unless you slice them thin and pat them dry. Apples work if you slice them very thin and pre-cook them slightly.
Can I use tub cream cheese?
You can, but block cream cheese is better. Tub cream cheese has more moisture and air, which can make the filling runny. If you must use tub cream cheese, drain it in a cheesecloth for 30 minutes to remove excess liquid before using.
How do I store leftovers?
Store in an airtight container at room temperature for up to 2 days. If your kitchen is hot, refrigerate them. Reheat in a toaster oven or conventional oven to restore crispness. Don’t microwave.
Can I double this recipe?
Yes, double everything. You’ll need two baking sheets. Make sure you have enough space between the Danish on the sheets so they can puff up without touching. You might need to bake them in two batches if your oven is small.
Print
Homemade Cream Cheese Fruit Danish: Easy 30-Min Brunch Recipe
- Total Time: 30 minutes
- Yield: 8 servings 1x
Description
These easy homemade cream cheese fruit Danish use store-bought puff pastry for a flaky, buttery, and tangy brunch treat that takes only 30 minutes to make.
Ingredients
- 2 sheets puff pastry (thawed, approx. 400g)
- 1 large egg + 1 tablespoon water (for egg wash)
- Coarse sugar (turbinado or demerara) for sprinkling
- 8 oz (225g) full-fat block cream cheese (room temperature)
- 3 tablespoons granulated sugar
- 1 teaspoon vanilla extract
- 1.5 cups mixed berries (strawberries, blueberries, raspberries)
- 1/4 cup (60g) apricot jam
- 1 teaspoon lemon juice
Instructions
- Preheat oven to 400°F (200°C). Line a baking sheet with parchment paper.
- In a small bowl, beat the cream cheese, sugar, and vanilla extract until smooth and creamy.
- Roll out the thawed puff pastry sheets to about 10×12 inches. Trim edges and cut each sheet into four squares (8 total). Place on the baking sheet.
- Spread about 1 tablespoon of the cream cheese mixture in the center of each square, leaving a 1-inch border.
- Arrange fruit on top of the cream cheese filling.
- Brush the pastry edges with the egg wash. Sprinkle with coarse sugar.
- Bake for 15-18 minutes until puffed and golden brown.
- While baking, heat the apricot jam in the microwave for 15-20 seconds and stir in lemon juice.
- Brush the warm glaze over the baked Danish immediately after removing from the oven.
- Let cool for 5 minutes before serving.
Notes
Keep the pastry cool to ensure flakiness. Pat dry any fresh fruit to prevent soggy bottoms. Use block cream cheese rather than tub cream cheese for a firmer filling. Glaze while warm for the best finish.
- Prep Time: 15 minutes
- Cook Time: 15-18 minutes
- Category: Brunch
- Cuisine: American
Nutrition
- Serving Size: 1 Danish
- Calories: 280
- Sugar: 12
- Sodium: 180
- Fat: 16
- Saturated Fat: 8
- Carbohydrates: 32
- Fiber: 1
- Protein: 5
Keywords: cream cheese danish, puff pastry recipe, easy brunch, homemade pastries, fruit danish, quick breakfast