I have a confession to make. Last Friday, I was exhausted. You know that kind of exhausted where you come home from work, the kids are hungry, and the last thing you want to do is stand over a stove? I was staring into the fridge, wondering if I could just order takeout one more time. But then I saw a half-empty bag of chocolate chips and a stick of butter sitting there, looking at me like it was challenging me.
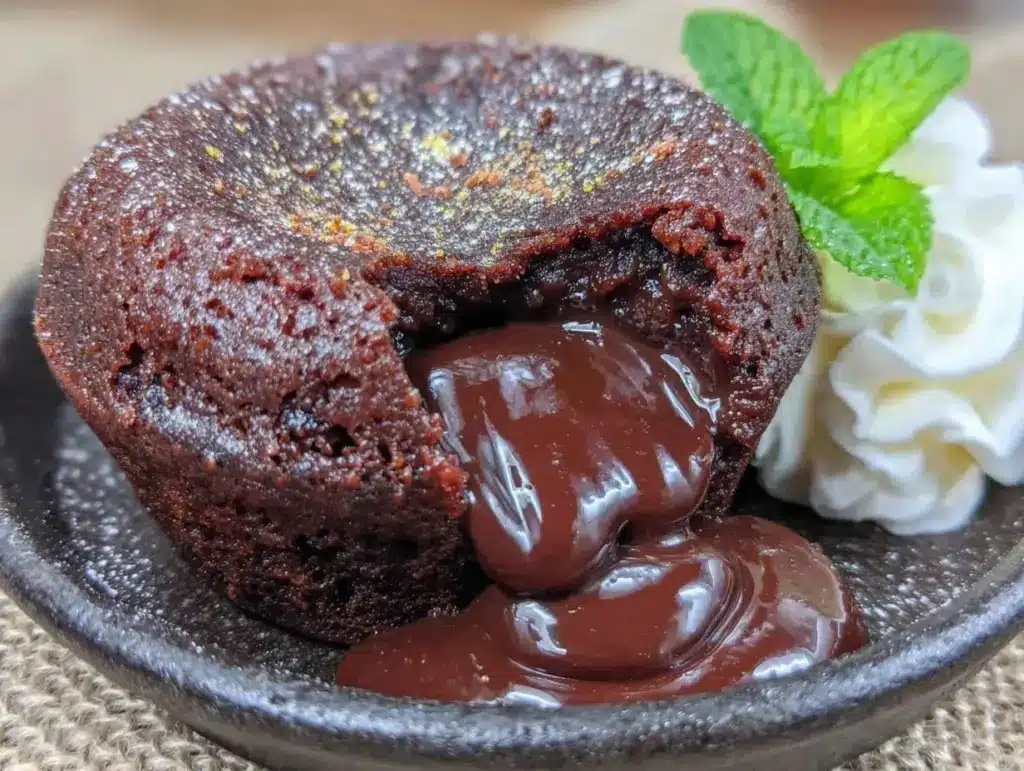
I decided to make my Chocolate Lava Cake with Molten Fudge Center. I wasn’t aiming for Michelin-star perfection. I just wanted something warm, sweet, and comforting that wouldn’t break the bank or take an hour to prepare. I threw together a simple batter, poured it into ramekins, and popped them in the oven. Ten minutes later, I pulled them out, flipped them onto plates, and watched that gooey chocolate center spill out.
My kids didn’t even ask what was for dessert. They just dug in. It’s become our go-to Friday night treat because it feels fancy but is actually incredibly budget-friendly. I’ve made this Chocolate Lava Cake with Molten Fudge Center at least a dozen times since that night. Some days I use dark chocolate, sometimes I use milk chocolate when the kids are being picky. But the result is always the same: happy bellies and zero guilt about spending too much on dinner.
What I love most is that this recipe doesn’t require fancy equipment or hard-to-find ingredients. You probably have everything you need in your pantry right now. It’s that rare dessert that feels like a special occasion but costs less than a box of cookies from the grocery store. Let me show you how to make this easy, molten magic without the stress.
Why You’ll Love This Recipe
There are plenty of desserts out there, but this Chocolate Lava Cake with Molten Fudge Center hits a different note. It’s quick, it’s cheap, and it’s reliably delicious. Here’s why I keep making it on repeat:
- Stupid Simple — Seriously, if you can melt chocolate and mix a bowl, you can do this. I’ve made this while helping my younger one with homework. It’s that hands-off the whole time, except for the last few minutes in the oven.
- Lightning Fast — From start to finish, it’s about 20 minutes. That’s faster than waiting for a pizza delivery driver who might get lost. Perfect for those “I need sugar NOW” moments.
- Budget-Smart — This uses basic pantry staples: flour, sugar, butter, eggs, and chocolate. It costs pennies per serving compared to buying individual lava cakes at a restaurant or bakery. I usually make a double batch because leftovers are rare, but if there are any, they stretch well.
- Kid-Approved — My kids think this is the best dessert ever. They love the surprise of the molten center. It’s a great way to get them excited about helping in the kitchen, too.
- Make-Ahead Friendly — You can prep the batter ahead of time and bake it later. This is a lifesaver when you have guests coming over but you’re busy with other dinner prep. It’s also great for meal prepping if you’re making individual portions for the week.
Real talk? This dessert has saved me more times than I can count. It’s my answer to “what’s for dessert?” when I’m tired, don’t want to order expensive treats, and still want something that feels special. My family is happy, I’m happy because I’m not stressed, and my wallet stays full.
Ingredients You’ll Need
Here’s the best part: you probably have most of these items already. This isn’t a recipe that requires a trip to three different specialty stores. I’m particular about the chocolate, though—good quality makes a huge difference in the final taste. Here’s what you need:
For the Batter
Dark chocolate chips (6 ounces / 170g) — I use semi-sweet chips for that rich, fudgy flavor. You can also chop up a chocolate bar if you prefer. Just make sure it’s real chocolate, not “chocolatey” coating, which doesn’t melt the same way.
Unsalted butter (½ cup / 113g) — This adds richness and helps create that gooey texture. Don’t skip it or try to cut it with oil; the butter is key for the mouthfeel. I keep a stick in the fridge at all times for this reason.
Granulated sugar (1 cup / 200g) — This sweetens the cake and helps create the crust. You can use brown sugar for a deeper, caramel-like flavor, but white sugar is classic and usually what I have on hand.
Eggs (2 large) — These are the structure. I use large eggs from the grocery store. Room temperature eggs mix better, but if I forget, I just microwave them for 10 seconds. Don’t worry about being too precise here.
All-purpose flour (2 tablespoons / 15g) — Just a little bit. This gives the cake some body so it’s not just liquid chocolate. Don’t add more, or you’ll end up with a full cake instead of a lava cake.
Salt (½ teaspoon) — This is crucial. Salt enhances the chocolate flavor. I use table salt or sea salt. Don’t skip this step; it makes the chocolate taste more like chocolate.
Vanilla extract (1 teaspoon) — Adds a nice background note. Pure vanilla is best, but imitation works in a pinch. I keep a small bottle in my pantry specifically for baking.
For Serving
Butter and cocoa powder — For greasing the ramekins. I melt a little butter and dust with cocoa powder to prevent sticking and add extra chocolate flavor. This is a pro tip that makes serving easier.
Whipped cream or ice cream — Optional, but highly recommended. I usually have homemade whipped cream in the fridge, but store-bought works fine. Vanilla ice cream is the classic pairing.
Substitutions and Tips
Gluten-Free? — You can swap the all-purpose flour for a 1:1 gluten-free flour blend. It works just as well. I’ve tested this with several brands, and they all hold up.
Dairy-Free? — Use dairy-free butter and dark chocolate chips that are certified dairy-free. The texture might be slightly different, but it’s still delicious. My lactose-intolerant sister loves this version.
Chocolate Choice — I prefer semi-sweet, but milk chocolate will make it sweeter and softer. Dark chocolate (70%+) will make it richer and less sweet. Choose based on your family’s preference.
Equipment Needed
You don’t need fancy equipment for this. Here’s what I actually use:
Ramekins (6 individual) — I use 6-ounce ramekins. They’re cheap and easy to find. You can use larger ones, but you’ll need to adjust the baking time. I prefer individual portions because it feels more special and prevents overeating.
Microwave-safe bowl — For melting the chocolate and butter. I use a glass bowl because it’s easy to clean. A metal bowl works too, but be careful not to burn yourself.
Mixing bowl — A medium-sized bowl for whisking the eggs and sugar. I use a stainless steel bowl, but any bowl works.
Whisk — For mixing the batter. A wire whisk is best, but a fork works in a pinch. I keep a whisk on my counter for easy access.
Oven — Obviously, you need an oven. Preheat it to 425°F (220°C). Make sure it’s fully heated before you put the cakes in.
Timer — This is non-negotiable. Lava cakes go from perfect to overcooked in seconds. I set my phone timer as soon as I put them in the oven. Don’t trust your eyes; trust the timer.
Small spoon or spatula — For greasing the ramekins. I use a pastry brush, but a paper towel works too. Just make sure you get every nook and cranny.
How to Make It: Step-by-Step
Alright, let’s make this! I’m walking you through exactly how I do it, including the little tricks I’ve picked up over the years.
Step 1: Prep Your Ramekins (2 minutes)
Butter and dust your ramekins. Take a small piece of butter and rub it all over the inside of each ramekin. Then, add a teaspoon of cocoa powder to each. Tap and rotate the ramekin to coat the buttered sides evenly. Tap out the excess. This ensures the cakes release easily and adds a chocolatey crust. If you skip this, you’ll have a sticky mess. Trust me on this one.
Step 2: Melt the Chocolate and Butter (2 minutes)
Combine the chopped chocolate and butter in a microwave-safe bowl. Microwave on high for 30 seconds. Stir. If it’s not fully melted, microwave for another 15-20 seconds. Stir until smooth. Be careful not to overheat, or the chocolate will seize. You want a glossy, smooth mixture. Set aside to cool slightly.
Step 3: Whisk Eggs and Sugar (1 minute)
In a separate bowl, whisk the eggs and granulated sugar together vigorously. You want the mixture to be pale and slightly thickened. This takes about 1-2 minutes by hand. If you have an electric mixer, use it for 30 seconds. This step incorporates air, which helps the cakes rise.
Step 4: Combine Wet Ingredients (1 minute)
Pour the melted chocolate mixture into the egg mixture. Whisk gently but thoroughly until combined. The batter will look thick and shiny. Don’t worry if it looks a bit dense; that’s exactly what you want.
Step 5: Add Flour and Salt (1 minute)
Stir in the flour, salt, and vanilla extract. Mix until just combined. Do not overmix. You want a smooth batter with no lumps of flour. If you overmix, you’ll develop gluten, and the cakes will be tough instead of tender.
Step 6: Fill and Bake (12-14 minutes)
Divide the batter evenly among the prepared ramekins. They should be about ¾ full. Place them on a baking sheet for stability. Bake at 425°F (220°C) for 12-14 minutes. The edges should be firm, but the center should still be soft and jiggly. This is the critical moment. If you bake them for 15 minutes, they’ll be fully set cakes. If you bake them for 10 minutes, they’ll be too runny. 12-14 minutes is the sweet spot.
Step 7: Cool and Serve (2 minutes)
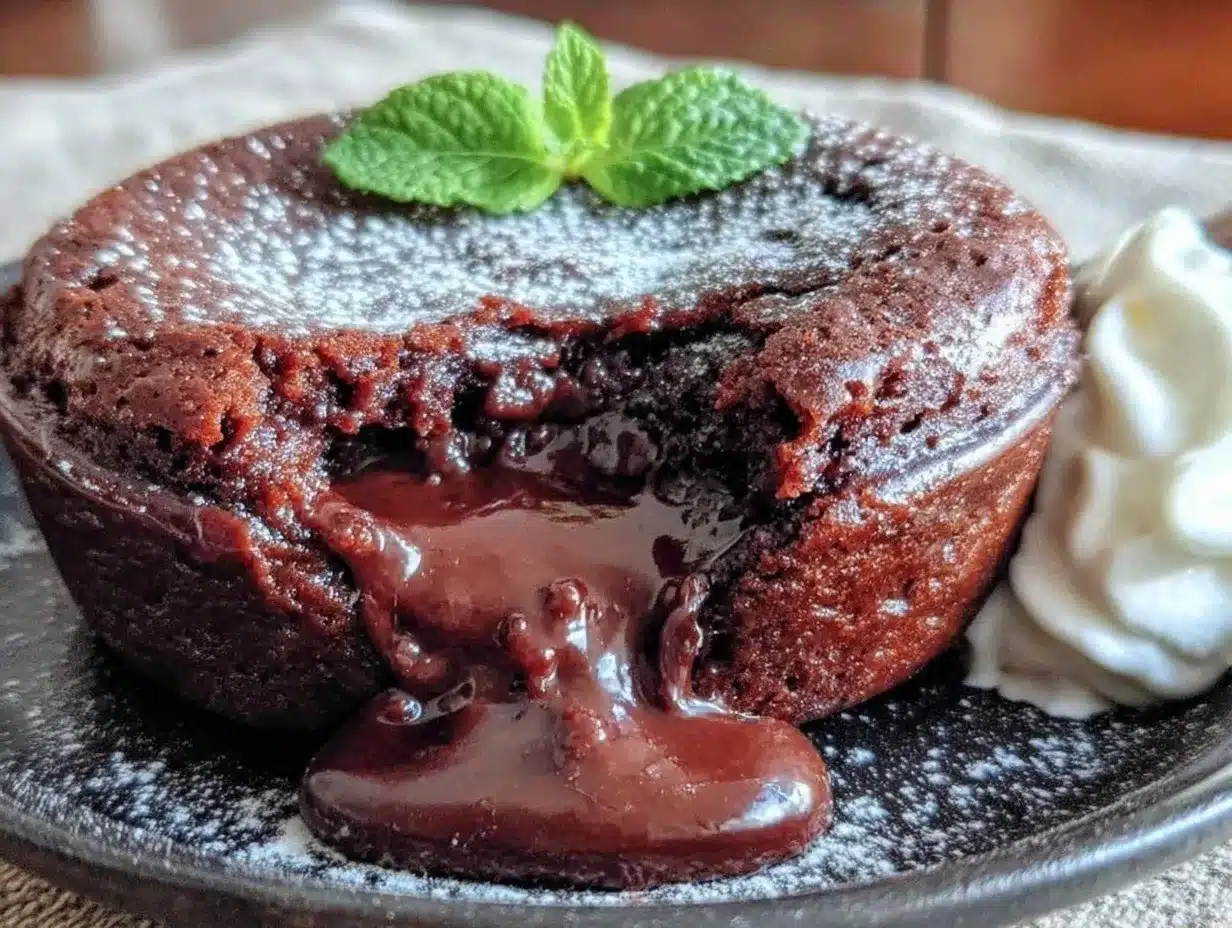
Remove the ramekins from the oven. Let them cool for 1 minute. This allows the cakes to set slightly so they don’t collapse when you invert them. Run a small knife around the edge to loosen. Place a plate over each ramekin and flip quickly. The cake should slide out easily. Dust with powdered sugar if desired, and serve immediately.
Total Time: About 20 minutes (5 minutes prep, 12-14 minutes bake, 2 minutes cool/serve)
Expert Tips & Tricks
Here’s everything I’ve learned from making this dozens of times. These tips will save you from my mistakes.
- Don’t Overbake — This is the #1 mistake. The center should be molten, not solid. When you pull them out, the tops should look set, but if you gently shake the ramekin, the center should jiggle like Jell-O. If it doesn’t jiggle, they’re done.
- Room Temperature Eggs — Room temperature eggs mix better and create a smoother batter. If you’re in a hurry, just drop the eggs in warm water for 5 minutes.
- Use Good Chocolate — Since chocolate is the star, use good quality chips. I like Ghirardelli or Lindt. Cheap chocolate chips have more wax and don’t melt as smoothly.
- Grease Well — Make sure you butter every nook of the ramekin. If there’s a dry spot, the cake will stick. I’ve had cakes get stuck before, and it’s frustrating. Take the time to do it right.
- Make Ahead Option — You can fill the ramekins up to 24 hours ahead. Cover them with plastic wrap and refrigerate. When ready to serve, let them sit at room temperature for 15 minutes, then bake as directed. You may need to add 1-2 minutes to the baking time.
Common Mistakes:
- Mistake: Cake is too runny — Fix: You underbaked it. Next time, add 1-2 minutes to the baking time.
- Mistake: Cake is too dense — Fix: You overmixed the batter. Whisk gently next time.
- Mistake: Cake sticks to ramekin — Fix: You didn’t grease well enough. Butter and cocoa powder are your friends.
Variations & Substitutions
Once you’ve nailed the basic version, here’s how you can mix it up. I’ve tried all of these.
- Peppermint Lava Cake — Add ½ teaspoon peppermint extract to the batter. Top with crushed candy canes. Great for holidays.
- Espresso Lava Cake — Add 1 teaspoon instant espresso powder to the batter. Enhances the chocolate flavor. Perfect for coffee lovers.
- Cherry Lava Cake — Drop a fresh or frozen cherry into the center of the batter before baking. The cherry bursts out when you cut in. My kids love this one.
- White Chocolate Lava Cake — Use white chocolate chips instead of dark. It’s sweeter and creamier. Add a pinch of orange zest for a nice twist.
- Vegan Version — Use dairy-free butter and chocolate, and replace eggs with flax eggs (1 tablespoon ground flaxseed + 3 tablespoons water per egg). It’s not exactly the same, but it’s still tasty.
Serving & Storage
How to Serve:
I usually serve these straight from the plate at the dinner table. They look rustic and stay warm. I top them with a dollop of whipped cream and a sprinkle of powdered sugar. It’s simple but elegant.
Side Dishes:
Since this is a rich dessert, I like to pair it with something light. A simple green salad with a vinaigrette works well. Or just enjoy it on its own with a cup of coffee or tea. I also serve it with a glass of cold milk—it’s a classic combination.
Storage Instructions:
Refrigerator: — These are best eaten immediately. If you have leftovers, store them in an airtight container in the fridge for up to 2 days. The texture will change, and they’ll be more like brownies.
Reheating: — To reheat, microwave for 10-15 seconds. Just enough to warm them through. Don’t overheat, or they’ll become solid.
Freezing: — You can freeze the unbaked batter in the ramekins. Freeze for up to 1 month. When ready to eat, bake from frozen, adding 2-3 minutes to the baking time. This is a great way to have dessert ready on demand.
Pro Tip: — Make a double batch and freeze the extra batter. It’s a lifesaver when you have unexpected guests or just want a treat without the effort.
Nutrition Information
I’m not a nutritionist, but here’s the breakdown if you’re tracking. This is a rich dessert, so portion control is key.
Per Serving (1 cake):
- Calories: 350
- Protein: 6g
- Carbs: 45g
- Fiber: 2g
- Sugar: 35g
- Fat: 18g
- Saturated Fat: 10g
What’s Good: — It’s relatively low in protein and fiber, but that’s expected for a dessert. It’s a good source of energy for a quick treat.
What to Know: — High in sugar and saturated fat. Enjoy in moderation. If you’re watching your sugar, consider using less sugar in the batter or using a sugar substitute.
My Take: — Look, this is comfort food. It’s not a health food. But it’s way better than store-bought desserts, and I know exactly what’s in it. When I want to make it lighter, I use dark chocolate and reduce the sugar. But usually? I just enjoy a single cake and feel good about it.
Final Thoughts
So that’s my go-to Chocolate Lava Cake with Molten Fudge Center! I’ve probably talked your ear off at this point, but when you make a recipe this often, you have a lot to say about it.
This has saved weeknight desserts more times than I can count. It’s my answer to “what’s for dessert?” when I’m tired, don’t want takeout, and still want something that tastes really good. My kids are happy, my husband’s happy, and I’m happy because I’m not stressed about cooking.
Make it yours! Try different add-ins, swap in your favorite chocolate, or adjust the sugar. The best recipes are the ones you adapt to your family’s tastes. If you make this, drop a comment and let me know what you think! I love hearing how recipes turn out in your kitchen. And if something doesn’t work, tell me that too—I’m here to help troubleshoot.
Happy cooking! And I hope your kitchen smells half as good as mine does right now.
Frequently Asked Questions
Q: Can I use milk chocolate instead of dark chocolate?
A: Yes, you can. Milk chocolate will make the lava cake sweeter and softer. I prefer semi-sweet because it balances the sweetness with the richness. If you use milk chocolate, you might want to reduce the sugar slightly, but it’s not necessary. It still works great.
Q: My sauce came out watery—what happened?
A: Usually, this means you underbaked it. The center should be molten, but not liquid chocolate. If it’s runny, let it bake for another 1-2 minutes next time. Also, make sure you’re not using too much chocolate or too little flour. The ratio is important for the right texture.
Q: Can I make this ahead for a dinner party?
A: Yes! You can prepare the batter and fill the ramekins up to 24 hours in advance. Cover them with plastic wrap and refrigerate. When ready to serve, let them sit at room temperature for 15 minutes, then bake as directed. You may need to add 1-2 minutes to the baking time. This is a huge time-saver for parties.
Q: Why did my cake stick to the ramekin?
A: This usually happens if you didn’t grease the ramekins well enough. Make sure you butter every nook and cranny, then dust with cocoa powder. If you skip the cocoa powder, the butter alone might not be enough. Also, let the cakes cool for 1 minute before inverting them. This allows them to set slightly.
Q: Can I use a muffin tin instead of ramekins?
A: You can, but you’ll need to adjust the baking time. Muffin tins are larger, so the cakes will take longer to bake. Start checking at 15 minutes. Also, grease the muffin tin well with butter and dust with cocoa powder. Individual portions are better for lava cakes, though, because they cook more evenly.
Q: How do I reheat leftovers without it getting dry?
A: Microwave for 10-15 seconds. Just enough to warm them through. Don’t overheat, or they’ll become solid. If you have time, let them come to room temperature before reheating. This helps them warm up more evenly.
Q: Can I double this recipe?
A: Absolutely! Double everything and use your biggest mixing bowl. The cooking times stay the same. I do this when I’m meal-prepping or feeding a crowd. Just make sure your oven has enough space for all the ramekins. You might need to bake them in batches.
Pin This Recipe!
Chocolate Lava Cake with Molten Fudge Center
- Total Time: 20 minutes
- Yield: 6 servings 1x
Description
A quick, budget-friendly, and kid-approved dessert featuring a rich chocolate exterior and a gooey, molten fudge center. Perfect for busy weeknights.
Ingredients
- 6 ounces (170g) dark chocolate chips (semi-sweet)
- ½ cup (113g) unsalted butter
- 1 cup (200g) granulated sugar
- 2 large eggs
- 2 tablespoons (15g) all-purpose flour
- ½ teaspoon salt
- 1 teaspoon vanilla extract
- Butter and cocoa powder (for greasing ramekins)
- Whipped cream or vanilla ice cream (optional, for serving)
Instructions
- Preheat oven to 425°F (220°C). Butter and dust 6 individual ramekins with cocoa powder, tapping out excess.
- Combine chocolate and butter in a microwave-safe bowl. Microwave on high for 30 seconds, stir, then microwave in 15-20 second intervals until smooth. Set aside to cool slightly.
- In a separate medium bowl, whisk eggs and sugar vigorously until pale and slightly thickened (about 1-2 minutes).
- Pour the melted chocolate mixture into the egg mixture and whisk gently until combined.
- Stir in flour, salt, and vanilla extract until just combined. Do not overmix.
- Divide batter evenly among prepared ramekins (filling them about ¾ full). Place ramekins on a baking sheet.
- Bake for 12-14 minutes until edges are firm but the center is soft and jiggly.
- Remove from oven and let cool for 1 minute. Run a knife around the edge to loosen, then invert onto plates. Serve immediately.
Notes
Do not overbake; the center must remain molten. Room temperature eggs mix better. For make-ahead, fill ramekins up to 24 hours in advance, cover, and refrigerate. Add 1-2 minutes to baking time if baking from cold. Can be frozen unbaked for up to 1 month.
- Prep Time: 5 minutes
- Cook Time: 12-14 minutes
- Category: Dessert
- Cuisine: American
Nutrition
- Serving Size: 1 cake per serving
- Calories: 350
- Sugar: 35
- Fat: 18
- Saturated Fat: 10
- Carbohydrates: 45
- Fiber: 2
- Protein: 6
Keywords: chocolate lava cake, molten chocolate cake, easy dessert, family friendly, quick dessert, budget friendly, gluten-free option, dairy-free option



