Last summer, I was standing in my kitchen at 9 PM, staring at a bunch of bananas that had turned from “perfectly ripe” to “brown mush” in the span of twenty-four hours. I was exhausted. I had just gotten the kids down, and the last thing I wanted to do was turn on the oven or spend an hour chopping vegetables. I needed dessert, but I also needed something that wouldn’t leave me with a sink full of dishes and a wallet lighter than I wanted it to be.
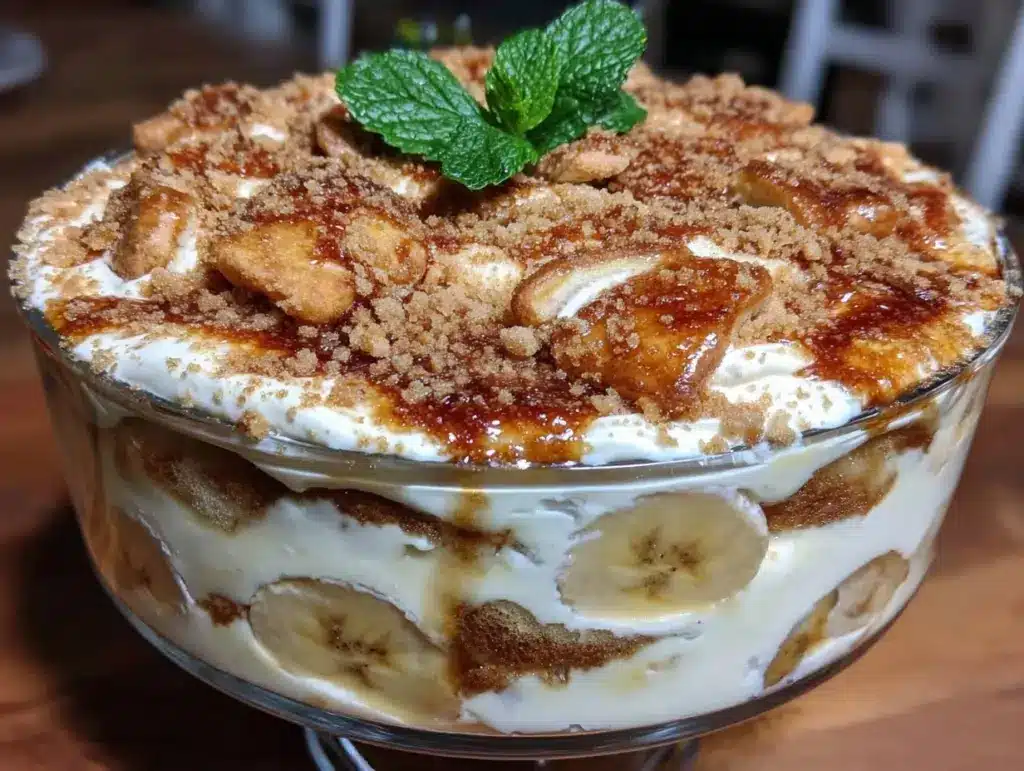
So, I did what any budget-savvy parent does: I raided the pantry and the fruit bowl. I threw together a banana pudding trifle with vanilla wafers using ingredients I already had on hand. I didn’t measure anything. I just layered it. I expected it to be okay—just a way to use up the bananas before they went bad. But then my seven-year-old wandered in, asked for a taste, and declared it “the best thing ever.” My husband, who usually sticks to chocolate chip cookies, actually asked me to make it again the next week.
That accidental trifle became our new Sunday tradition. It’s cheap, it’s incredibly easy, and it’s the kind of dessert that makes people ask for the recipe at potlucks. People assume it’s complicated because it looks so pretty in a glass bowl, but the truth is, it’s basically just assembly. No baking required. No fancy techniques. Just sweet, creamy, comforting layers that cost less than a dollar per serving.
I’ve made this banana pudding trifle with vanilla wafers probably fifty times since that night. I’ve tweaked the ratios, tried different milks, and even experimented with adding whipped cream (spoiler: it’s good, but the custard is king). If you’re looking for a dessert that feeds a crowd, satisfies sweet tooths of all ages, and doesn’t break the bank, this is it. It’s the ultimate “I need to impress without trying too hard” recipe.
Why You’ll Love This Banana Pudding Trifle
There are a dozen reasons I keep coming back to this trifle, but let’s be real: it’s not just about the taste. It’s about the fact that it actually works for real life. Here’s why this banana pudding trifle with vanilla wafers has earned a permanent spot in our rotation:
- Stupid Simple Assembly — Seriously, if you can layer ingredients, you can make this. I’ve let my teenagers build it while they watch TV. There’s no cooking, no stirring pots on the stove, and no risk of burning anything. It’s literally just stacking.
- Pantry Staples — You probably have everything you need except the pudding mix and the bananas. This isn’t a recipe that requires a special trip to the store for obscure ingredients. It’s cheap, accessible, and reliable.
- Kid-Approved Flavor — My picky eater, who usually turns his nose up at anything with “texture,” loves this. The vanilla wafers soften just enough to be chewy but not soggy, and the custard is smooth. It’s a crowd-pleaser that works for toddlers to grandparents.
- Makes Amazing Leftovers — And by leftovers, I mean the reason I deliberately make a double batch. This trifle tastes even better the next day because the flavors have had time to meld. The wafers absorb the custard and become almost like a cake-like base. I pack it in Tupperware for school lunches or afternoon snacks.
- Budget-Friendly — Feeds 8-10 people for under $10. That’s less than the cost of a single slice of cheesecake at a restaurant. When you’re feeding a family, every dollar counts, and this dessert proves you don’t need to spend a fortune to make everyone happy.
This is my go-to when I need dessert to just work. No stress, no last-minute panic, just reliable, delicious food that makes everyone smile.
Ingredients You’ll Need
Here’s the best part: this list is short. I’m not particular about most of these, but I am picky about two things: the quality of the vanilla wafers and the ripeness of the bananas. Let’s break it down.
For the Layers
Vanilla Wafers (1 package, about 40-50 cookies) — I use Nilla Wafers. They’re the standard for a reason—they hold up well and have that classic vanilla flavor. Don’t substitute with chocolate chip cookies here; it changes the whole profile. You need that crisp vanilla crunch that softens over time.
Ripe Bananas (4-5 medium) — This is crucial. They need to be spotted brown. Yellow bananas are too firm and not sweet enough. Brown bananas give you that intense banana flavor and a creamier texture. If you buy them green, let them sit on the counter for a few days. Trust me, it’s worth the wait.
Instant Vanilla Pudding Mix (2 boxes, 3.4 oz each) — I use Jell-O or a store brand. Both work perfectly. Don’t try to make homemade custard from scratch unless you have hours to spare; this is the “easy” recipe. Instant is key here because it thickens quickly without cooking.
Whole Milk (3 cups / 720ml) — Use whole milk for the best richness. You can use 2% if you’re watching calories, but the texture won’t be as luxurious. The fat content helps carry the vanilla flavor.
Heavy Cream or Cool Whip (1 cup heavy cream OR 1 container Cool Whip) — This is where you choose your fighter. Fresh whipped cream (whipped with a little sugar and vanilla) feels fancier and lighter. Cool Whip is the lazy, budget-friendly option that saves time and doesn’t require an electric mixer. I usually go with Cool Whip on weeknights and fresh cream on weekends.
For the Garnish (Optional but Recommended)
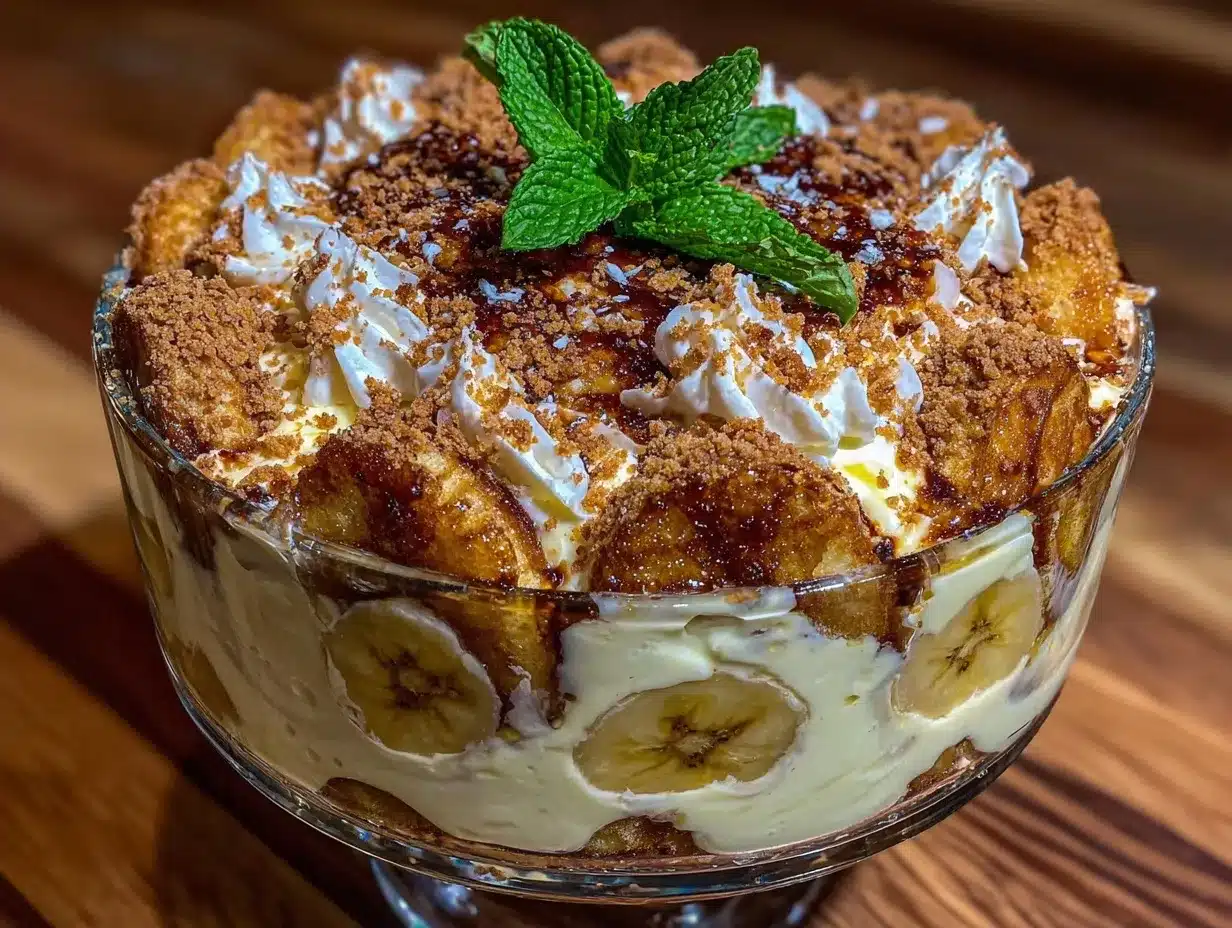
Extra Vanilla Wafers — Crushed on top for texture.
Whipped Cream Dollops — Just for looks if you’re serving guests.
Mini Chocolate Chips — I know, it’s controversial. But my kids love the contrast of chocolate and banana. Add a handful if your crew does too.
Equipment Needed
You don’t need fancy equipment for this. Here’s what I actually use:
Large Mixing Bowl — A 4-quart bowl is perfect for whisking the pudding. Any big bowl works.
Whisk — For mixing the pudding and milk. A fork works in a pinch, but a whisk is faster and smoother.
9×13 Glass Baking Dish or Trifle Bowl — A 9×13 dish is easiest for family servings. A clear glass trifle bowl looks beautiful for parties. The shape doesn’t matter as long as it’s wide enough to layer.
Knife and Cutting Board — For slicing the bananas. A serrated knife helps if the bananas are super soft.
Electric Mixer (Optional) — Only if you’re making fresh whipped cream. If using Cool Whip, no mixer needed.
How to Make It: Step-by-Step
Alright, let’s make this! I’m walking you through exactly how I do it, including the little tricks I’ve picked up so you don’t end up with soggy wafers or lumpy pudding.
Step 1: Prep Your Bananas (5 minutes)
Peel your bananas and slice them into rounds. If they’re very ripe, they’ll be soft, so handle them gently. I slice them into about ¼-inch rounds. If you make them too thick, you won’t get enough banana flavor in every bite. Too thin, and they might disappear into the custard. Aim for visible slices.
Step 2: Make the Pudding (5 minutes)
In your large mixing bowl, whisk together the two boxes of instant vanilla pudding mix and the cold milk. Whisk vigorously for about 2 minutes. It might seem like a lot of whisking, but it ensures there are no lumps and the pudding thickens properly. Let it sit for 5 minutes to fully set. It should be thick and creamy, like a soft-serve ice cream consistency.
Step 3: Prepare Your Cream (5 minutes)
If using Cool Whip, just let it thaw and fluff it with a spoon. If making fresh whipped cream, whip 1 cup of cold heavy cream with 2 tablespoons of sugar and 1 teaspoon of vanilla extract until stiff peaks form. Don’t over-whip it, or it’ll turn to butter. Set aside.
Step 4: Start the First Layer (2 minutes)
Take your 9×13 dish or trifle bowl. Place a single layer of whole vanilla wafers on the bottom. Don’t overlap them too much; they need to lay flat. You don’t need to be perfect here—it’s a rustic dessert. If you have broken wafers, use them here; no one will know.
Step 5: Add Banana and Pudding Layers
Layer 1: Spread half of the sliced bananas over the wafers. Try to distribute them evenly so every spoonful gets banana. Then, spoon half of the pudding mixture over the bananas. Use a spatula to spread it out to the edges. You want to cover the wafers completely so they don’t get soggy in just one spot.
Layer 2: Add the second layer of vanilla wafers on top of the pudding. Then, add the remaining bananas. Finally, spread the rest of the pudding on top. Smooth it out with your spatula. It should look like a thick, creamy cake now.
Step 6: Top It Off
Spread the whipped cream or Cool Whip over the top layer. It doesn’t need to be perfect—swirls look nice. If you’re using crushed vanilla wafers, sprinkle them on top for a little crunch. If you’re adding chocolate chips, scatter them now.
Step 7: Chill and Serve
Cover the dish with plastic wrap and refrigerate for at least 4 hours, but ideally overnight. This is the most important step. The wafers need time to soften and absorb the pudding, turning into a cake-like texture. If you eat it immediately, it’s just cold pudding on hard cookies. Patience pays off.
Total Time: About 20 minutes active, plus 4+ hours chilling.
Expert Tips & Tricks
Here’s everything I’ve learned from making this dozens of times. These tips will save you from my mistakes.
Don’t Skip the Chill Time
I know it’s tempting to dig in right away, but the magic happens in the fridge. The vanilla wafers act like a sponge, soaking up the moisture from the pudding and bananas. After 4 hours, the texture transforms from “layers” to “unified dessert.” If you’re in a hurry, freeze it for 1 hour to speed things up, but the fridge is best.
Banana Browning Hack
If you’re making this ahead of time and the bananas look like they’re turning too brown, toss them in a little lemon juice. It won’t affect the taste much, but it keeps them looking fresh. However, if you’re eating it within 24 hours, it doesn’t matter at all. The browned banana taste is part of the charm.
Use Room Temperature Cream
If you’re using Cool Whip, make sure it’s fully thawed before spreading. Lumpy Cool Whip is not appetizing. If using fresh cream, make sure your bowl and beaters are cold. It whips better and holds its shape longer.
Doubling the Batch
This recipe doubles easily. Just use a larger dish, like two 9×13 pans or a large oval casserole dish. The layering process is the same. I often double it when I have company because it disappears fast.
Storage Tip
Keep it covered tightly with plastic wrap. It will last in the fridge for up to 3 days. After that, the wafers might get too soft, and the bananas can start to oxidize. It’s best eaten within the first two days.
Variations & Substitutions
Once you’ve nailed the basic version, here’s how you can mix it up. I’ve tried all of these, and they’re all winners.
Chocolate Banana Trifle
Swap the vanilla pudding for chocolate pudding mix. Add chocolate chips between the layers. It’s like a banana split in a bowl. My kids go crazy for this version.
Strawberry Banana Trifle
Add a layer of sliced strawberries between the bananas. The tartness of the strawberries cuts through the sweetness of the pudding. It’s a nice summer twist.
Butterscotch Banana Trifle
Use butterscotch pudding mix instead of vanilla. Top with crushed butterscotch chips. It’s richer and more complex. I love this version for fall.
Dairy-Free Option
Use almond milk or oat milk for the pudding. Use a dairy-free whipped topping or coconut cream. It’s not exactly the same, but it’s still delicious and safe for those with allergies.
Gluten-Free
Use gluten-free vanilla wafers (there are several good brands now) and make sure your pudding mix is certified GF. Everything else is naturally gluten-free.
Serving & Storage
How to Serve:
I usually serve this straight from the fridge. It’s cold, creamy, and refreshing. I cut it into squares if using a 9×13 dish. If using a trifle bowl, I scoop it out with a large spoon. It looks elegant with a dollop of extra whipped cream on top.
Side Dishes:
This is a dessert, so it doesn’t need sides. But if you’re serving it after a meal, it pairs well with coffee or tea. It’s also great with a glass of cold milk or a warm cup of tea.
Refrigerator:
Store in an airtight container or covered with plastic wrap for up to 3 days. The texture will continue to soften, which is fine.
Freezing:
I don’t recommend freezing this. The bananas will get mushy when thawed, and the whipped cream can separate. It’s best fresh or chilled.
Nutrition Information
I’m not a nutritionist, but here’s the breakdown if you’re tracking. Keep in mind this is a sweet treat, so portions matter.
Per Serving (based on 12 servings):
– Calories: 280
– Protein: 5g
– Carbs: 42g
– Fiber: 2g
– Sugar: 28g
– Fat: 10g
– Sodium: 220mg
What’s Good:
– It has some protein from the milk and pudding.
– Bananas provide potassium.
– It’s a manageable portion size if you’re watching calories.
What to Know:
– Higher in sugar from the pudding mix and bananas.
– Contains dairy and gluten.
– If you use low-fat milk and sugar-free pudding, you can cut the calories significantly.
Final Thoughts
So that’s my go-to banana pudding trifle with vanilla wafers! I’ve probably talked your ear off at this point, but when you make a recipe this often, you have a lot to say about it.
This has saved me from dessert disasters more times than I can count. It’s my answer to “what’s for dessert?” when I’m tired, don’t want to bake, and still want something that tastes homemade. My kids are happy, my husband is happy, and I’m happy because I’m not stressed about cooking.
Make it yours! Try different fruit additions, swap in your favorite wafers, or adjust the sweetness. The best recipes are the ones you adapt to your family’s tastes. If you make this, drop a comment and let me know what you think! I love hearing how recipes turn out in your kitchen. And if something doesn’t work, tell me that too—I’m here to help troubleshoot.
Happy cooking! And I hope your kitchen smells half as good as mine does right now.
Frequently Asked Questions
Can I use homemade custard instead of pudding mix?
You can, but it takes much longer and requires cooking. The instant pudding mix is what makes this recipe “easy” and “budget-friendly.” If you want to use homemade, just make sure it’s cooled completely before layering. But honestly, the instant mix tastes just as good for this specific recipe.
Why did my wafers get soggy?
This usually happens if you eat the trifle too soon. The wafers need time to absorb the moisture. If you’re serving it immediately, they’ll be hard. If you wait 4+ hours, they’ll be perfect. Also, make sure you’re covering the wafers with pudding on both sides to prevent them from drying out or getting too wet in one spot.
Can I make this ahead for a party?
Yes! In fact, it’s better made ahead. You can assemble it the night before. Just keep it covered in the fridge. It will hold up well for up to 2 days. I often make it on Sunday for a Monday night dinner or a weekend gathering.
Can I use frozen bananas?
I don’t recommend it. Frozen bananas release a lot of water when they thaw, which can make the pudding watery. Fresh bananas are best. If you only have frozen, thaw them completely and pat them dry with a paper towel before slicing.
How do I store leftovers?
Store in an airtight container in the fridge for up to 3 days. The texture will continue to soften, which is fine. Don’t freeze it, as the texture will change.
Can I double this recipe?
Absolutely! Just use a larger dish or two smaller dishes. The layering process is the same. I double it when I’m feeding a crowd because it disappears fast.
What if I don’t like vanilla wafers?
You can substitute them with shortbread cookies, graham crackers, or even ladyfingers. They won’t taste exactly the same, but they’ll work in a pinch. The vanilla wafer is the traditional choice, though, for a reason.
Pin This Recipe!
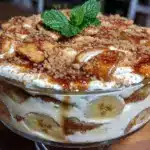
Banana Pudding Trifle: Cheap, Easy & Kid-Friendly
- Total Time: 4 hours 20 minutes
- Yield: 12 servings 1x
Description
A no-bake, budget-friendly dessert made by layering vanilla wafers, ripe bananas, and instant vanilla pudding with whipped cream or Cool Whip. It requires minimal effort and tastes even better after chilling overnight.
Ingredients
- 1 package (40-50 cookies) vanilla wafers (e.g., Nilla Wafers)
- 4–5 medium ripe bananas (spotted brown)
- 2 boxes (3.4 oz each) instant vanilla pudding mix
- 3 cups cold whole milk
- 1 cup heavy cream (whipped with 2 tbsp sugar and 1 tsp vanilla) OR 1 container Cool Whip (thawed)
- Optional garnish: Crushed vanilla wafers, mini chocolate chips
Instructions
- Peel and slice bananas into ¼-inch rounds.
- In a large mixing bowl, whisk together the instant vanilla pudding mix and cold milk vigorously for 2 minutes to remove lumps.
- Let the pudding mixture sit for 5 minutes to thicken.
- If using fresh cream, whip heavy cream with sugar and vanilla until stiff peaks form. If using Cool Whip, fluff it with a spoon.
- Place a single layer of vanilla wafers on the bottom of a 9×13 glass dish or trifle bowl.
- Spread half of the sliced bananas over the wafers.
- Spoon half of the pudding mixture over the bananas and spread to cover completely.
- Add a second layer of vanilla wafers.
- Add the remaining bananas.
- Spread the rest of the pudding on top.
- Spread the whipped cream or Cool Whip over the top layer.
- Garnish with crushed wafers or chocolate chips if desired.
- Cover with plastic wrap and refrigerate for at least 4 hours, ideally overnight, to allow wafers to soften.
Notes
Use ripe, spotted brown bananas for the best flavor and texture. Do not skip the chilling time, as the wafers need at least 4 hours to soften and absorb the pudding. If making ahead, toss bananas in a little lemon juice to prevent excessive browning. This recipe can be doubled for larger crowds.
- Prep Time: 20 minutes
- Cook Time: 0 minutes
- Category: Dessert
- Cuisine: American
Nutrition
- Serving Size: 1 slice or scoop
- Calories: 280
- Sugar: 28
- Sodium: 220
- Fat: 10
- Saturated Fat: 4
- Carbohydrates: 42
- Fiber: 2
- Protein: 5
Keywords: banana pudding, trifle, no-bake dessert, kid-friendly, budget-friendly, vanilla wafers, easy dessert, crowd-pleaser