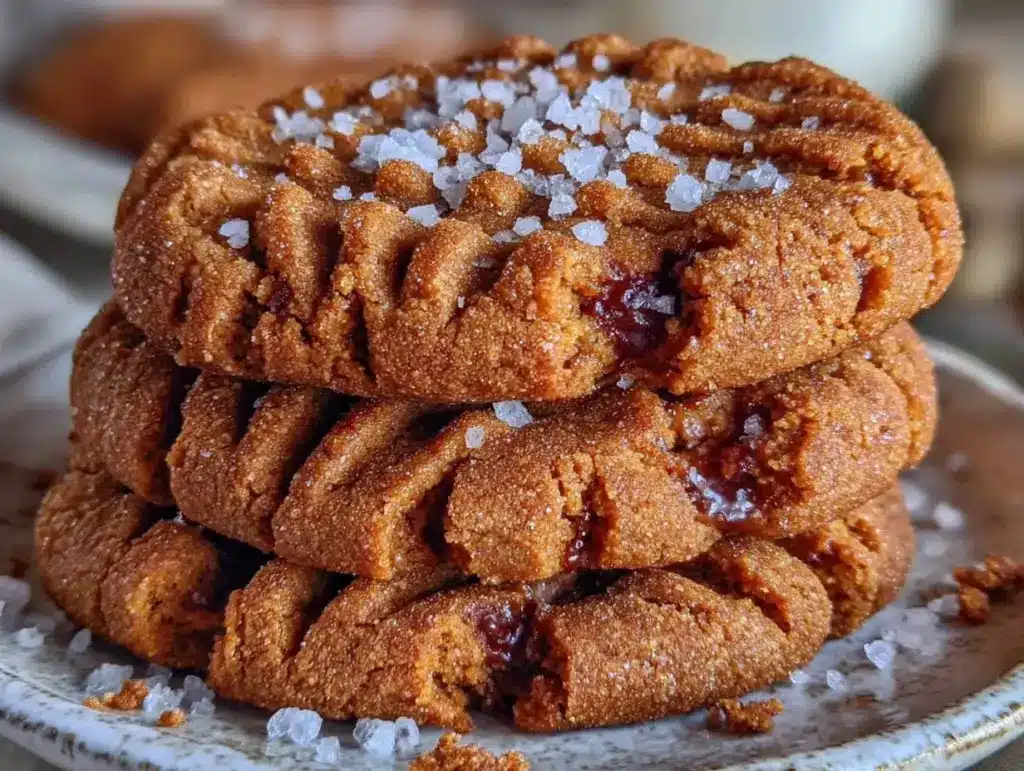
Last Tuesday, I was staring into my pantry with that specific mix of dread and desperation that every parent knows. You know the look. The kids are home from school, the hunger levels are at critical mass, and the idea of making a “real” dinner feels impossible. My usual go-to, that creamy butternut squash soup I love for cozy nights, wasn’t really the answer here. My kids wanted something sweet. Something crunchy. Something that didn’t involve a forty-minute prep time.
So, I did what I always do: I raided the back corners of the cupboards. I found a jar of peanut butter that had been hiding since Christmas, a bag of brown sugar, and some eggs. That’s it. Three ingredients. No flour. No baking soda. No fancy vanilla extract I was too cheap to buy.
I threw them together, rolled them into balls, threw them on a baking sheet, and walked away to actually cook dinner (which ended up being a quick chicken and apple sausage skillet because sometimes you just need protein too). When I checked on them twenty minutes later, the smell hit me. It was that warm, nutty, comforting scent that immediately made my house feel like a home instead of a chaotic office.
I took one out. It was soft, chewy, and tasted like the expensive peanut butter cookies from the bakery down the street. But here’s the kicker: they cost me about 80 cents per dozen to make. My kids devoured the entire batch before dinner was even fully cooled. Now, this 3-ingredient peanut butter cookie recipe is our go-to emergency dessert. It’s budget-friendly, it’s incredibly simple, and that crunchy sea salt topping? It’s the game-changer that makes them feel fancy without the fancy price tag.
Why You’ll Love This Recipe
Let’s be real. Life is hard. Cooking should be easy. This recipe isn’t just about saving money; it’s about saving your sanity. Here’s why these cookies have earned a permanent spot in our rotation:
- Pantry Staples Only — Seriously. You likely have all three main ingredients right now. Peanut butter, sugar, eggs. No running to the store at 8 PM. This is the ultimate “I forgot to buy dessert” savior.
- Stupid Simple — There is no measuring cups involved for the dough. You just mix. No rolling out dough. No chilling time. No waiting. If you can stir, you can make these. My seven-year-old made a batch last weekend while I was folding laundry.
- Expensive-Tasting for Pennies — The texture is spot-on. Crisp edges, chewy center. Adding that flaky sea salt on top elevates them from “basic snack” to “gourmet treat.” My husband thought I bought them from a specialty shop until I told him the total cost.
- Kid-Approved Texture — These aren’t dry or crumbly. They hold together perfectly. No more chasing cookie crumbs under the fridge. They’re sturdy enough for lunchboxes and sweet enough for bedtime treats.
- Quick Clean-Up — One bowl. One spatula. One baking sheet. That’s it. I hate doing dishes, so this is my favorite dessert recipe for that reason alone.
This is my answer to “Can we have cookies?” when I’m tired, broke, and out of ideas. It just works.
Ingredients You’ll Need
Before we get started, here’s the best part: this list is short. Like, embarrassingly short. I’m particular about the *type* of peanut butter here, though. Don’t skip that tip.
The Dough
Smooth Peanut Butter (1 cup / 250g) — This is the most important ingredient. Use regular, creamy peanut butter. Not the “natural” kind where the oil separates and you have to stir it for ten minutes. Not the “no-stir” kind with weird hydrogenated oils. Just standard, creamy peanut butter (Jif or Skippy work great). The oil in regular PB helps bind these cookies without flour. If you use natural PB, the cookies will be too dry and crumbly. Trust me.
Brown Sugar (1 cup / 200g) — Packed. This gives them that chewy texture and deep molasses flavor. White sugar works, but it makes them crispier and less chewy. For that bakery-style soft center, brown sugar is non-negotiable. I keep a bag in the pantry specifically for these.
Eggs (1 large egg) — This acts as the binder. Since there’s no flour, the egg is what holds the peanut butter and sugar together. Room temperature is fine, but don’t use cold eggs straight from the fridge if you can help it. They mix in easier.
The Topping
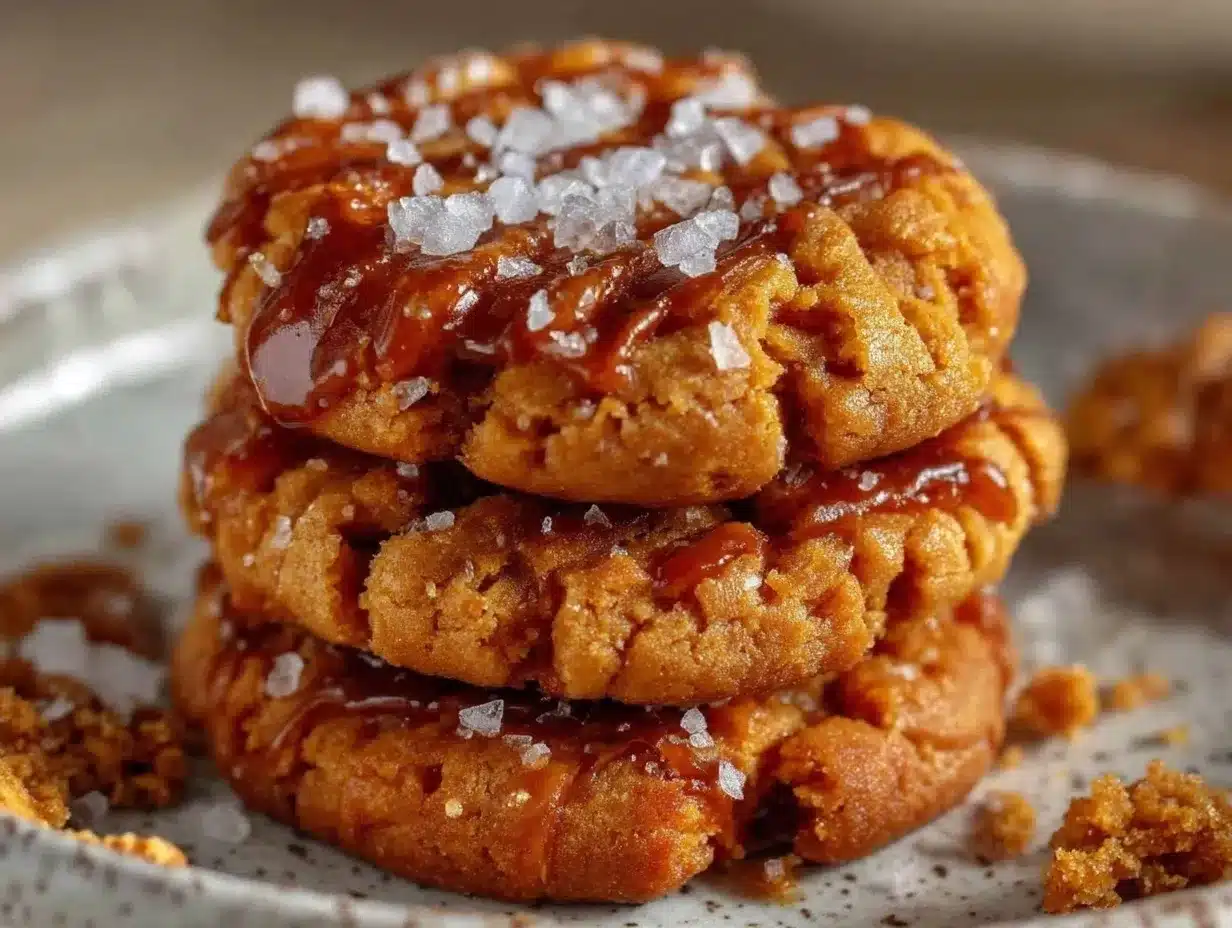
Flaky Sea Salt (for sprinkling) — This is the secret weapon. Regular table salt won’t give you that satisfying crunch and burst of flavor. You need Maldon or any flaky sea salt. It’s worth the few extra dollars. Sprinkle it on right after baking while the cookies are still soft so it sticks.
Optional: Chocolate Chips (½ cup) — If you want to stretch the flavor or add a bit more sweetness, stir in semi-sweet chocolate chips. It turns these into peanut butter cups essentially. I do this sometimes for my sweet-tooth husband.
Equipment Needed
You don’t need fancy gadgets for this. Here’s what I actually use:
Mixing Bowl — Any medium-sized bowl works. I use a ceramic one because it’s heavy and doesn’t slide around.
Spatula or Wooden Spoon — You need something sturdy to mix the peanut butter and sugar. It can be thick, so a flimsy spoon might bend.
Baking Sheet — Standard 9×13 or half-sheet pan. I line mine with parchment paper. It makes cleanup instant and prevents sticking. Aluminum foil works in a pinch, but parchment is better.
Cooling Rack — Optional, but nice. These cookies continue to cook on the hot pan, so moving them to a rack helps them set properly without getting soggy.
Small Bowl for Salt — Just pour your sea salt into a tiny bowl so you can pinch it easily with your fingers.
How to Make It: Step-by-Step
Alright, let’s make these! It takes about 15 minutes total. I’m walking you through exactly how I do it, including the little tricks I’ve picked up over dozens of batches.
Step 1: Prep Your Oven and Pan
Preheat your oven to 350°F (175°C). Line a baking sheet with parchment paper. I usually line two sheets because I double the batch. If you’re making a smaller batch, one sheet is fine, just leave space between the cookies—they spread a little.
Step 2: Mix the Dough
In your mixing bowl, combine the 1 cup of peanut butter and 1 cup of packed brown sugar. Stir them together vigorously. It will look a bit lumpy at first. Keep stirring until it’s mostly smooth and combined. There’s no need to be perfect here. Then, crack in the egg. Mix it in until the dough comes together into a thick, sticky ball. It should look uniform. If it’s too dry (which happens if your PB is old), add a teaspoon of milk. If it’s too wet, add a sprinkle of flour (but you shouldn’t need it).
Step 3: Roll the Cookies
Take a tablespoon of dough (a heaping tablespoon is best for cookie size) and roll it between your palms to form a smooth ball. Place it on the prepared baking sheet. Flatten it slightly with the tines of a fork. I make an X pattern on top because it looks classic and helps them bake evenly. Don’t flatten them too much, or they’ll be flat discs. Leave them about half an inch thick.
Step 4: Bake
Place the baking sheet in the oven. Bake for 8-10 minutes. Here’s the visual cue: the edges should be lightly golden and firm to the touch, but the centers will still look soft and slightly underdone. This is crucial. They will firm up as they cool. If you wait until they look fully done in the oven, they’ll be dry. I usually pull them out at 8 minutes for chewy cookies or 10 minutes for crispier edges.
Step 5: The Salt Trick
Immediately when you pull them out of the oven, sprinkle the flaky sea salt over the top. The cookies are still hot and slightly oily, so the salt will stick right on. Do this while they’re hot, or the salt will just roll off. Let them cool on the pan for 5 minutes before moving them. They are very fragile right out of the oven.
Total Time: About 20 minutes (5 minutes prep, 10-15 minutes bake, 5 minutes cool).
Expert Tips & Tricks
Here’s everything I’ve learned from making this dozens of times. These tips will save you from my mistakes.
Don’t Overbake
This is the #1 mistake. These cookies look done when they aren’t. Pull them when the edges are set but the middle looks soft. They continue to cook on the hot baking sheet. If you bake them until they look hard in the oven, they’ll be rock-hard once cooled.
Peanut Butter Quality Matters
As I mentioned, use regular peanut butter. The oils in standard PB (like Jif or Skippy) are refined in a way that helps these flourless cookies hold their shape. Natural peanut butter has separated oils that don’t bind the same way. If you *must* use natural PB, you’ll need to add ¼ cup of flour to make them hold together.
Use a Cookie Scoop
If you have one, use a small cookie scoop. It ensures every cookie is the same size, so they bake evenly. If you’re using spoons, try to make them all roughly the same size. Uneven sizes mean some burn while others are raw.
Salt Placement
Don’t just dump the salt on. Pinch it between your fingers and sprinkle it evenly. You want a little bit in every bite. If you miss spots, some cookies will taste bland while others are too salty. Consistency is key.
Storage Tip
These cookies dry out fast if left out. Store them in an airtight container with a slice of bread. The bread releases moisture and keeps the cookies soft for days. I do this for all my soft cookies.
Variations & Substitutions
Once you’ve nailed the basic version, here’s how you can mix it up. I’ve tried all of these.
Chocolate Peanut Butter Cups
Stir ½ cup of semi-sweet chocolate chips into the dough before baking. Or, after baking, drizzle melted chocolate over the top and sprinkle with more sea salt. It’s basically a Reese’s cup in cookie form.
Peanut Butter Banana Cookies
Mash 1 ripe banana and use it instead of the egg. This makes them slightly denser and adds natural sweetness. Great for using up bananas before they go bad.
Nut-Free Version
Use sunflower seed butter or soy nut butter instead of peanut butter. The ratios are the same. My son’s school is nut-free, so I make these with sunflower butter for his lunchbox treats.
Gluten-Free
This recipe is naturally gluten-free because there’s no flour. Just double-check your peanut butter label to ensure it was processed in a gluten-free facility if you have celiac disease.
Vegan Option
Use a flax egg (1 tbsp ground flaxseed + 3 tbsp water) instead of the egg, and ensure your peanut butter and sugar are vegan (some sugars are processed with bone char). The texture will be slightly different but still good.
Serving & Storage
How to Serve:
I usually serve these straight from the baking sheet to my kids while they’re doing homework. But they’re also great with a cold glass of milk or a cup of coffee. They pair beautifully with a warm drink because they’re rich and sweet.
Refrigerator:
Store in an airtight container for up to 5 days. As mentioned, add a slice of bread to keep them soft. If you like them crisp, leave the lid off for a day.
Freezing:
You can freeze the unbaked dough balls. Roll them, freeze them on a sheet pan, then transfer to a freezer bag. Bake from frozen, adding 2-3 minutes to the bake time. This is perfect for meal prep. I freeze a batch of dough every time I make these, so I always have fresh cookies ready.
Leftovers:
Honestly, there rarely are leftovers. But if there are, they keep well. I’ve never had them go bad in the fridge within a week.
Nutrition Information
I’m not a nutritionist, but here’s the breakdown if you’re tracking. Remember, these are treat cookies, so enjoy them in moderation.
Per Cookie (makes about 18 cookies):
– Calories: 90
– Protein: 3g
– Carbs: 8g
– Fiber: 1g
– Sugar: 6g
– Fat: 6g
– Sodium: 50mg
What’s Good:
– High in protein from the peanut butter
– No refined flour
– Simple ingredients
What to Know:
– High in calories due to peanut butter density
– High in sugar (though it’s natural from the sugar and PB)
– Contains peanuts (allergy warning)
Look, these are cookies. They’re meant to be sweet and satisfying. They’re way better than store-bought because you know exactly what’s in them. When I make them for my kids, I count them as a fun snack, not a health food. Balance is everything.
Final Thoughts
So that’s my 3-ingredient peanut butter cookie recipe! I know it sounds too simple to be good, but I promise you, it is. It’s saved me more times than I can count. It’s my answer to “I want cookies” when I’m tired, broke, and out of ideas. My kids are happy, my wallet is happy, and I’m happy because I didn’t have to bake for an hour.
Make it yours! Try different salts, add chocolate, or just keep it simple. The best recipes are the ones you adapt to your family’s tastes. If you make this, drop a comment and let me know what you think! I love hearing how recipes turn out in your kitchen. And if something doesn’t work, tell me that too—I’m here to help troubleshoot.
Happy baking! And I hope your kitchen smells half as good as mine does right now.
Frequently Asked Questions
Q: Can I use crunchy peanut butter?
A: Yes! If you like chunks of peanut in your cookies, crunchy PB works perfectly. Just be aware the cookies might be slightly harder to roll because of the texture, but they taste amazing. I use crunchy sometimes for my husband who likes the texture.
Q: Why did my cookies spread too much?
A: This usually happens if the dough was too warm before baking. If your kitchen is hot, chill the dough balls in the fridge for 15 minutes before baking. Also, make sure you’re not using too much peanut butter. Measure it correctly.
Q: Can I double the recipe?
A: Absolutely! I double this recipe all the time. Just use a larger bowl and make sure your baking sheets aren’t overcrowded. Bake in batches if needed. The cooking time stays the same.
Q: My cookies are too dry. What happened?
A: You might have overbaked them. Pull them out when they look slightly underdone. Also, check your peanut butter. If it’s an older jar with less oil, the cookies will be drier. Add a teaspoon of milk or oil next time.
Q: Can I make these ahead for a party?
A: Yes! Make the dough balls and freeze them. When you need them, bake them fresh. They taste best fresh out of the oven. If you bake them ahead, store them in an airtight container with a slice of bread to keep them soft.
Q: Is there a substitute for brown sugar?
A: You can use white sugar, but the cookies will be crispier and less chewy. You can also use coconut sugar for a healthier option, though it will change the flavor slightly. Brown sugar is best for that classic peanut butter cookie taste.
Pin This Recipe!
3-Ingredient Peanut Butter Cookies
- Total Time: 20 minutes
- Yield: 18 cookies 1x
Description
A budget-friendly, flourless dessert made with just peanut butter, brown sugar, and eggs. These cookies are soft, chewy, and ready in under 20 minutes, making them the perfect emergency treat for busy families.
Ingredients
- 1 cup (250g) smooth creamy peanut butter (regular, not natural)
- 1 cup (200g) packed brown sugar
- 1 large egg
- Flaky sea salt (for sprinkling)
- Optional: ½ cup semi-sweet chocolate chips
Instructions
- Preheat oven to 350°F (175°C) and line a baking sheet with parchment paper.
- In a mixing bowl, combine the peanut butter and brown sugar. Stir vigorously until mostly smooth and combined.
- Add the egg and mix until the dough comes together into a thick, sticky ball.
- Roll the dough into heaping tablespoon-sized balls and place them on the prepared baking sheet.
- Flatten each cookie slightly with the tines of a fork, creating an X pattern on top.
- Bake for 8-10 minutes. The edges should be lightly golden and firm, but the centers should still look soft.
- Immediately remove from the oven and sprinkle with flaky sea salt while the cookies are still hot.
- Let the cookies cool on the baking sheet for 5 minutes before transferring to a cooling rack.
Notes
Use regular creamy peanut butter (like Jif or Skippy) rather than natural peanut butter to ensure the cookies hold together. Do not overbake; the cookies will firm up as they cool. Store in an airtight container with a slice of bread to keep them soft. For a vegan option, substitute the egg with a flax egg.
- Prep Time: 5 minutes
- Cook Time: 10 minutes
- Category: Dessert
- Cuisine: American
Nutrition
- Serving Size: 1 cookie
- Calories: 90
- Sugar: 6
- Sodium: 50
- Fat: 6
- Saturated Fat: 1.5
- Carbohydrates: 8
- Fiber: 1
- Protein: 3
Keywords: peanut butter cookies, 3 ingredient recipe, budget friendly dessert, flourless cookies, easy cookies, kid-friendly snacks, gluten-free cookies