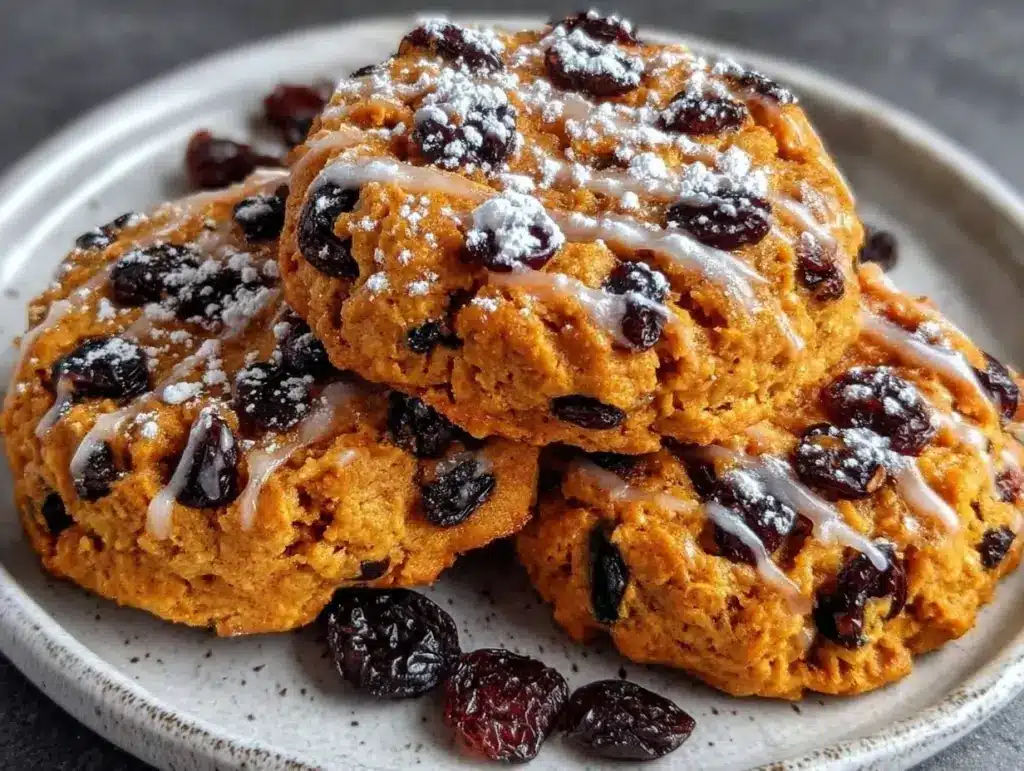
I have a confession to make. For years, I was the person who picked the raisins out of oatmeal cookies. I know, I know. It’s a controversial stance in some circles, but hear me out. I didn’t hate the idea of a chewy, spiced cookie. I just hated the dry, cardboard-like discs that came out of those big plastic tubs at the gas station. They were sweet, sure, but they lacked soul. They lacked moisture. They lacked that thing that makes you close your eyes and take another bite.
Then, about three years ago, my neighbor Mrs. Higgins handed me a Tupperware container. It wasn’t fancy. It was just a plain plastic tub with a lid that didn’t quite seal. Inside were these golden-brown, slightly irregular cookies that smelled like cinnamon and home. “Try one,” she said. “They’re cheap to make, so I always have extras.”
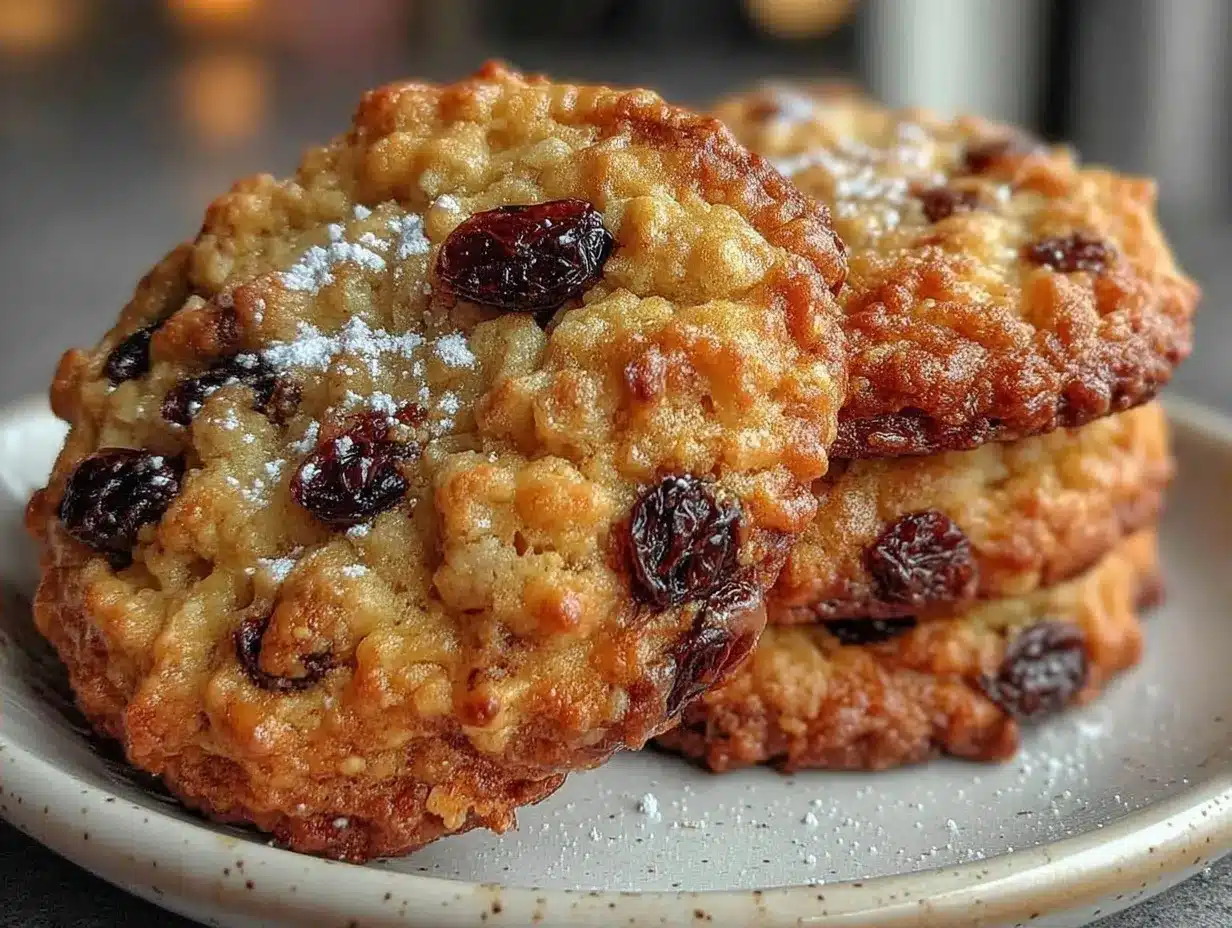
I took a bite. And just like that, my lifelong prejudice vanished. These weren’t dry. They were chewy in the center, crisp on the edges, and packed with the deep, molasses-y sweetness of brown sugar. The cinnamon wasn’t just a sprinkle; it was baked into the dough, creating that warm, spicy aroma that filled my kitchen and made my kids actually ask for seconds. Not thirds. Seconds. Which, for teenagers, is basically a standing ovation.
I’ve spent the last few years tweaking this recipe. I’ve tested it with different oats, different sugars, and even tried to cut corners on the butter (don’t do that). I’ve made these for school bake sales, for my husband’s office, and just because I wanted a warm cookie with my morning coffee. This oatmeal raisin cookies with brown sugar and cinnamon recipe has become my go-to for any situation where I need to feed a crowd without breaking the bank or spending hours in the kitchen. It’s practical, it’s delicious, and it’s honestly the best budget-friendly dessert I’ve ever mastered.
If you’re skeptical about oatmeal raisin, or if you think baking is too expensive or complicated, this is your sign to try it. These cookies are forgiving, cheap, and incredibly satisfying. Let’s get into why this batch is special.
Why You’ll Love This Budget-Friendly Cookie Recipe
There are a dozen reasons I keep coming back to this dough, but let’s be real: it’s not just about the taste. It’s about the lifestyle it fits into. Here’s why this oatmeal raisin cookies with brown sugar and cinnamon recipe has earned a permanent spot in my weekly rotation.
- Pantry Staples Only — Seriously. If you have flour, sugar, butter, eggs, and oats, you have everything you need. No fancy vanilla bean paste or exotic spices. Just good, honest ingredients you likely already have sitting in your cupboards. It’s perfect for those “I need to make something with what I have” moments.
- Stupidly Cheap — Let’s talk money. A batch of these cookies costs me about $4 to $5 to make, depending on sales. That’s roughly 10 to 15 cents per cookie. Compare that to a single cookie at a coffee shop for $2.50, and you’re doing some serious math. I often double the batch when groceries are on sale, which brings the cost down even further.
- Kid-Approved (Even the Picky Eaters) — My youngest, who usually rejects anything with “raisin” in the name, loves these. The brown sugar masks the tartness of the raisins, and the cinnamon makes them taste like a treat rather than a health food. My husband loves them too, mostly because they remind him of his grandma’s kitchen.
- Meal Prep Friendly — These cookies keep well. Like, really well. I bake them on Sunday, store them in an airtight container, and they stay soft and chewy for a full week. I pack them in my kids’ lunchboxes three days a week. It’s a small way to sneak in a bit of warmth and comfort during a busy school week.
- Make-Ahead Dough Option — If you’re not ready to bake right away, you can chill the dough for up to three days. Or, you can freeze the dough balls and bake them straight from frozen when guests pop in. It’s like having homemade cookies ready to go, whenever you need them.
This isn’t just a recipe; it’s a tool for easy, affordable living. It takes the stress out of “what’s for dessert?” and replaces it with “I just made some cookies, want one?”
Ingredients You’ll Need (And Why They Matter)
Here’s the thing about this recipe: simplicity is its superpower. You don’t need a specialty store to make these. You just need to pay attention to quality where it counts. I’m going to walk you through the list, not just as a shopping list, but as a guide to making sure your cookies turn out perfect every time.
The Wet Stuff
Butter (1 cup / 2 sticks / 226g) — Unsalted is best so you can control the salt level. Room temperature is key here. If your butter is cold, it won’t cream properly with the sugar, and your cookies will be dense. I take my butter out of the fridge about an hour before I start. If I forget, I cut it into cubes and microwave it for 10 seconds at a time. Just don’t melt it.
Brown Sugar (1 cup packed / 220g) — This is the star of the show. Dark brown sugar gives a deeper, molasses flavor, but light brown sugar works fine too. The moisture in the brown sugar is what keeps these cookies chewy. Don’t use white sugar as a direct substitute here; you’ll lose that chewiness.
Granulated White Sugar (½ cup / 100g) — This helps with the crisp edges. It balances out the chewiness of the brown sugar. It’s a classic combo for a reason.
Eggs (2 large) — Room temperature eggs incorporate better into the batter. I usually just let them sit on the counter while I prep the dry ingredients.
Vanilla Extract (1 teaspoon) — Real vanilla. Not the imitation stuff. It makes a noticeable difference in the flavor depth. If you’re on a budget, a small bottle of good vanilla lasts forever because you only use a teaspoon at a time.
The Dry Stuff
All-Purpose Flour (2 cups / 250g) — Standard stuff. No need for bread flour or cake flour. Just keep in mind that if you scoop your flour directly from the bag, you might pack it down and get too much. I prefer to spoon it into the measuring cup and level it off with a knife. It’s a small habit that makes a big difference in texture.
Rolled Oats (3 cups / 270g) — Old-fashioned rolled oats are best here. They have the right texture—chewy but substantial. Quick oats will make the cookies cakey and dense. Instant oats? Skip them. They’ll turn into mush. You can buy a big bag of oats; they’re one of the cheapest ingredients in the store and they last forever.
Baking Soda (1 teaspoon) — This is your leavening agent. Make sure it’s not expired. If it’s old, your cookies won’t spread or rise properly. A quick test: drop a little in vinegar. If it fizzes, you’re good.
Baking Powder (½ teaspoon) — Just a little boost to help them rise.
Salt (1 teaspoon) — Essential for balancing the sweetness. Don’t skip it. Even in cookies.
Cinnamon (2 teaspoons) — Ground cinnamon. This is what gives them that warm, cozy scent. I use a generous amount because I love that spice flavor.
The Mix-Ins
Raisins (1 cup / 140g) — Standard dark raisins. Some people plump them in hot water first, but I find it adds unnecessary steps. The moisture from the dough is usually enough. If you’re worried about them being too dry, just toss them in with the flour before adding to the batter.
Equipment Needed
You don’t need fancy gadgets for this. Here’s what I actually use in my kitchen.
Large Mixing Bowl — I use a 5-quart bowl. It needs to be big enough to mix everything without making a mess. Glass or ceramic works well because they don’t retain heat.
Hand Mixer or Stand Mixer — I use a hand mixer because it’s easier to clean, but a stand mixer works great too. If you’re doing this by hand, you’ll need some arm strength to cream the butter and sugar properly. About 2 minutes of vigorous stirring.
Measuring Cups and Spoons — Standard stuff. I have a set that I bought at a discount store years ago, and it still works perfectly. Accuracy matters in baking, so don’t eyeball the flour.
Baking Sheets — I use two half-sheet pans. If you only have one, you’ll need to bake in batches. Make sure your pans are cool before adding new dough.
Parchment Paper — This is a game-changer for cleanup. I line my baking sheets with parchment. It prevents sticking and makes washing up a 10-second job. I reuse the parchment if it’s not too greasy, but I replace it if it’s browned.
Cooling Rack — Not strictly necessary, but it helps the cookies cool evenly so they don’t get soggy on the bottom. I use a wire rack that fits over my sink for easy cleanup.
Airtight Container — For storing the finished cookies. I keep a few different sizes on hand. Glass containers are great because they don’t retain odors.
How to Make It: Step-by-Step
Alright, let’s get baking. I’m going to walk you through exactly how I do it, including the little tricks that keep these cookies soft and delicious.
Step 1: Prep Your Oven and Pans (5 minutes)
Preheat your oven to 350°F (175°C). This is crucial. If your oven is too cool, the cookies will spread too much and burn. If it’s too hot, they’ll burn on the outside before cooking inside. While the oven heats, line your baking sheets with parchment paper. This saves you from scrubbing burnt sugar off your pans later.
Step 2: Cream the Butter and Sugars (3 minutes)
In your large bowl, combine the softened butter, brown sugar, and white sugar. Beat them together on medium speed until the mixture is light, fluffy, and pale in color. This usually takes about 2-3 minutes. Don’t rush this step. Creaming the butter and sugar incorporates air, which helps the cookies rise and get that nice texture. If you skip this, your cookies will be flat and dense.
Step 3: Add Eggs and Vanilla (2 minutes)
Beat in the eggs one at a time, mixing well after each addition. Then add the vanilla extract. Scrape down the sides of the bowl with a spatula to make sure everything is incorporated. The mixture should look smooth and creamy.
Step 4: Mix the Dry Ingredients (2 minutes)
In a separate bowl (or just use the same one if you’re lazy, but separate is cleaner), whisk together the flour, baking soda, baking powder, salt, and cinnamon. Whisking these together ensures that the leavening agents and spices are evenly distributed. If you don’t whisk, you might get a bite of pure baking soda, which tastes terrible.
Step 5: Combine Wet and Dry (2 minutes)
Gradually add the dry ingredients to the wet mixture. Mix on low speed until just combined. Overmixing at this stage can make the cookies tough. You want a soft, sticky dough. It’s okay if it looks a bit shaggy.
Step 6: Fold in the Raisins (1 minute)
Stir in the raisins by hand or on the lowest mixer setting. Make sure they’re evenly distributed throughout the dough. If you want to, you can toss the raisins in a tablespoon of flour before adding them. This prevents them from sinking to the bottom of the bowl.
Step 7: Scoop and Bake (12-15 minutes)
Scoop tablespoon-sized balls of dough onto your prepared baking sheets, spacing them about 2 inches apart. They will spread. Bake for 12-15 minutes. You want the edges to be golden brown, but the centers to still look slightly soft and underdone. They will firm up as they cool. If you bake them until they look fully set, they’ll be hard as rocks when they cool.
Step 8: Cool and Store (10 minutes)
Let the cookies cool on the baking sheet for 5 minutes. Then transfer them to a wire rack to cool completely. This step is important because they’re very fragile when hot. Once cool, store them in an airtight container. They’ll keep for up to a week at room temperature.
Expert Tips & Tricks
Here’s everything I’ve learned from making these cookies dozens of times. These tips will save you from my mistakes.
Don’t Overbake
This is the #1 mistake people make. Oatmeal raisin cookies continue to cook on the hot baking sheet after you take them out of the oven. If you wait until they look perfectly done, they’ll be dry. Pull them out when the edges are set but the centers are still soft. They’ll firm up as they cool.
Chill the Dough (Optional but Recommended)
If you have time, chill the dough for at least 30 minutes before baking. This helps the flavors meld and prevents the cookies from spreading too much. It also makes them thicker and chewier. I often chill the dough overnight if I’m planning to bake the next day.
Use Room Temperature Ingredients
Butter and eggs should be at room temperature. Cold ingredients don’t mix as well, leading to a lumpy dough. If you forget, you can speed up the process by microwaving the butter for 10 seconds or letting the eggs sit in warm water for 5 minutes.
Measure Flour Correctly
Flour is tricky. If you scoop it directly from the bag, you’ll pack it down and use too much. This leads to dry, crumbly cookies. Instead, spoon the flour into your measuring cup and level it off with a knife. It’s a small habit that makes a huge difference.
Double the Batch
This recipe doubles easily. I often make two batches when I’m meal-prepping. Freeze the extra dough balls on a baking sheet, then transfer them to a freezer bag. You can bake them straight from frozen, just add 2-3 minutes to the baking time. It’s like having fresh cookies on demand.
Variations & Substitutions
Once you’ve nailed the basic version, here’s how you can mix it up. I’ve tried all of these.
Chocolate Chip Twist
Swap the raisins for semi-sweet chocolate chips. Or do half and half. This is a favorite in my house. The chocolate melts into the warm oats, creating little pockets of gooeyness.
White Chocolate and Cranberry
Swap the raisins for dried cranberries and add 1 cup of white chocolate chips. It’s sweeter and tangier. Great for holiday gatherings.
Gluten-Free Option
Use a 1-to-1 gluten-free flour blend. Make sure it contains xanthan gum, or add ½ teaspoon. The texture might be slightly different, but it’s still delicious.
Lower Sugar
Reduce the white sugar to ¼ cup and increase the brown sugar to 1 ¼ cups. It’s still sweet, but less so. You can also use applesauce to replace half the butter, though the texture will be softer.
Nut Additions
Add ½ cup of chopped walnuts or pecans. The nuts add crunch and richness. Toast them first for extra flavor.
Serving & Storage
These cookies are best served slightly warm, right after baking. But they’re also great at room temperature.
How to Store
Store in an airtight container at room temperature for up to 5 days. If you live in a humid climate, they might get soft faster. In that case, add a piece of bread to the container. The cookies will absorb the moisture from the bread and stay chewy.
Freezing
You can freeze baked cookies for up to 3 months. Place them in a single layer in a freezer-safe container, separated by parchment paper. Thaw at room temperature before serving.
Reheating
If you want that fresh-baked taste, microwave a cookie for 10-15 seconds. It’ll be warm and soft. Or, bake a few at 350°F for 5 minutes.
Nutrition Information
I’m not a nutritionist, but here’s the breakdown if you’re tracking. Keep in mind that these are treats, so enjoy them in moderation.
Per Cookie (makes about 24 cookies):
- Calories: 140
- Protein: 2g
- Carbs: 22g
- Fiber: 1g
- Sugar: 12g
- Fat: 6g
- Saturated Fat: 4g
- Cholesterol: 20mg
- Sodium: 110mg
These cookies are a great budget-friendly treat. They’re filling enough to satisfy a sweet tooth without costing a fortune. Plus, they’re easier on the wallet than buying a box of store-bought cookies.
Final Thoughts
So that’s my go-to oatmeal raisin cookie recipe. It’s simple, it’s cheap, and it’s delicious. I’ve made these for years, and they never fail to please. Whether you’re feeding a family, bringing a treat to work, or just want a warm cookie with your coffee, these are the ones to make.
Don’t be afraid to experiment with the mix-ins. Try chocolate chips, nuts, or dried fruit. Find what works for your family. And remember, baking is about practice. Your first batch might not be perfect, but your second one will be.
If you make these, I’d love to hear how they turn out. Drop a comment below and let me know what you think. And if you’re looking for other easy, budget-friendly recipes, check out my best creamy butternut squash soup or my brown sugar peach caramel coffee cake. They’re all staples in my kitchen.
Happy baking!
Frequently Asked Questions
Can I use quick oats instead of rolled oats?
I don’t recommend it. Quick oats are finer and will make the cookies cakey and dense. Rolled oats give that classic chewy texture. If you only have quick oats, you can pulse them in a blender for a few seconds to make them coarser, but rolled oats are best.
Why did my cookies spread too much?
This usually happens if the butter was too warm or if the oven wasn’t hot enough. Make sure your butter is softened, not melted. Also, check your oven temperature with an oven thermometer. Many ovens run cooler than they say.
Can I freeze the cookie dough?
Yes! Scoop the dough into balls and freeze them on a baking sheet. Once frozen, transfer them to a freezer bag. You can bake them straight from frozen, just add 2-3 minutes to the baking time.
How do I keep the cookies soft?
Don’t overbake them. Pull them out when the edges are golden but the centers are still soft. Also, storing them with a piece of bread in an airtight container helps keep them moist.
Can I make these gluten-free?
Yes, use a 1-to-1 gluten-free flour blend. Make sure it contains xanthan gum, or add ½ teaspoon. The texture might be slightly different, but it’s still delicious.
Can I substitute the raisins?
Absolutely. Chocolate chips, dried cranberries, chopped nuts, or even white chocolate chips all work great. Feel free to mix and match.
How long do these cookies last?
They last up to 5 days at room temperature in an airtight container. They can also be frozen for up to 3 months.
Pin This Recipe!

Oatmeal Raisin Cookies with Brown Sugar and Cinnamon
- Total Time: 27-30 minutes
- Yield: 24 cookies 1x
Description
A budget-friendly, chewy oatmeal raisin cookie recipe that uses pantry staples like brown sugar and cinnamon for a moist, flavorful treat perfect for families and meal prep.
Ingredients
- 1 cup (2 sticks / 226g) unsalted butter, room temperature
- 1 cup packed (220g) brown sugar
- ½ cup (100g) granulated white sugar
- 2 large eggs, room temperature
- 1 teaspoon vanilla extract
- 2 cups (250g) all-purpose flour
- 3 cups (270g) old-fashioned rolled oats
- 1 teaspoon baking soda
- ½ teaspoon baking powder
- 1 teaspoon salt
- 2 teaspoons ground cinnamon
- 1 cup (140g) raisins
Instructions
- Preheat oven to 350°F (175°C) and line baking sheets with parchment paper.
- In a large bowl, cream together the softened butter, brown sugar, and white sugar on medium speed until light, fluffy, and pale (about 2-3 minutes).
- Beat in the eggs one at a time, mixing well after each addition, then add the vanilla extract and scrape down the sides of the bowl.
- In a separate bowl, whisk together the flour, baking soda, baking powder, salt, and cinnamon.
- Gradually add the dry ingredients to the wet mixture, mixing on low speed until just combined.
- Fold in the raisins by hand or on the lowest mixer setting until evenly distributed.
- Scoop tablespoon-sized balls of dough onto prepared baking sheets, spacing them about 2 inches apart.
- Bake for 12-15 minutes, or until edges are golden brown but centers still look slightly soft.
- Let cookies cool on the baking sheet for 5 minutes, then transfer to a wire rack to cool completely.
Notes
For best results, use room temperature butter and eggs. Do not overbake; cookies will firm up as they cool. Dough can be chilled for up to 3 days or frozen for later baking. Store in an airtight container with a piece of bread to maintain softness.
- Prep Time: 15 minutes
- Cook Time: 12-15 minutes
- Category: Dessert
- Cuisine: American
Nutrition
- Serving Size: 1 cookie
- Calories: 140
- Sugar: 12
- Sodium: 110
- Fat: 6
- Saturated Fat: 4
- Carbohydrates: 22
- Fiber: 1
- Protein: 2
Keywords: oatmeal raisin cookies, brown sugar cookies, cinnamon cookies, budget baking, easy cookie recipe, chewy cookies, family dessert