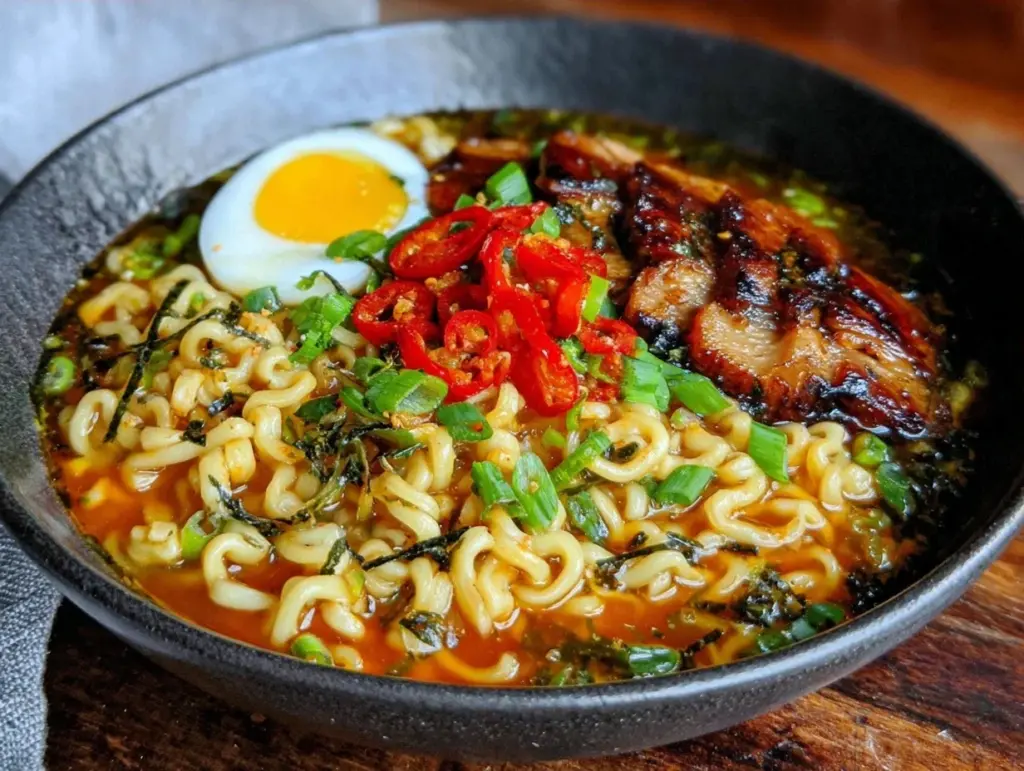
There is a specific kind of despair that hits around 4:30 PM on a Tuesday when you’ve had a long week and the fridge looks like a graveyard of half-used condiments. For years, my solution was the same: order delivery, wait 45 minutes, pay $25 for noodles that arrive lukewarm and soggy, and feel guilty about the waste. Then I realized I was paying a premium to skip the one task I actually enjoy.
That’s how I started making Spicy Miso Ramen meal prep for busy weeknights. It started as an experiment. I wanted the deep, umami-rich comfort of a restaurant bowl without the daily commitment of cooking from scratch every single night. I needed something that tasted better the next day (like a good curry does) but didn’t require reheating in a microwave for ten minutes until the noodles turned to mush. After testing about twelve different broth-to-miso ratios and noodle types, I finally cracked the code.
This isn’t just a recipe; it’s a Sunday afternoon strategy. I make this spicy miso ramen once, portion it out into four containers, and boom—my dinner problem is solved for the week. It’s efficient, it’s budget-friendly, and it tastes like you spent hours simmering bones when it actually took about 20 minutes of active prep. If you’re tired of the mid-week takeout trap, this is your fix.
Why You’ll Love This Spicy Miso Ramen Meal Prep
I know what you’re thinking. “Ramen is a one-night thing. It doesn’t travel well.” And you’d be right if you tried to prep it like a standard soup. But this version is engineered specifically for the fridge and the freezer. Here’s why this spicy miso ramen meal prep has completely replaced my evening stress:
- Flavor That Improves Overnight — Miso is a fermented ingredient, which means its flavor deepens and mellows as it sits. Day one is good. Day three is incredible. The spicy elements meld with the savory miso, creating a broth that’s more complex than when you first made it.
- Grab-and-Go Convenience — I pack these in glass containers with a tight seal. They stack perfectly in the fridge. I just need a microwave and a fork. No reassembling, no hunting for toppings. It’s dinner, ready to go.
- Freezer-Friendly Broth — This is the game-changer. The spicy miso broth freezes beautifully. I make a big batch, freeze half in flat bags, and thaw it out on days when I’m too tired to cook. The noodles I keep separate (more on that later), but the broth is solid.
- Stupid Simple Ingredients — You don’t need to visit three specialty stores. I use standard miso paste, chili oil, soy sauce, and easy veggies. It’s pantry-friendly. If you can make creamy ground beef stroganoff on a budget, you can master this.
- Highly Customizable — This base recipe is a canvas. Add chicken, tofu, shrimp, or extra eggs. It adapts to whatever protein you have on hand or what’s on sale.
This is my “make it once, eat it four times this week” hero recipe. It takes the guesswork out of dinner and leaves me with four days of genuinely good food.
Ingredients You’ll Need
Before we dive into the method, let’s talk about what goes into this bowl. I’m particular about three things here: the type of miso, the noodles, and the heat source. Get these right, and you’re golden.
For the Spicy Miso Broth
White Miso Paste (3 tablespoons / 45g) — I use white (shiro) miso for this because it’s milder and slightly sweeter than red miso. It creates a smoother, creamier broth. If you only have red miso, mix it half-and-half with white to keep it balanced.
Sesame Oil (1 tablespoon / 15ml) — Toasted sesame oil is non-negotiable. It adds that nutty aroma that defines ramen. Don’t use regular sesame oil; it tastes flat. I keep a bottle of Kadoya on hand.
Chicken Broth (4 cups / 950ml) — Use low-sodium. Miso is salty, and the broth is your base. If it’s already salty, you’ll overseason the whole pot. Homemade is great, but a good carton like Pacific Foods works perfectly here.
Soy Sauce (1 tablespoon / 15ml) — Adds depth and extra saltiness. I use regular Kikkoman. Tamari if you’re going gluten-free.
Ginger (1 tablespoon, freshly grated) — Fresh ginger cuts through the richness of the miso. Grate it fine. Pre-minced ginger from a jar has a weird texture and taste that I don’t want in my broth.
Garlic (2 cloves, minced) — Basic aromatics. Don’t skip it.
Chili Oil or Gochujang (1-2 tablespoons) — This is where the “spicy” comes in. I like chili crisp (like Lao Gan Ma) for the crunch and heat. If you prefer a smoother heat, use gochujang (Korean chili paste), but reduce the soy sauce slightly since gochujang is salty.
For the Noodles & Toppings
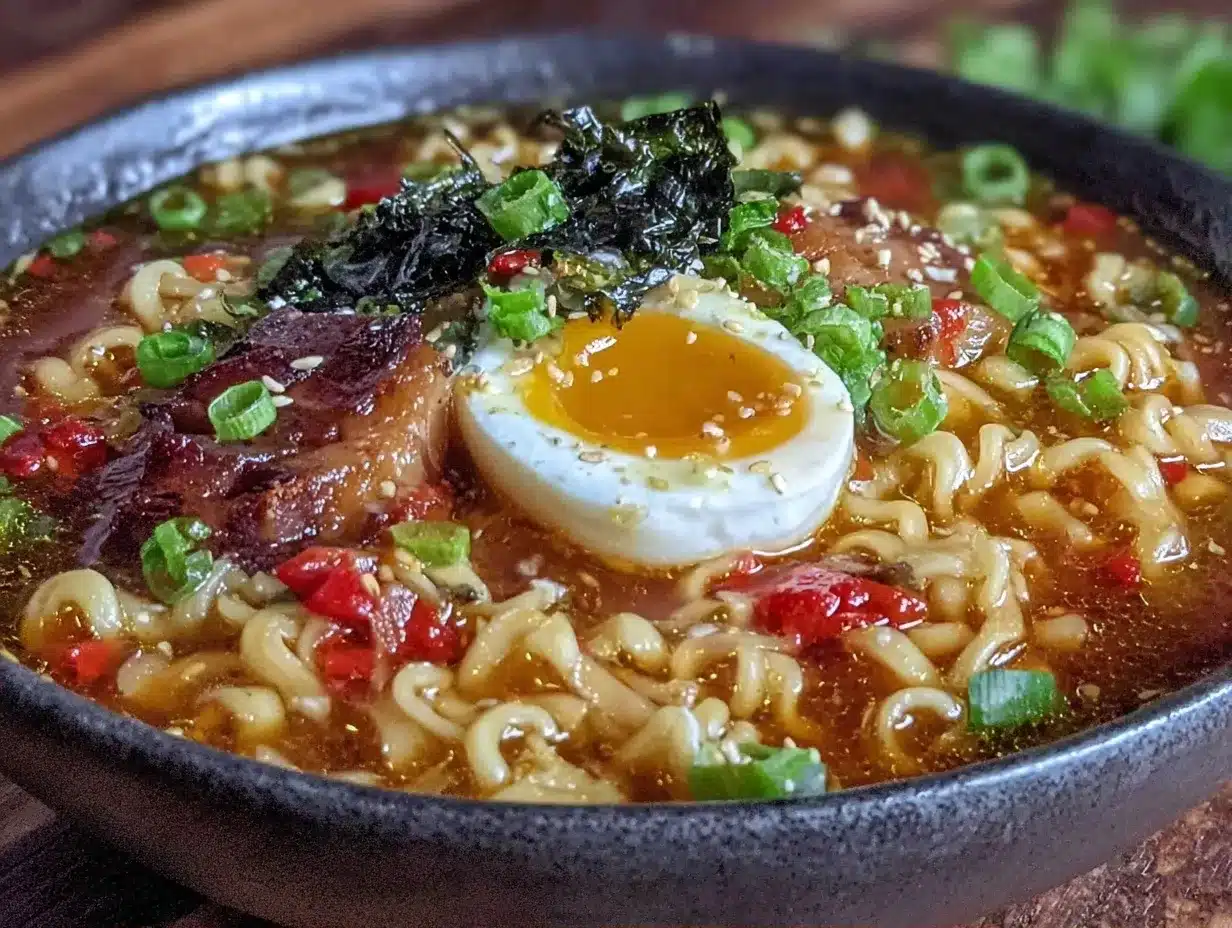
Ramen Noodles (1 package / 200g) — I use fresh ramen noodles if I can find them. They have the best chew. If using dried, look for thin, curly wheat noodles. Avoid the super-thin instant noodles; they turn to mush in meal prep.
Eggs (4 large) — Soft-boiled or hard-boiled eggs are classic. I prefer soft-boiled with a jammy yolk. It adds richness to the broth.
Green Onions (4 stalks, sliced) — For freshness and color. I use the white parts in the broth and save the green tops for garnish.
Napa Cabbage (2 cups, chopped) — This holds up well in the fridge. It softens but doesn’t disintegrate like spinach would. It adds volume and texture.
Sesame Seeds (1 tablespoon) — For garnish. Toast them in a dry pan for 2 minutes. It’s a 30-second step that makes a huge difference.
Optional Add-ins — Corn kernels (adds sweetness), bean sprouts (add fresh crunch right before eating), or leftover rotisserie chicken (shredded). I often swap in spicy mayo elements if I want a fusion twist, but the classic toppings are my go-to.
Equipment Needed
You don’t need fancy gear for this. Here’s what I actually use:
Large Pot (6-quart) — I use a heavy-bottomed pot for the broth. It distributes heat evenly so the miso doesn’t scorch. A Dutch oven works great.
Medium Saucepan — For boiling the eggs and blanching the noodles separately.
Glass Meal Prep Containers — Square containers stack better. I use 32oz containers for these bowls. Make sure they’re airtight. Glass is better than plastic because it doesn’t absorb the strong miso smell.
Whisk — Essential for dissolving the miso paste. If you dump it in whole, you’ll get lumps of salty paste in your spoon.
Colander — For draining noodles and vegetables.
Timer — For the eggs. 6.5 minutes for jammy, 8 minutes for hard-boiled. Set it. Do not eyeball it.
How to Make It: Step-by-Step
Alright, let’s get this prepped. I aim to have this done in about 45 minutes total, including boiling eggs and chopping. Here’s my methodical approach.
Step 1: Prep the Eggs (10 minutes)
Start by boiling the eggs. Bring a medium pot of water to a boil. Gently lower the eggs in with a spoon. Cook for exactly 6.5 minutes for jammy yolks. While they cook, prepare an ice bath (bowl of water with ice). Once the timer goes off, transfer the eggs immediately to the ice bath. This stops the cooking and makes them easier to peel later. Let them cool completely, then peel and set aside. You can do this a day ahead.
Step 2: Sauté the Aromatics (5 minutes)
In your large pot, heat the sesame oil over medium heat. Add the minced garlic and grated ginger. Sauté for 1-2 minutes until fragrant. Don’t let the garlic brown; you just want it to release its flavor. Add the chopped white parts of the green onions and cook for another 30 seconds.
Step 3: Build the Broth (5 minutes)
Pour in the chicken broth. Add the soy sauce, chili oil (or chili crisp), and the miso paste. Important: Do not let the broth come to a rolling boil after adding the miso. High heat can kill the beneficial probiotics and make the miso taste bitter. Heat it gently until it’s hot and the miso is fully dissolved. Use your whisk to ensure no clumps remain. Taste the broth. It should be savory, slightly spicy, and rich. Adjust salt or spice to your liking.
Step 4: Cook the Noodles and Veggies (5 minutes)
In a separate saucepan, bring water to a boil for the noodles. Cook the ramen noodles according to package directions, usually 2-3 minutes for fresh noodles. Drain and rinse briefly with cold water to stop cooking. This prevents them from getting soggy in the container.
In the same water (or a new pot), blanch the Napa cabbage for 1-2 minutes until tender-crisp. Drain and set aside with the noodles.
Step 5: Assemble the Meal Prep Containers
Here is the crucial part for success. Do not mix the noodles into the hot broth yet. Noodles absorb liquid and expand. If you prep them together, you’ll have dry, mushy noodles by day three.
For each container:
- Place a portion of cooked noodles at the bottom.
- Top with the blanched Napa cabbage.
- Add the halved egg.
- Add any other toppings (corn, chicken, etc.).
- Pack the spicy miso broth separately in a smaller container or pour it over the toppings right before eating.
If you want to save space, you can pour the broth over the noodles but store the whole thing in the fridge and eat it within 24 hours. For longer storage, keep them separate.
Step 6: Store and Label
Let everything cool to room temperature before sealing. Label the containers with the date. These will last in the fridge for 3-4 days. The broth can be frozen for up to 3 months.
Expert Tips & Tricks
Here’s everything I’ve learned from making this dozens of times. These tips will save you from my mistakes.
The Noodle Separation Rule
This is the #1 rule of ramen meal prep. Noodles are like sponges. If they sit in the broth, they drink it all up and turn into a solid block of starch. Separate storage is non-negotiable for meal prep success. If you’re lazy, pour the broth over right before you microwave.
Don’t Boil the Miso
I mentioned this, but it bears repeating. Miso is a fermented paste. Boiling it destroys the flavor complexity and the probiotics. Warm the broth, then whisk in the miso off the heat. It’s a small step that makes a big difference in taste.
Toast Your Sesame Seeds
Raw sesame seeds are fine, but toasted ones add a nutty crunch that elevates the whole dish. It takes two minutes in a dry pan. Shake the pan constantly so they don’t burn. I do this while the broth simmers.
Use Glass Containers
Miso has a strong smell and can stain plastic. Glass containers stay cleaner and don’t retain odors. Plus, they go straight from fridge to microwave without worrying about plastic leaching.
Freezing Strategy
The broth freezes perfectly. The eggs and veggies do not freeze well (eggs get rubbery, veggies get watery). So, freeze the broth in flat bags or containers. Thaw overnight in the fridge. Cook fresh noodles and veggies when you’re ready to eat. This gives you the taste of fresh ramen with the convenience of meal prep.
Common Mistakes
Mistake: Broth is too salty. Fix: Use low-sodium broth and taste before adding soy sauce. Miso varies in saltiness by brand.
Mistake: Noodles are mushy. Fix: Undercook them by 1 minute. They’ll finish cooking in the microwave.
Mistake: Toppings are cold and soggy. Fix: Add fresh toppings (like bean sprouts or raw green onions) after reheating, not before.
Variations & Substitutions
Once you’ve nailed the basic version, here’s how you can mix it up. I’ve tried all of these.
Pork Version
Add 1 pound of thinly sliced pork belly or shoulder. Sear it in a pan first, then add it to the broth for the last 5 minutes. This is how you get that rich, tonkotsu-style flavor without boiling bones for days.
Vegetarian/Vegan
Swap chicken broth for vegetable broth or mushroom broth (like Bonito Dashifree for umami). Use white miso (naturally vegan) and skip the egg or use a tofu egg. Add extra firm tofu cubes, pan-fried until crispy.
Shrimp Ramen
Sauté shrimp in garlic butter and add to the bowl. Shrimp cooks in 2 minutes. This pairs well with a splash of lime juice for a Thai-inspired twist.
Spicy Miso Soup Style
If you don’t want noodles, skip them entirely. Add diced potatoes or daikon radish to the broth. This is more like a hearty soup. It reheats even better than the noodle version.
Dietary Modifications
Gluten-Free: Use gluten-free miso (most white miso is GF, but check labels) and tamari instead of soy sauce. Use rice noodles or buckwheat soba noodles (check for GF certification).
Low-Sodium: Use low-sodium broth and no added soy sauce. Rely on the miso and chili oil for flavor. You might need to reduce the miso slightly.
Serving & Storage
How do I serve this? I microwave the broth and the noodle/veggie container separately for 2-3 minutes. Pour the hot broth over the noodles. Add the egg and fresh toppings. It’s ready in minutes.
Side Dishes
I usually keep it simple. Sometimes I add a side of soft frosted pumpkin bars if I need a sweet treat, but usually, I just want the savory comfort. A simple side salad works well too.
Reheating
Microwave the broth in a microwave-safe bowl. Heat the noodles and veggies in a separate bowl. Pour broth over noodles. Stir. Eat.
If you’re reheating the whole thing (not recommended for long-term storage), add a splash of water to the noodles to prevent drying out.
Storage
Fridge: Up to 4 days (noodles and broth separate).
Freezer: Broth only, up to 3 months.
Thawing: Overnight in the fridge.
Pro Tip
If your leftovers are drying out, stir in a teaspoon of butter or a splash of cream when reheating. It brings back that creamy, restaurant-quality texture.
Nutrition Information
I’m not a nutritionist, but here’s the breakdown if you’re tracking. This is based on one container with noodles, broth, one egg, and cabbage.
- Calories: 450
- Protein: 22g
- Carbs: 55g
- Fiber: 3g
- Fat: 16g
- Sodium: 900mg (varies by miso/soy sauce)
It’s a hearty meal. The sodium is higher due to the miso, so if you’re watching salt, use low-sodium miso and broth. The protein from the egg and miso makes it filling. It’s comfort food, so enjoy it!
Final Thoughts
So that’s my go-to spicy miso ramen meal prep! I know it sounds like a lot of work, but once you do it, you’ll realize it’s easier than deciding what to order every night. This has saved me from so many takeout disasters. It’s my answer to “what’s for dinner” when I’m tired, don’t want to cook from scratch, but still want something warm and delicious.
Make it yours! Try different proteins, swap the veggies, adjust the spice level. The best recipes are the ones you adapt to your tastes. If you make this, drop a comment and let me know what you think! I love hearing how recipes turn out in your kitchen. And if something doesn’t work, tell me that too—I’m here to help troubleshoot.
Happy cooking! And I hope your kitchen smells half as good as mine does right now.
Frequently Asked Questions
Can I freeze the noodles with the broth?
I strongly advise against it. Noodles absorb the liquid and become mushy when frozen and thawed. The texture is ruined. Freeze the broth separately and cook fresh noodles when you’re ready to eat. It’s worth the extra 3 minutes.
Why did my broth turn cloudy?
This usually happens if you boil the miso paste. Miso contains starches and proteins that can cloud the broth if agitated too much at high heat. Keep the heat low and whisk gently. It’s still safe to eat, just not as clear.
Can I use red miso instead of white miso?
You can, but red miso is saltier and has a stronger, funkier flavor. It will change the taste profile significantly. If you use red miso, reduce the soy sauce and maybe add a pinch of sugar to balance it. White miso is milder and better for a general audience.
How do I make it spicier?
Add more chili oil or chili crisp. You can also add a dash of sriracha or gochujang. Taste as you go. Remember, the flavors will mellow slightly as it sits in the fridge, so make it a bit spicier than you want it on day one.
Can I prep this for more than 4 days?
I wouldn’t recommend keeping the noodles in the fridge for more than 3-4 days. They start to degrade in texture. If you need longer storage, freeze the broth and cook noodles fresh each day. The broth is the part that preserves well.
Is this recipe healthy?
It’s a balanced meal with protein, carbs, and veggies. However, it is higher in sodium due to the miso and soy sauce. If you’re watching salt, use low-sodium versions of those ingredients. The veggies and egg add fiber and nutrients, making it a decent meal prep option.
Pin This Recipe!
Spicy Miso Ramen: 5-Ingredient Meal Prep
- Total Time: 45 minutes
- Yield: 4 servings 1x
Description
A convenient and flavorful spicy miso ramen meal prep recipe designed for busy weeknights. This dish features a deep, umami-rich broth that improves overnight, with separate storage for noodles to ensure perfect texture.
Ingredients
- 3 tablespoons (45g) White Miso Paste
- 1 tablespoon (15ml) Toasted Sesame Oil
- 4 cups (950ml) Low-sodium Chicken Broth
- 1 tablespoon (15ml) Soy Sauce (or Tamari for gluten-free)
- 1 tablespoon Fresh Ginger, grated
- 2 cloves Garlic, minced
- 1–2 tablespoons Chili Oil or Chili Crisp (or Gochujang)
- 1 package (200g) Ramen Noodles (fresh or thin curly wheat)
- 4 large Eggs
- 4 stalks Green Onions, sliced
- 2 cups Napa Cabbage, chopped
- 1 tablespoon Sesame Seeds, toasted
Instructions
- Boil eggs in a medium pot for 6.5 minutes for jammy yolks. Immediately transfer to an ice bath to cool, then peel and set aside.
- In a large pot, heat sesame oil over medium heat. Sauté garlic and ginger for 1-2 minutes until fragrant, then add the white parts of the green onions for 30 seconds.
- Pour in chicken broth, soy sauce, and chili oil. Whisk in the miso paste off the heat or on very low heat to avoid boiling, ensuring it is fully dissolved.
- In a separate saucepan, boil ramen noodles according to package directions (usually 2-3 minutes). Drain and rinse with cold water to stop cooking.
- Blanch Napa cabbage in boiling water for 1-2 minutes until tender-crisp. Drain and set aside.
- Assemble meal prep containers: Place noodles at the bottom, top with cabbage, halved egg, and other toppings.
- Pack the spicy miso broth separately in a smaller container or pour over toppings right before eating to prevent noodles from becoming soggy.
- Store in airtight glass containers in the fridge for 3-4 days. The broth can be frozen for up to 3 months.
Notes
Do not boil the miso paste as high heat destroys probiotics and flavor. Always store noodles and broth separately for best meal prep results. Noodles absorb liquid and will become mushy if left in the broth. Toast sesame seeds for added crunch.
- Prep Time: 15 minutes
- Cook Time: 30 minutes
- Category: Main Course
- Cuisine: Japanese
Nutrition
- Serving Size: 1 bowl with noodles,
- Calories: 450
- Sugar: 4
- Sodium: 900
- Fat: 16
- Saturated Fat: 3
- Carbohydrates: 55
- Fiber: 3
- Protein: 22
Keywords: spicy miso ramen, meal prep, ramen meal prep, easy dinner, weeknight meals, umami broth, spicy noodles, healthy meal prep



