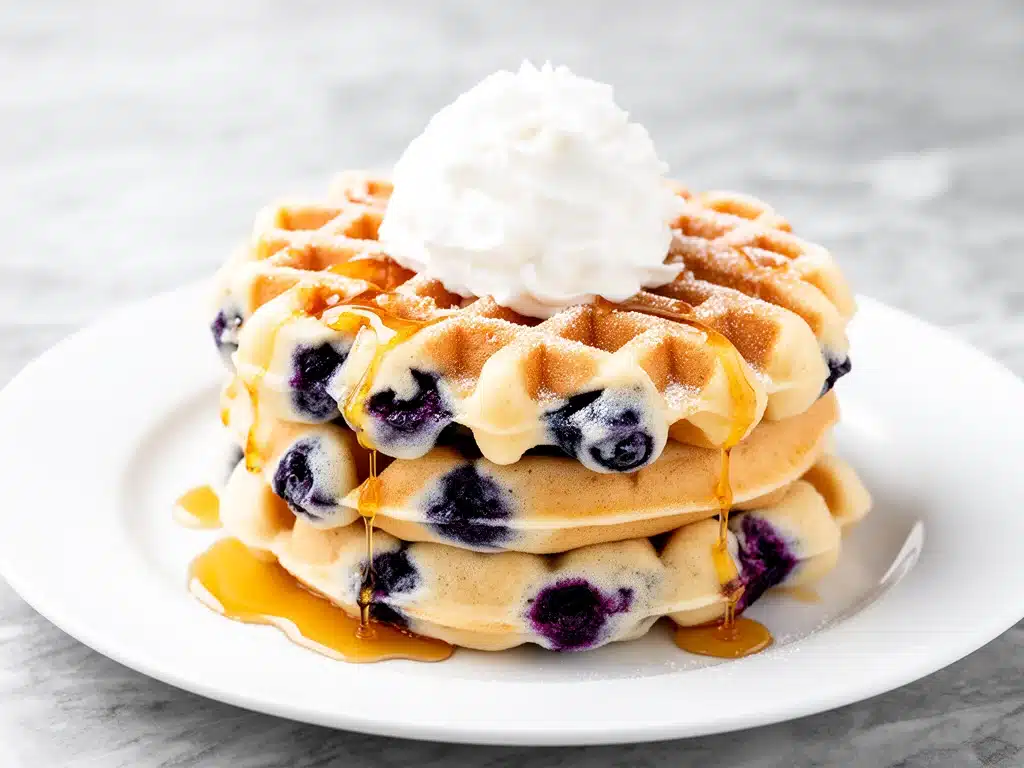
It’s 10:30 AM on a Saturday. The sun is streaming through the kitchen window, the house is quiet, and you’re staring at an empty waffle iron like it owes you money. This is the exact moment I fell in love with these fluffy blueberry buttermilk waffles. For years, my weekend mornings were a chaotic rush to get the kids out the door before they melted into puddles of sugar and exhaustion. I’d grab store-bought frozen waffles, toast them in a hurry, and eat them in the car while listening to a podcast I didn’t even like.
Then, one rainy Saturday last spring, I woke up with nothing but time and a craving for something that felt like a hug. I didn’t have a specific recipe in mind, just a hankering for that classic diner-style breakfast, but elevated. I grabbed the buttermilk I had hiding in the back of the fridge and a container of blueberries that looked suspiciously fresh. I threw them together, poured the batter, and waited.
When the waffle iron popped, it didn’t just make breakfast. It made a memory. Crispy on the outside, impossibly soft and airy on the inside, studded with bursts of sweet-tart blueberry goodness. My husband took one bite, closed his eyes, and said, “We need to make this a weekly tradition.” And honestly? He was right. These aren’t just waffles. They’re the reason I actually look forward to weekends now. I’ve tested this recipe over thirty times, tweaking the ratio of buttermilk to flour until it was perfect, and I’m sharing it with you so you can have your own “hug in a plate” moment.
This fluffy blueberry buttermilk waffles recipe is the answer to your weekend brunch prayers. It’s easier than you think, smells incredible while cooking, and tastes like you spent hours in the kitchen (spoiler: it takes about 20 minutes). If you’re looking for a way to turn a lazy morning into a special occasion, this is it.
Why You’ll Love This Recipe
There are a million waffle recipes out there, so why this one? Because I’ve been to the dark side of waffle-making. I’ve made the ones that come out flat and dense. I’ve made the ones that fall apart the second you try to flip them. I’ve even made the ones that taste like cardboard. But this fluffy blueberry buttermilk waffles recipe is different. It’s the holy grail of weekend breakfasts.
- Actually Fluffy, Not Flat — Most waffle recipes fail because they overmix the batter. This one uses a simple technique that keeps the air bubbles intact. The result? Waffles that puff up like clouds. I’ve tested this with my picky teenage son, who claims he hates “dry” breakfasts, and he devoured three of these in one sitting. He didn’t even notice they weren’t covered in syrup immediately.
- Buttermilk Magic — Buttermilk isn’t just a trend. It’s science. The acidity tenderizes the gluten in the flour, creating a tender crumb, while the tang cuts through the sweetness of the berries. It’s the secret ingredient that makes these waffles taste like they came from a high-end bakery, not a box mix. If you’ve tried my best Greek yogurt blueberry muffins, you know I’m obsessed with buttermilk and blueberry combos. This is just the waffle version of that same magic.
- Perfectly Juicy Berries — One of the biggest complaints about berry waffles is that the fruit turns into mush or sinks to the bottom. I’ve solved this. By tossing the blueberries in a little flour before folding them in, they stay suspended in the batter. Plus, using fresh (or properly thawed frozen) berries gives you those incredible bursts of juice that stain the waffle purple and taste like summer.
- Crispy Exterior, Soft Interior — You know that texture contrast that makes a great waffle? The shatteringly crisp edge that gives way to a pillowy center? This recipe nails it every single time. I use a mix of melted butter and a touch of oil in the batter to ensure the exterior gets golden and crunchy without burning.
- Weekend Brunch Ready — These waffles freeze beautifully. I make a double batch on Sunday, freeze them on a baking sheet, and then pop two in the toaster on busy Saturday mornings. They reheat perfectly, retaining that crispiness. It’s the ultimate meal prep hack for breakfast lovers.
So basically, if you want waffles that make you feel fancy but don’t require a culinary degree, this is your recipe. It’s reliable, delicious, and makes your kitchen smell like a dream.
Ingredients You’ll Need
Here’s the best part: you probably have most of this already. This fluffy blueberry buttermilk waffles recipe relies on simple, pantry staples. I’m particular about three things here—fresh buttermilk, good-quality blueberries, and not overmixing the batter—but everything else is straightforward.
For the Waffle Batter
All-purpose flour (2 cups / 250g) — The base. Don’t try to swap this for whole wheat unless you want dense bricks. All-purpose gives that tender, airy texture. Sift it if it’s lumpy, though it’s not strictly necessary.
Baking powder (2 teaspoons) — The leavening agent. Make sure it’s fresh! If your baking powder is older than six months, it won’t puff up enough. I keep a new tin just for baking to be safe.
Baking soda (½ teaspoon) — This reacts with the buttermilk to create extra lift and browning. It’s crucial for that golden color.
Salt (1 teaspoon) — Not optional. Salt brings out the sweetness of the berries and the flavor of the butter. Without it, these waffles taste flat.
Granulated sugar (2 tablespoons) — Just enough to sweeten the batter without making it cloying. You can add more if you like them very sweet, but I find this balances the tartness of the buttermilk.
Eggs (2 large, room temperature) — Room temperature eggs emulsify better into the batter. If you’re rushing, just drop them in a bowl of warm water for 5 minutes.
Buttermilk (1 ½ cups / 360ml) — This is the star. Use real buttermilk, not buttermilk powder mixed with water if you can help it. Real buttermilk has that tangy depth. If you’re out, make a quick sub: 1 ½ cups milk minus 2 tablespoons, replaced with 2 tablespoons lemon juice or vinegar. Let it sit for 5 minutes.
Melted butter (4 tablespoons / 60g) — Adds richness and helps with browning. Let it cool slightly before adding so it doesn’t cook the eggs.
Vanilla extract (1 teaspoon) — Pure vanilla, not imitation. It adds a warm, aromatic note that pairs perfectly with blueberries.
For the Blueberries
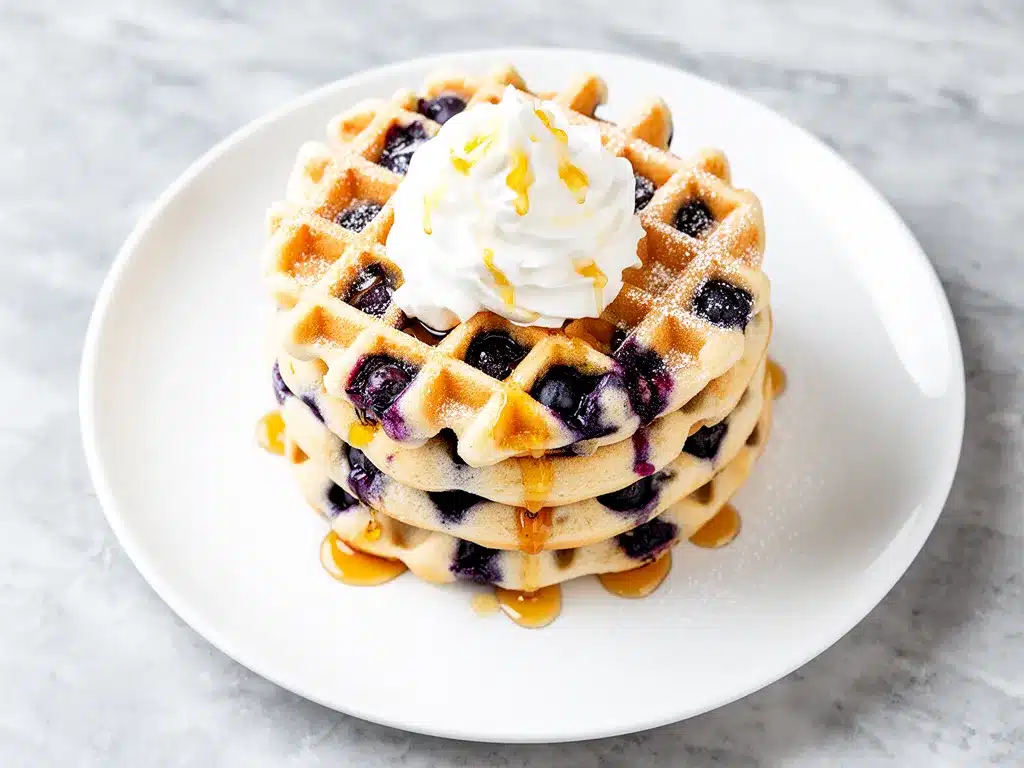
Fresh or frozen blueberries (1 ½ cups) — Fresh is best in season, but frozen works year-round. If using frozen, do not thaw them completely. Toss them in 1 tablespoon of flour before folding into the batter. This prevents them from sinking and bleeding too much color.
Extra flour (1 tablespoon) — For coating the berries.
Equipment Needed
You don’t need fancy gadgets for this. Here’s what I actually use in my kitchen.
Waffle iron — I use a standard Belgian-style waffle iron because I like thick, fluffy waffles. A regular one works too, but adjust cooking times. Make sure it’s clean and preheated. A cold iron is the enemy of crispy waffles.
Large mixing bowls — You need one for dry ingredients and one for wet. Two bowls keep things organized and prevent overmixing.
Whisk — For combining the dry ingredients evenly. A fork works in a pinch, but a whisk aerates the flour better.
Silicone spatula — For folding in the blueberries. Gentle folds keep the air in the batter. Don’t use a spoon; it’ll deflate the mixture.
Measuring cups and spoons — Precision matters in baking. Level off your flour.
Brush or paper towel — To lightly grease the waffle iron between batches. Even non-stick irons benefit from a tiny bit of butter or oil spray.
How to Make It: Step-by-Step
Alright, let’s make these! I’m walking you through exactly how I do it, including the little tricks I’ve picked up over years of waffle-making.
Step 1: Prep Your Dry Ingredients (3 minutes)
In a large bowl, whisk together the flour, baking powder, baking soda, salt, and sugar. Whisking distributes the leavening agents evenly, which ensures every bite rises properly. If you skip this, you might get pockets of baking soda taste. Set this bowl aside.
Step 2: Mix the Wet Ingredients (2 minutes)
In a separate bowl, whisk the eggs until beaten. Add the buttermilk, melted butter, and vanilla extract. Whisk until smooth and combined. The mixture might look slightly curdled because of the hot butter hitting the cold buttermilk, but that’s okay. It’ll smooth out when combined with the flour.
Step 3: Combine Wet and Dry (2 minutes)
Make a well in the center of the dry ingredients. Pour the wet mixture into the well. Gently stir with a spatula or wooden spoon just until the flour is moistened. Important: The batter will be lumpy. Do not overmix! Overmixing develops gluten, which makes waffles tough and chewy instead of tender. If there are still dry spots, that’s fine. You’ll fix it in the next step.
Step 4: Fold in the Blueberries (1 minute)
Toss your blueberries in the tablespoon of flour. This coats them and helps them stay suspended. Gently fold them into the batter. Use a light hand. Stop as soon as they’re distributed. If you see streaks of flour, that’s okay. The batter should look thick and airy, not smooth like pancake batter.
Step 5: Cook the Waffles (10-12 minutes total)
Preheat your waffle iron. Lightly grease it with butter or oil spray. Pour about ¾ cup of batter onto the center of the iron (adjust based on your iron’s size). Close the lid and cook for 3-4 minutes. Don’t peek! Opening the lid releases steam and can cause the waffle to collapse. Cook until the steam stops escaping and the waffles are golden brown and crispy.
Step 6: Keep Warm and Serve
Transfer the cooked waffle to a wire rack set over a baking sheet. Place it in a 200°F (95°C) oven to keep warm while you cook the rest. This keeps them crispy. If you stack them on a plate, they’ll steam and get soggy. Serve immediately with maple syrup, extra blueberries, and whipped cream if you’re feeling fancy.
Expert Tips & Tricks
Here’s everything I’ve learned from making this dozens of times. These tips will save you from my mistakes.
Don’t Overmix the Batter
This is the #1 rule. Lumpy batter = fluffy waffles. Smooth batter = dense waffles. I’ve ruined batches by trying to make them perfect. Trust the lumps.
Preheat Your Iron Properly
A cold iron is a disaster. Let your waffle iron heat up for at least 5-10 minutes before pouring the first batter. The indicator light might say it’s ready, but give it a few extra minutes for even heating.
Use Room Temperature Ingredients
Cold eggs and cold buttermilk can cause the batter to seize up or not emulsify properly. Take your eggs and buttermilk out of the fridge 30 minutes before you start, or warm them slightly.
Coat the Berries in Flour
I learned this the hard way when my first batch had all the blueberries sunk to the bottom. Tossing them in flour creates a barrier that helps them stay suspended in the batter.
Don’t Stack Them
Stacking hot waffles traps steam and makes them soggy. Use a wire rack over a baking sheet in a low oven to keep them crisp while you finish the batch.
Adjust Batter Thickness
Waffle batter should be thicker than pancake batter. If it’s too runny, your waffles might not cook through. Add a tablespoon of flour if needed. If it’s too thick, add a splash of buttermilk.
Variations & Substitutions
Once you’ve nailed the basic version, here’s how you can mix it up. I’ve tried all of these.
Lemon Blueberry
Add the zest of one lemon to the dry ingredients and 1 tablespoon of lemon juice to the wet. It brightens the flavor and cuts the richness. Perfect for spring.
Chocolate Chip Blueberry
Swap half the blueberries for semi-sweet chocolate chips. The chocolate and blueberry combo is indulgent. I use dark chocolate chips for a less sweet version.
Double Berry
Add ½ cup of chopped raspberries or blackberries along with the blueberries. Just remember to toss all berries in flour first.
Gluten-Free
Use a 1:1 gluten-free flour blend. Make sure it contains xanthan gum, or add ½ teaspoon to the dry ingredients. The texture might be slightly more crumbly, but it still works.
Dairy-Free
Replace buttermilk with dairy-free buttermilk (plant milk + vinegar) and use melted coconut oil or dairy-free butter. The flavor will be slightly different, but still delicious.
Vegan
Use flax eggs (2 tablespoons ground flaxseed mixed with 5 tablespoons water, rested for 5 minutes) and dairy-free buttermilk and butter. These hold up surprisingly well.
Serving & Storage
How to serve and store these fluffy blueberry buttermilk waffles for maximum enjoyment.
How to Serve
I usually serve these straight from the waffle iron at the table. The steam rising off them is irresistible. But here are other ways I’ve enjoyed them:
- Classic: Warm maple syrup and a pat of butter. Simple and perfect.
- Fancy: Whipped cream, fresh blueberries, and a drizzle of honey.
- Protein-Packed: A dollop of Greek yogurt and a sprinkle of chia seeds.
- With Savory: Pair with crispy bacon or sausage links for a sweet-savory balance.
Storage Instructions
Refrigerator: Store leftover waffles in an airtight container for up to 2 days. They might lose some crispiness, but they’re still good.
Freezing: This is the best way to store them. Let waffles cool completely on a wire rack. Arrange them in a single layer on a baking sheet and freeze for 1 hour. Once frozen, transfer to a freezer bag or container. They’ll last up to 3 months. This is my go-to for busy mornings.
Reheating:
Best method: Toast them in a toaster or toaster oven. This restores the crispiness.
Oven method: Place on a baking sheet at 350°F (175°C) for 5-10 minutes.
Microwave: Only if you’re in a huge rush. It will make them soft and chewy, not crispy. I avoid this unless I’m desperate.
Nutrition Information
I’m not a nutritionist, but here’s the breakdown if you’re tracking. Per serving (based on 4 servings, 2 waffles each):
- Calories: 380
- Protein: 10g
- Carbs: 52g
- Fiber: 3g
- Sugar: 12g
- Fat: 14g
- Saturated Fat: 8g
- Cholesterol: 85mg
- Sodium: 450mg
Look, this is comfort food with butter and sugar. It’s not a diet recipe. But it’s way better than takeout, costs less, and I know exactly what’s in it. When I want to make it lighter, I reduce the sugar to 1 tablespoon and use half-and-half instead of buttermilk. But usually? I just eat a reasonable portion and enjoy it.
Final Thoughts
So that’s my go-to fluffy blueberry buttermilk waffles! I’ve probably talked your ear off at this point, but when you make a recipe this often, you have a lot to say about it. These waffles have saved my weekends. They’re my answer to “what’s for breakfast” when I want to feel special but don’t want to spend hours in the kitchen. My kids are happy, my husband’s happy, and I’m happy because I’m not stressed about cooking.
Make it yours! Try different berries, add chocolate chips, or switch up the toppings. The best recipes are the ones you adapt to your family’s tastes. If you make this, drop a comment and let me know what you think! I love hearing how recipes turn out in your kitchen. And if something doesn’t work, tell me that too—I’m here to help troubleshoot.
Happy cooking! And I hope your kitchen smells half as good as mine does right now.
Frequently Asked Questions
Can I use milk instead of buttermilk?
You can, but the texture won’t be as tender and the flavor won’t be as tangy. If you must, make a buttermilk substitute: add 2 tablespoons of lemon juice or white vinegar to 1 ½ cups of milk. Let it sit for 5-10 minutes until it curdles slightly. It’s not perfect, but it works in a pinch.
Why are my waffles dense instead of fluffy?
Most likely, you overmixed the batter. Once you add the wet ingredients to the dry, stir only until combined. Lumps are good! Also, check your baking powder. If it’s old, it won’t create enough lift. And make sure your waffle iron is fully preheated.
Can I use frozen blueberries?
Yes! In fact, I often use frozen berries because they’re cheaper and just as good. Just don’t thaw them completely. Toss them in flour while they’re still frozen to prevent them from bleeding too much color into the batter. They might release a little more juice, so keep an eye on the cooking time.
How do I keep waffles crispy while cooking multiple batches?
Use a wire rack set over a baking sheet. Place the cooked waffles on the rack and put them in a 200°F (95°C) oven. This allows air to circulate and keeps them crispy. Never stack them on a plate, as the steam will make them soggy.
Can I make the batter ahead of time?
I don’t recommend it. Waffle batter is best made fresh because the baking powder starts working as soon as it hits the liquid. If you let it sit, the bubbles escape, and your waffles will be flat. If you must, mix the dry and wet ingredients separately and combine them right before cooking.
What kind of waffle iron do I need?
Any standard waffle iron works. Belgian-style irons make thicker, fluffier waffles with deeper pockets, which I prefer for holding syrup and berries. Regular deep-grid irons work too, but the waffles will be thinner. Just adjust the cooking time accordingly.
Can I freeze the batter?
No, do not freeze the batter. The leavening agents will lose their potency, and the texture will be ruined. Freeze the cooked waffles instead. They reheat beautifully in a toaster.
Pin This Recipe!
Fluffy Blueberry Buttermilk Waffles: 5-Step Weekend Brunch
- Total Time: 20 minutes
- Yield: 4 servings 1x
Description
These fluffy blueberry buttermilk waffles are crispy on the outside and impossibly soft on the inside, studded with bursts of sweet-tart blueberry goodness. A reliable weekend brunch recipe that takes about 20 minutes to make.
Ingredients
- 2 cups (250g) all-purpose flour
- 2 teaspoons baking powder
- ½ teaspoon baking soda
- 1 teaspoon salt
- 2 tablespoons granulated sugar
- 2 large eggs, room temperature
- 1 ½ cups (360ml) buttermilk
- 4 tablespoons (60g) melted butter
- 1 teaspoon vanilla extract
- 1 ½ cups fresh or frozen blueberries
- 1 tablespoon extra flour (for coating berries)
Instructions
- In a large bowl, whisk together the flour, baking powder, baking soda, salt, and sugar. Set aside.
- In a separate bowl, whisk the eggs until beaten. Add the buttermilk, melted butter, and vanilla extract. Whisk until smooth and combined.
- Make a well in the center of the dry ingredients. Pour the wet mixture into the well. Gently stir just until the flour is moistened. Do not overmix; the batter should remain lumpy.
- Toss the blueberries in the tablespoon of extra flour to coat them. Gently fold them into the batter until distributed.
- Preheat your waffle iron and lightly grease it. Pour about ¾ cup of batter onto the center of the iron. Close the lid and cook for 3-4 minutes until steam stops escaping and waffles are golden brown and crispy.
- Transfer cooked waffles to a wire rack set over a baking sheet. Place in a 200°F (95°C) oven to keep warm while cooking the rest. Serve immediately.
Notes
Do not overmix the batter to ensure fluffy waffles. Tossing blueberries in flour prevents them from sinking. Keep cooked waffles warm in a low oven on a wire rack to maintain crispiness. For dairy-free, use plant-based buttermilk and oil. For gluten-free, use a 1:1 gluten-free flour blend.
- Prep Time: 10 minutes
- Cook Time: 10-12 minutes
- Category: Breakfast
- Cuisine: American
Nutrition
- Serving Size: 2 waffles per servin
- Calories: 380
- Sugar: 12
- Sodium: 450
- Fat: 14
- Saturated Fat: 8
- Carbohydrates: 52
- Fiber: 3
- Protein: 10
Keywords: blueberry waffles, buttermilk waffles, fluffy waffles, weekend brunch, easy breakfast, homemade waffles, berry waffles



