Last Labor Day, I made a huge mistake. I assumed that because it was a holiday, I needed to cook a full, complicated dinner and then bake a towering, intricate dessert. I spent six hours in the kitchen sweating through a July afternoon, only to realize I had zero energy left to actually enjoy the food. The cake I pulled out of the oven was dry, my friends were standing around awkwardly holding paper plates, and I was ready to throw my apron in the trash. That was the moment I decided: never again.
So, the following year, I decided to keep it simple. I needed something that looked impressive enough for a holiday gathering but required absolutely zero heat. I needed a dessert that could sit in the fridge all day while I hosted, and that my kids could even help with. That’s when I rediscovered the no-bake chocolate peanut butter icebox cake. It’s honestly the easiest 5-ingredient dessert I’ve ever made, and it has saved my holidays, my busy weeknights, and my sanity.
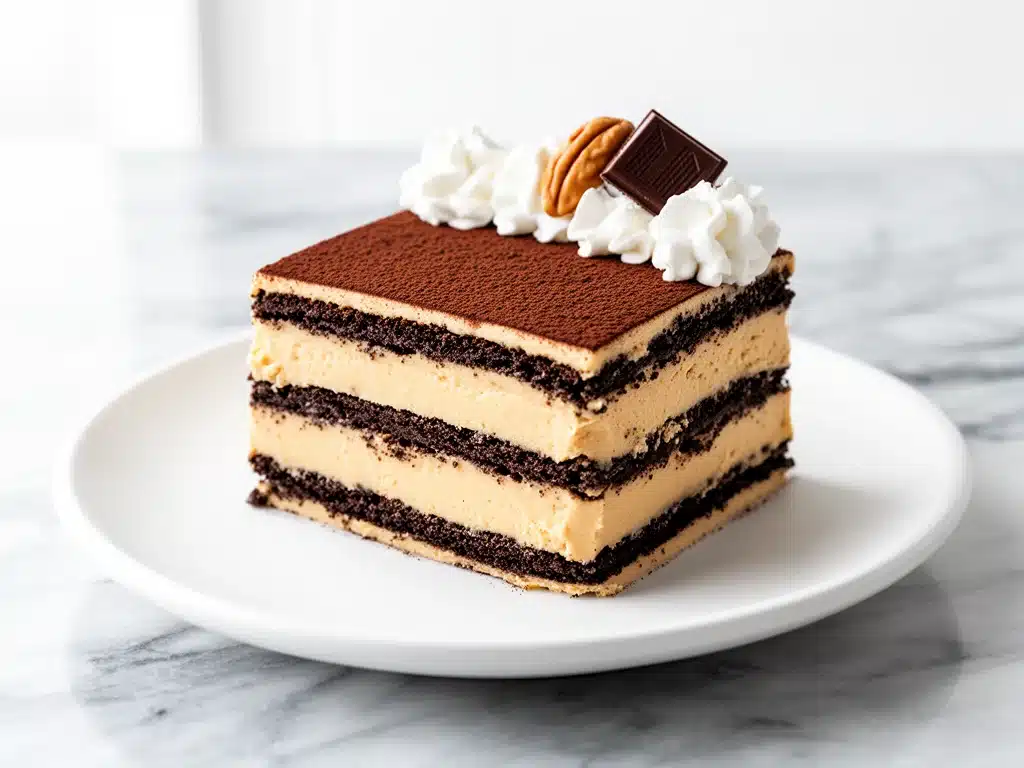
There is something magical about this cake. You stack layers of chocolate wafers with a creamy peanut butter mixture, let it sit in the fridge overnight, and wake up to a dessert that tastes like it came from a high-end bakery. The cookies soften into a cake-like texture, the flavors meld together perfectly, and it’s cool, refreshing, and rich all at once. I’ve made this Labor Day No-Bake Chocolate Peanut Butter Icebox Cake for picnics, potlucks, and Tuesday nights when I just need a little sweet treat. It’s the ultimate crowd-pleaser that doesn’t require an oven.
I’ve tested this recipe at least a dozen times—sometimes with different brands of cookies, sometimes with homemade peanut butter, and sometimes with a shortcut using jarred peanut butter. Every single time, it works. It’s forgiving, it’s fast to assemble, and the cleanup is basically non-existent. If you’re looking for a way to impress your guests without spending your entire day standing over a stove, this is it. Seriously, five ingredients. That’s it. Let me show you how to make it.
Why You’ll Love This Recipe
I know what you’re thinking. “Another icebox cake? Really?” But hear me out. This isn’t just another cookie stack. This is the dessert that changed how I think about hosting. Here’s why this no-bake chocolate peanut butter icebox cake has become a permanent fixture in my weekly rotation:
Zero Oven Required — This is the biggest selling point. In the summer, or when you’re hosting a big holiday dinner, turning on the oven feels like a crime. This cake stays in the fridge. It’s cool, it’s refreshing, and it doesn’t heat up your kitchen. Perfect for hot July days or busy weeknights when you’re already tired from cooking dinner.
Five Ingredients, No Skill Needed — Seriously. If you can spread peanut butter on a sandwich, you can make this cake. There’s no whipping egg whites, no tempering chocolate, no complex baking techniques. Just layer, chill, and eat. I’ve made this while helping my kids with homework, and it turned out perfectly every time.
Makes Amazing Leftovers — Unlike many baked goods that go stale in a day, this cake actually gets better overnight. The cookies fully absorb the cream mixture, becoming soft and fudgy. I often make it on Sunday night so it’s ready for Monday lunch, or I make a double batch because it disappears so fast in my house.
Customizable and Forgiving — Run out of chocolate wafers? Use chocolate sandwich cookies (like Oreos, though the texture changes slightly). Don’t like chunky peanut butter? Use smooth. Want to add a drizzle of caramel? Go for it. This recipe is a canvas, not a rigid rulebook. I’ve made variations with different nuts, different cookies, and different mix-ins, and they all work.
Budget-Friendly — You don’t need expensive specialty ingredients. The main components are basic pantry staples. It feeds a crowd for a fraction of the cost of a bakery cake. I’ve served this at potlucks where people asked for the recipe, thinking it was a fancy, expensive dessert. The look on their faces when I tell them it’s just cookies and peanut butter is priceless.
This is my go-to when I need a dessert that just works. No stress, no mess, no oven heat. Just reliable, delicious food that makes everyone happy. Whether it’s a big holiday gathering or a quiet Tuesday night treat, this cake delivers every single time.
Ingredients You’ll Need
Here’s the best part: you probably have most of this already in your pantry or fridge. I’m particular about a few things here, and I’ll tell you exactly why they matter. This recipe is simple, but quality ingredients make a huge difference in the final taste.
For the Cream Layer
Cream Cheese (8 ounces / 225g) — Full-fat is non-negotiable here. It needs to be smooth and spreadable. Let it sit on the counter for 15 minutes before you start so it blends easily. If it’s too cold, you’ll get lumps in your cream layer, and nobody wants that. I use Philadelphia brand because it’s consistent, but any good full-fat cream cheese works.
Heavy Cream (2 cups / 480ml) — This is what gives the cake its light, airy texture. You need to whip it to stiff peaks. Make sure your bowl and beaters are cold—pop them in the fridge for 10 minutes before whipping. Cold cream whips better and holds its shape longer. Don’t use whipped topping from a can; it doesn’t have the same richness or stability.
Peanut Butter (1 cup / 250g) — This is where you can get creative. I love using crunchy peanut butter for texture, but smooth works too if you prefer a finer mouthfeel. Natural peanut butter (just peanuts and salt) can be tricky because the oil separates. If you use natural, stir it *very* well until it’s fully incorporated, or it might make the cream runny. Regular commercial peanut butter (like Jif or Skippy) is more reliable for this recipe because the stabilizers help keep the mixture firm.
Vanilla Extract (1 teaspoon) — Pure vanilla adds depth and balances the sweetness. Skip the imitation stuff; it tastes artificial and can ruin the delicate flavor profile. Just a teaspoon is enough to tie everything together.
For the Layers
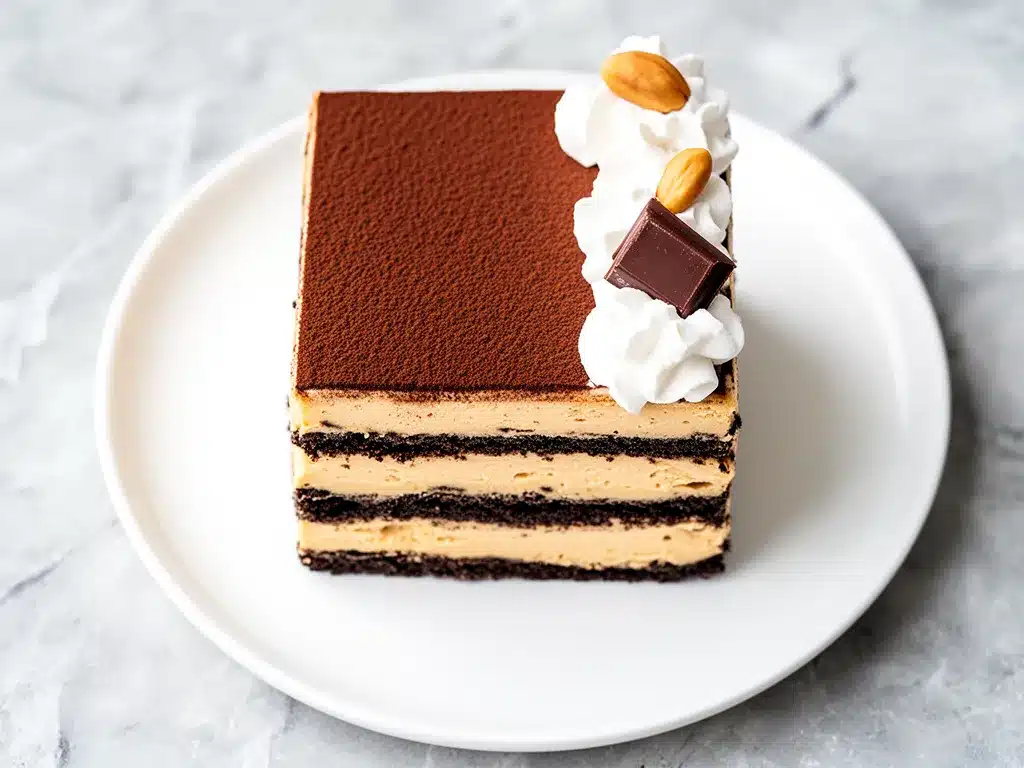
Chocolate Wafers (1 package / about 30-35 cookies) — I use Nabisco Chocolate Wafers. They’re thin, crisp, and have the perfect chocolate-to-cookie ratio. They soften beautifully in the fridge without turning to mush. Avoid thick chocolate sandwich cookies unless you want a denser, sweeter cake. If you can’t find wafers, chocolate graham crackers work, but the texture will be more crumbly.
Optional: Chocolate Syrup or Caramel (for drizzling) — Not required, but highly recommended. A drizzle of chocolate syrup or salted caramel on top adds a fancy touch and extra flavor. I usually keep a bottle of Hershey’s syrup in the pantry just for this purpose.
Optional: Chopped Peanuts (for garnish) — A sprinkle of chopped roasted peanuts on top adds a nice crunch and visual appeal. It also reinforces the peanut butter flavor. I usually chop them by hand with a knife for a rustic look.
Pro Tip: I always buy an extra box of wafers. You need a lot of them to cover the bottom and sides of the pan, and it’s frustrating to run out halfway through. Also, keep the cream mixture in the fridge while you assemble if it’s hot outside. You want it to stay firm.
Equipment Needed
You don’t need fancy equipment for this. Here’s what I actually use:
9×13 Inch Baking Dish — This is the standard size for icebox cakes. It holds the right amount of layers. Pyrex or glass is nice because you can see the layers, but metal or ceramic works too. Just make sure it’s deep enough to hold all the layers without overflowing.
Electric Mixer — Handheld or stand mixer. You need to whip the cream to stiff peaks, which is hard to do by hand. A mixer takes about 2-3 minutes. If you don’t have one, you can use a whisk, but it will take a lot of elbow grease and arm strength.
Spatula — A large rubber spatula is essential for folding the peanut butter into the cream and spreading the layers evenly. Get one that’s flexible so you can get into the corners of the bowl.
Measuring Cups and Spoons — Standard stuff. Dollar store versions work fine. Make sure you measure the peanut butter correctly; too much can make the mixture too soft.
Plastic Wrap — To cover the dish while it chills. This prevents the cake from absorbing fridge odors and keeps it moist. I usually use a sheet of plastic wrap pressed directly onto the surface of the cake, then another layer over the top.
Knife — For slicing the cake. A sharp chef’s knife works best. If you don’t have one, a serrated bread knife can work, but it might crumble the edges. Run the knife under hot water and dry it before each cut for clean slices.
Optional: Food Processor — If you want to chop the peanuts finely, a food processor is great. But a knife works fine too.
How to Make It: Step-by-Step
Alright, let’s make this! I’m walking you through exactly how I do it, including the little tricks I’ve picked up over the years. This process is mostly assembly, so don’t worry about getting it perfect. It’s forgiving.
Step 1: Whip the Cream (5-8 minutes)
Start by whipping the heavy cream. Pour the cold heavy cream into a chilled mixing bowl. Using an electric mixer on medium-high speed, whip the cream until stiff peaks form. This means when you lift the beaters, the cream stands up straight without drooping. Be careful not to over-whip, or it will turn into butter. It should take about 2-3 minutes. Once it’s stiff, set it aside.
Step 2: Mix the Peanut Butter Layer (3 minutes)
In a separate large bowl, beat the softened cream cheese until smooth and creamy. Add the peanut butter and vanilla extract. Beat on medium speed until fully combined and smooth. The mixture should be thick and spreadable. If it’s too thick, you can add a tablespoon of milk, but usually, it’s fine as is. Fold in one-third of the whipped cream into the cream cheese mixture to lighten it up. Then, gently fold in the remaining whipped cream until just combined. Don’t overmix; you want to keep the air in the cream. The final mixture should be light, fluffy, and spreadable.
Step 3: Prepare the Pan
Lightly grease your 9×13 inch baking dish with non-stick spray or a little butter. This helps the cake release easily later, though it’s not strictly necessary. Set out your chocolate wafers and a large spatula.
Step 4: Layer the Cake (10-15 minutes)
Here’s the fun part. Start by laying a single layer of chocolate wafers on the bottom of the pan. You might need to break a few cookies to fit the edges, and that’s totally fine. Don’t worry about perfect alignment; it’s rustic. Next, spread about one-third of the peanut butter cream mixture over the cookies. Use the spatula to spread it evenly to the edges. Make sure there are no gaps.
Repeat the process: another layer of cookies, then another third of the cream. Then a final layer of cookies, and the remaining cream on top. Smooth the top layer with the spatula. If you want to drizzle chocolate syrup or caramel, do it now. It will sink in slightly as it chills, which is delicious. Sprinkle chopped peanuts on top if you’re using them.
Step 5: Chill the Cake (Overnight)
Cover the dish tightly with plastic wrap. Press the plastic directly onto the surface of the cream to prevent a skin from forming. Place the dish in the refrigerator for at least 8 hours, or overnight. This is the most important step. The cookies need time to soften and absorb the moisture from the cream, transforming into a cake-like texture. If you’re in a hurry, you can chill it for 4 hours, but the texture won’t be as cohesive. Patience pays off here.
Step 6: Slice and Serve
Once chilled, remove the plastic wrap. Use a sharp knife to slice the cake into squares. For clean cuts, dip the knife in hot water and wipe it dry before each slice. Serve immediately. It’s best eaten within 2-3 days, but it usually doesn’t last that long in my house.
Total Time: About 20 minutes active, plus 8+ hours chilling.
Troubleshooting Tips:
- Cream too runny: Make sure your bowl and beaters were cold, and you whipped the cream to stiff peaks. Also, ensure the cream cheese was fully softened and smooth before mixing.
- Cookies too hard: You didn’t chill it long enough. Give it another hour or two. If it’s still hard, the cookies might be too thick. Try thinner wafers next time.
- Cake falls apart when slicing: The knife wasn’t sharp enough, or you didn’t chill it long enough. Use a sharp, clean knife and let it chill overnight.
Expert Tips & Tricks
Here’s everything I’ve learned from making this dozens of times. These tips will save you from my mistakes.
Cold Everything is Key
The success of this cake depends on the stability of the whipped cream. Cold cream whips better and holds its shape. Cold cream cheese blends smoother. Cold bowls prevent the cream from melting as you whip. I keep my mixing bowls in the fridge overnight before making this. It’s a small step that makes a huge difference.
Don’t Skip the Plastic Wrap Contact
When covering the cake, press the plastic wrap directly onto the surface of the cream. This prevents air from reaching the surface, which causes a skin to form. It also keeps the cake moist. If you just cover the top of the dish, the cream will dry out and crack.
Use High-Quality Peanut Butter
The peanut butter is the star flavor. Don’t use the cheapest, most processed stuff. Look for a natural peanut butter with just peanuts and salt, or a premium brand like Smucker’s Natural. The flavor is noticeably better and less sweet. If you use natural peanut butter, make sure it’s fully stirred and not oily.
Break Cookies Strategically
When fitting cookies around the edges, break them in half or quarters. Don’t try to force a whole cookie to bend; it will crack and look messy. Broken cookies are fine; no one will know. Just make sure you cover the entire surface with a layer of cookies.
Chill Overnight for Best Results
I know it’s tempting to eat it right away. Don’t. The cookies need time to soften. If you eat it after 2 hours, it’s just wet cookies. After 8 hours, it’s a cake. Trust the process. The longer it chills, the better it gets.
Add a Pinch of Salt
If your peanut butter isn’t salty, add a pinch of salt to the cream mixture. Salt enhances the chocolate and peanut flavors. It’s a subtle touch that makes the dessert taste more balanced and less cloyingly sweet.
Variations & Substitutions
Once you’ve nailed the basic version, here’s how you can mix it up. I’ve tried all of these, and they all work.
Chocolate Chip Cookie Version
Instead of chocolate wafers, use chocolate chip cookies. The texture will be chewier and sweeter. You might need to press the cookies down slightly so they fit in layers. This version is richer and more like a dessert bar.
Graham Cracker Version
Swap chocolate wafers for graham crackers. This makes the cake lighter and less sweet. It’s more like a s’mores-inspired dessert. You can add a layer of marshmallow fluff between the layers for extra s’mores flavor.
Almond Butter Swap
Replace peanut butter with almond butter. This gives a more sophisticated, nutty flavor. It’s slightly more expensive, but delicious. Use the same amount as peanut butter.
Strawberry Cream Version
Replace the peanut butter with strawberry jam or pureed strawberries. Mix it with the cream cheese and whipped cream. It’s a fruity, pink version that’s great for spring. Top with fresh strawberries.
Coconut Version
Add shredded coconut to the cream mixture, and use coconut-flavored wafers if you can find them. Top with toasted coconut flakes. It’s a tropical twist that’s surprisingly good.
Dietary Modifications:
- Gluten-Free: Use gluten-free chocolate wafers or gluten-free cookies. Most major brands make GF versions now.
- Dairy-Free: Use dairy-free cream cheese (like Miyoko’s or Kite Hill) and dairy-free heavy cream (like Coconut Cream). Use dairy-free chocolate wafers. The texture might be slightly different, but it still works.
- Nut-Free: Replace peanut butter with sunflower seed butter or soy nut butter. It’s a bit less common, but available in most grocery stores.
Serving & Storage
How to Serve:
I usually serve this straight from the dish, slicing it into squares. It looks rustic and homemade. But here are other ways I’ve enjoyed it:
- With Fresh Fruit: Top each slice with fresh berries or sliced bananas. The acidity cuts through the richness.
- With Whipped Cream: Add a dollop of extra whipped cream on top for a fancy touch.
- With Chocolate Sauce: Drizzle warm chocolate sauce over each slice just before serving.
Storage Instructions:
Refrigerator: Store in an airtight container or covered with plastic wrap for up to 4 days. The cake will continue to soften in the fridge. It’s best eaten within 2-3 days for optimal texture.
Freezing: This cake doesn’t freeze well. The whipped cream and cream cheese can become grainy or separate when thawed. It’s best made fresh or stored in the fridge. If you must freeze it, freeze the assembled cake (without the topping) for up to 1 month. Thaw in the fridge overnight before serving. The texture will be slightly different, but still edible.
Meal Prep: This is perfect for meal prep. Make it on Sunday, and it’s ready for the week. Slice it into individual portions for easy grab-and-go desserts. It’s a great way to satisfy sweet tooth cravings without baking.
Nutrition Information
I’m not a nutritionist, but here’s the breakdown if you’re tracking. Keep in mind that this is a rich, indulgent dessert, so portions matter.
Per Serving (based on 12 servings):
- Calories: 380
- Protein: 6g
- Carbs: 42g
- Fiber: 2g
- Sugar: 32g
- Fat: 22g
- Saturated Fat: 12g
- Cholesterol: 45mg
- Sodium: 280mg
What’s Good:
– Provides some protein from the cream cheese and peanut butter.
– Peanut butter offers healthy fats and satiety.
– Can be made gluten-free or dairy-free with substitutions.
What to Know:
– Higher in calories and sugar due to the cookies and cream.
– Contains dairy and peanuts (common allergens).
– Moderate sodium content.
My Take:
Look, this is a dessert. It’s sweet, rich, and indulgent. It’s not a health food. But it’s way better than store-bought cake, and you control the ingredients. When I want to make it lighter, I use less sugar in the peanut butter (by choosing natural) and add fresh fruit on top. But usually? I just enjoy a slice and savor it. Moderation is key.
Final Thoughts
So that’s my go-to Labor Day No-Bake Chocolate Peanut Butter Icebox Cake! I’ve probably talked your ear off at this point, but when you make a recipe this often, you have a lot to say about it.
This has saved my holidays and my weeknights more times than I can count. It’s my answer to “what’s for dessert” when I’m tired, don’t want to bake, and still want something that tastes really good. My kids are happy, my guests are impressed, and I’m happy because I’m not stressed about cooking.
Make it yours! Try different cookies, different nut butters, different toppings. The best recipes are the ones you adapt to your family’s tastes. If you make this, drop a comment and let me know what you think! I love hearing how recipes turn out in your kitchen. And if something doesn’t work, tell me that too—I’m here to help troubleshoot.
Happy cooking! And I hope your kitchen smells half as good as mine does right now.
Frequently Asked Questions
Can I use homemade peanut butter?
Yes, you can, but it can be tricky. Homemade peanut butter often has more oil and less structure than commercial brands. If you use it, make sure it’s very well stirred and thick. You might need to add a little more cream cheese or chill the mixture longer to ensure it sets properly. If it’s too runny, the cake won’t hold its shape.
Why did my cake turn out runny?
This usually happens if the cream wasn’t whipped to stiff peaks, or if the cream cheese wasn’t fully softened and smooth. Also, if you used warm cream or a warm bowl, the cream might have melted. Make sure everything is cold, and whip the cream until it holds stiff peaks. Also, ensure you chilled the cake for at least 8 hours.
Can I make this ahead for a party?
Absolutely. This cake is actually better when made ahead. You can make it 1-2 days in advance. Just keep it covered in the fridge. It’s perfect for potlucks because it travels well and doesn’t need to be kept cold during transport (though it’s best served chilled).
Can I use chocolate sandwich cookies instead of wafers?
Yes, but the texture will be different. Sandwich cookies are thicker and sweeter, so the cake will be denser and richer. You might need to press them down slightly to fit in layers. It’s still delicious, just a different experience. I prefer wafers for their delicate, cake-like texture.
How do I store leftovers?
Store in an airtight container in the fridge for up to 4 days. The cake will continue to soften. If it gets too dry, cover it with plastic wrap directly on the surface. Don’t freeze it, as the texture will suffer.
Can I add other mix-ins?
Yes! You can add crushed cookies, chopped nuts, or even a layer of caramel or chocolate chips between the layers. Get creative. I’ve added a layer of peanut butter cups before, and it was amazing. Just make sure the mix-ins don’t make the cake too heavy.
What if I don’t have an electric mixer?
You can whip the cream by hand with a whisk, but it will take a lot of effort and time. You need to whip it until stiff peaks form, which is hard to do by hand. If you don’t have a mixer, consider using a pre-whipped topping, but the texture and taste won’t be as good. It’s worth getting a mixer if you plan to make this often.
Pin This Recipe!
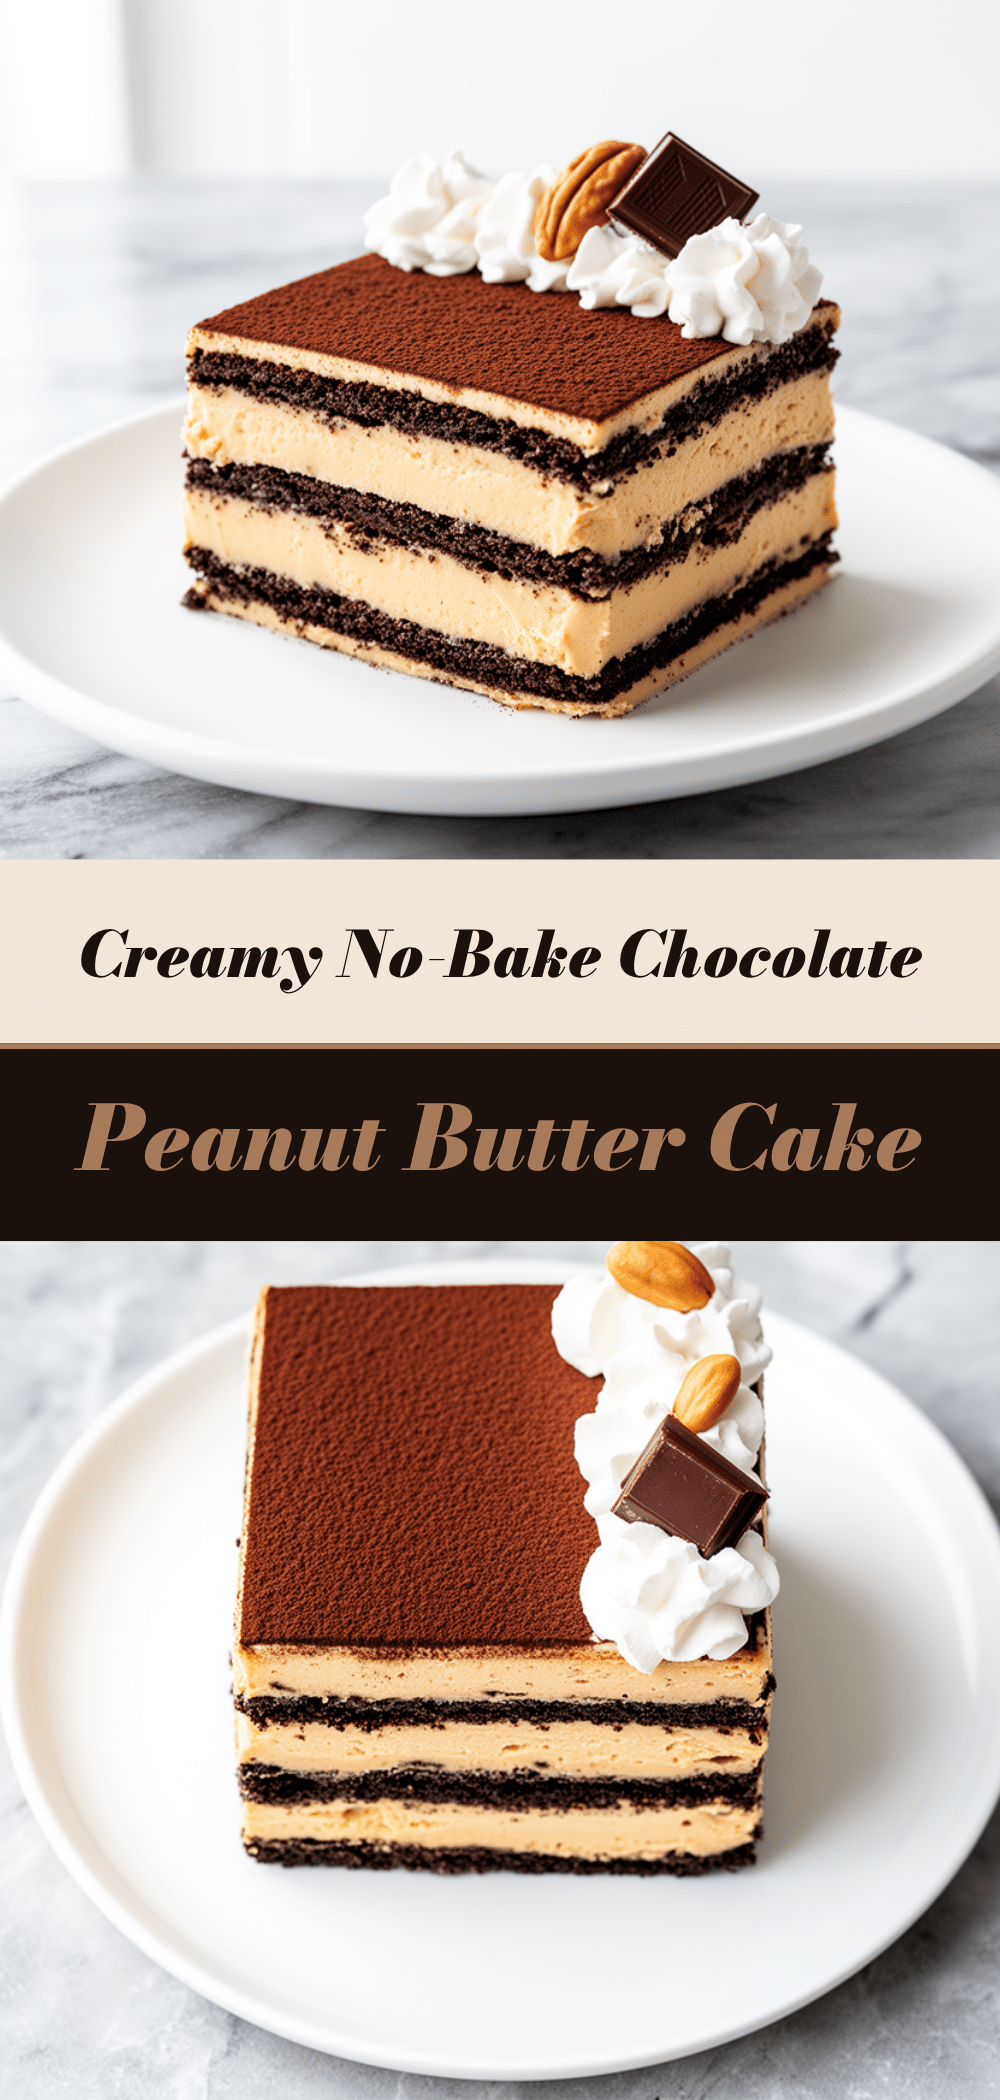
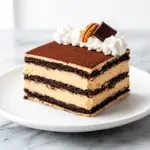
Labor Day No-Bake Chocolate Peanut Butter Icebox Cake
- Total Time: 8 hours 20 minutes
- Yield: 12 servings 1x
Description
An easy, no-bake 5-ingredient dessert featuring layers of chocolate wafers and creamy peanut butter mixture. This icebox cake requires zero oven time, making it perfect for holidays, hot weather, or busy weeknights.
Ingredients
- 8 ounces (225g) full-fat cream cheese, softened
- 2 cups (480ml) heavy cream, cold
- 1 cup (250g) peanut butter (crunchy or smooth)
- 1 teaspoon vanilla extract
- 1 package (30-35 cookies) chocolate wafers
- Optional: Chocolate syrup or caramel for drizzling
- Optional: Chopped roasted peanuts for garnish
Instructions
- Whip the cold heavy cream in a chilled bowl using an electric mixer on medium-high speed until stiff peaks form. Set aside.
- In a separate large bowl, beat the softened cream cheese until smooth. Add the peanut butter and vanilla extract, beating until fully combined.
- Fold one-third of the whipped cream into the cream cheese mixture to lighten it. Gently fold in the remaining whipped cream until just combined.
- Lightly grease a 9×13 inch baking dish.
- Layer a single layer of chocolate wafers on the bottom of the dish.
- Spread one-third of the peanut butter cream mixture over the cookies.
- Repeat with another layer of cookies and another third of the cream.
- Finish with a final layer of cookies and the remaining cream on top. Smooth the top.
- Optionally drizzle with chocolate syrup or caramel and sprinkle with chopped peanuts.
- Cover tightly with plastic wrap, pressing it directly onto the surface of the cream.
- Refrigerate for at least 8 hours or overnight until the cookies soften.
- Slice with a sharp knife dipped in hot water and served chilled.
Notes
Ensure all ingredients, especially the cream and bowl, are cold for best whipping results. The cake must chill overnight for the cookies to soften properly. It does not freeze well due to the cream cheese and whipped cream texture. Can be made gluten-free by using GF wafers and dairy-free by using plant-based alternatives.
- Prep Time: 20 minutes
- Cook Time: 0 minutes
- Category: Dessert
- Cuisine: American
Nutrition
- Serving Size: 1 slice
- Calories: 380
- Sugar: 32
- Sodium: 280
- Fat: 22
- Saturated Fat: 12
- Carbohydrates: 42
- Fiber: 2
- Protein: 6
Keywords: no-bake, icebox cake, peanut butter, chocolate, dessert, labor day, easy recipe, 5 ingredients, crowd pleaser