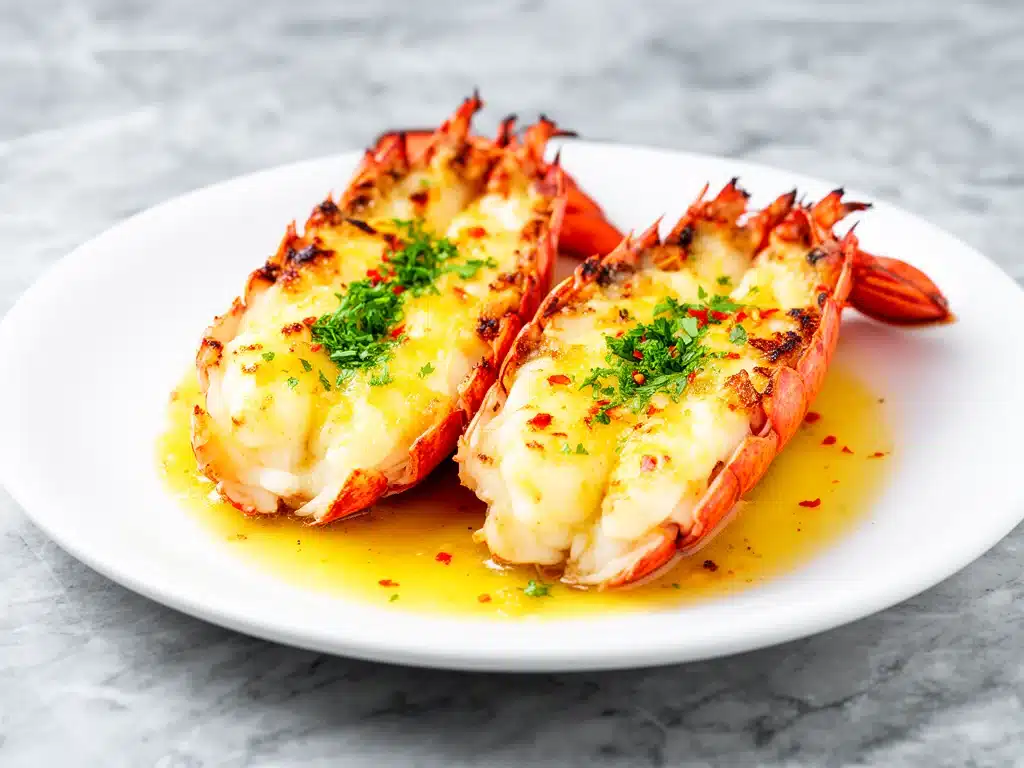
I still remember the first time I ordered lobster tails at a fancy restaurant. I was twenty-two, trying to impress a date, and I ordered the most expensive thing on the menu without really knowing what I was in for. The server brought out this tiny, sad-looking shell, and I spent ten minutes trying to pry the meat out without looking like a total novice. When I finally got a bite, it was rubbery, overcooked, and honestly? Disappointing. I walked out of that restaurant feeling like I’d been scammed, convinced that lobster was just a fancy word for expensive chewy meat.
Fast forward to last week. I was staring at a grocery store display case, eyeing some beautiful, fresh lobster tails. They were pricey, sure, but I wasn’t going to pay $100 for a dinner for two at a restaurant just to get rubbery meat again. I decided to take matters into my own hands. I bought the tails, came home, and made my broiled garlic butter lobster tails. I didn’t use any fancy techniques. No sous-vide. No complicated brining. Just simple, honest ingredients and the broiler in my oven.
The result? Pure magic. The meat was tender, sweet, and juicy, infused with this rich, garlicky butter that pooled at the bottom of the shell. It tasted better than anything I’ve had in a restaurant. Better than takeout. Actually, better than most high-end seafood spots I’ve visited. I ate three tails before my husband even sat down at the table. I’m not even sorry about it.
This recipe has completely changed how I think about seafood. It’s not just for special occasions anymore. It’s become my secret weapon for weeknight dinners when I want to feel fancy but don’t want to spend hours cooking. The best part? It takes less time than it takes to wait for a pizza delivery. If you’ve been intimidated by cooking lobster at home, this is your sign to stop being scared and start cooking. Trust me. Once you try this broiled garlic butter lobster tails better than takeout method, you’ll never go back.
Why You’ll Love This Recipe
There are plenty of reasons to love this dish, but let’s be real—you’re probably here because you want restaurant-quality food without the restaurant price tag or the three-hour wait time. Here’s why this recipe has earned a permanent spot in my weekly rotation:
- It’s Surprisingly Affordable — Lobster is often seen as a luxury, but buying frozen tails and cooking them yourself costs a fraction of what you’d pay at a seafood shack. I usually find tails for $12-$15 per pound, which is a steal for the quality you get.
- Restaurant-Quality Flavor — The garlic butter mixture is the star here. It’s not just melted butter dumped on top. It’s sautéed garlic, fresh herbs, lemon juice, and a touch of heat that creates a complex, savory sauce that clings to every fiber of the lobster meat.
- Lightning Fast — From thawing to table, this takes about 20 minutes. The actual cooking time is just 5-8 minutes under the broiler. It’s faster than making pasta, and honestly, it feels much more impressive to serve.
- Zero Skill Required — You don’t need to be a chef. You just need to follow a few simple steps. If you can melt butter and press a button on your oven, you can make this. I’ve made this while holding a baby, and it still turned out perfect.
- Perfect for Date Night — Want to impress your partner without stressing? This dish looks stunning on the plate. The golden, bubbling butter and the bright green parsley garnish make it look like you spent hours preparing it. Spoiler alert: you didn’t.
- Healthy & Light — Unlike heavy pasta dishes or fried foods, lobster is lean protein. With the garlic butter, it’s rich but not heavy. You feel satisfied, not sluggish. It’s a great option if you’re watching your calorie intake but still want to indulge.
This recipe has saved me more times than I can count. It’s my go-to when I need to feel fancy but have zero energy. It’s elegant, it’s delicious, and it’s ridiculously easy. Once you make it, you’ll understand why I’m so obsessed.
Ingredients You’ll Need
One of the best things about this broiled garlic butter lobster tails better than takeout recipe is how few ingredients you need. You don’t need a pantry full of exotic spices. Just a few simple, high-quality items. Here’s what you’ll need:
For the Lobster
Lobster tails (2-4 tails, about 6oz each) — I prefer fresh tails if you can find them, but frozen works just as well. If you buy frozen, make sure to thaw them slowly in the fridge overnight. Never thaw in hot water—it cooks the meat unevenly. Look for tails that are plump and have no cracks in the shell.
Butter (1/2 cup / 113g) — Use unsalted butter so you can control the saltiness. I like to use high-quality European-style butter if I’m feeling fancy, but regular salted butter works fine too. Just reduce the added salt in the recipe.
For the Garlic Butter Sauce
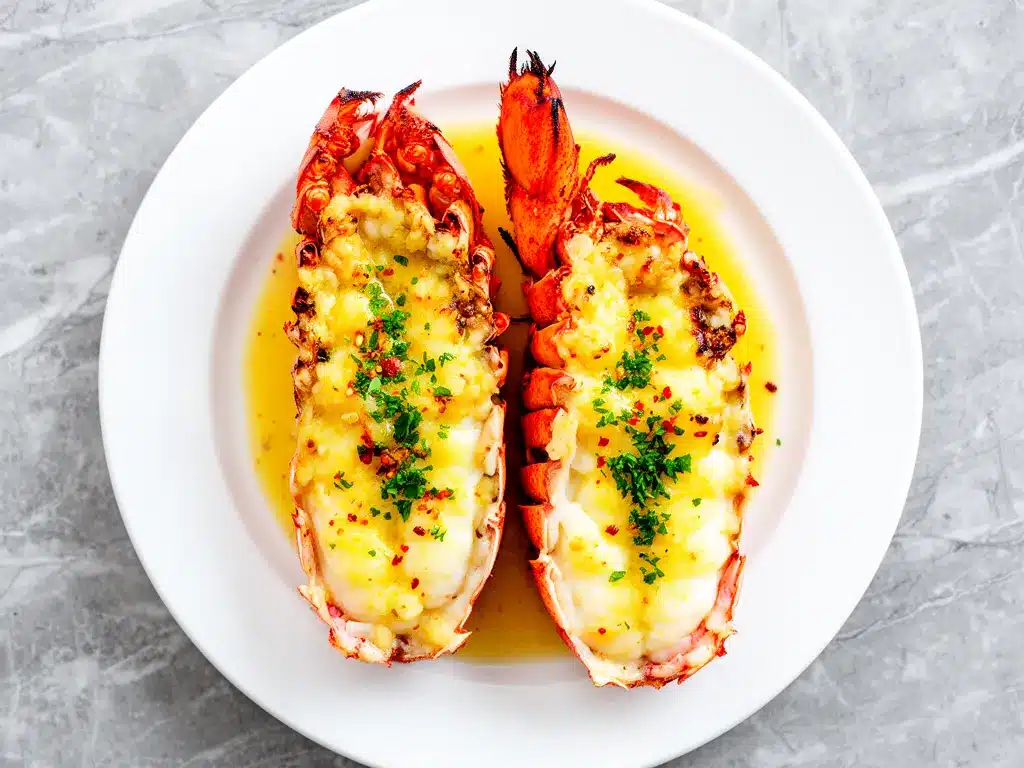
Garlic (4-6 cloves, minced) — Yes, lots of garlic. This is a garlic butter lobster recipe after all. Don’t be shy. Fresh garlic is non-negotiable here. Jarred garlic has a metallic taste that ruins the delicate flavor of the lobster.
Fresh parsley (2 tablespoons, chopped) — Flat-leaf parsley is best. It adds a fresh, herbal note that cuts through the richness of the butter. Dried parsley works in a pinch, but fresh makes a huge difference.
Lemon juice (1 tablespoon) — A splash of lemon brightens everything up. It balances the richness of the butter and garlic. Freshly squeezed is best, but bottled works if you’re in a rush.
Red pepper flakes (1/4 teaspoon) — Optional, but I recommend it. A tiny bit of heat adds complexity and wakes up your palate. If you’re sensitive to spice, start with a pinch.
Salt and black pepper — To taste. Since lobster is naturally sweet, a little salt enhances that sweetness. Freshly cracked black pepper adds a nice aroma.
White wine (2 tablespoons, optional) — I like to deglaze the pan with a splash of dry white wine like Sauvignon Blanc or Pinot Grigio. It adds depth to the sauce. If you don’t drink alcohol, you can skip this or use more chicken broth.
Substitutions & Tips
No lobster tails? You can use this same garlic butter method for shrimp, scallops, or even crab legs. The sauce works with almost any shellfish.
Herb swap? If you don’t have parsley, try tarragon or chives. Both pair beautifully with lobster.
Butter alternative? If you’re dairy-free, you can use ghee or olive oil, but the sauce won’t be as rich. Ghee is the closest substitute for flavor.
Equipment Needed
You don’t need any fancy gadgets for this. Here’s what I actually use in my kitchen:
Oven with a broiler setting — This is essential. You need high, direct heat from the top to cook the lobster quickly and get that golden, bubbly finish. Make sure your broiler is working properly. If yours has high and low settings, use high.
Small saucepan or skillet — For melting the butter and sautéing the garlic. A small non-stick skillet works perfectly. I use a 10-inch pan because it’s the right size for melting half a cup of butter without it splattering everywhere.
Kitchen shears or a sharp knife — To cut through the lobster shell. Kitchen shears are easier and safer. Just cut down the center of the top shell, being careful not to cut too deep into the meat.
Basting brush — To spread the garlic butter over the lobster meat. A silicone basting brush works well because it’s heat-resistant and easy to clean. A regular pastry brush works too.
Baking sheet or broiler pan — To hold the lobster tails while they cook. Line it with foil for easy cleanup. Lobster butter can drip and burn on your pan, making cleanup a nightmare if you don’t line it.
Optional: Meat thermometer — To check for doneness. Lobster is done when the internal temperature reaches 145°F (63°C). But honestly, I usually just go by the color—opaque and white, not translucent.
How to Make It: Step-by-Step
Alright, let’s get cooking. This process is straightforward, but there are a few tricks to get that perfect texture. I’m walking you through exactly how I do it, including the little details that make a big difference.
Step 1: Thaw and Prep the Lobster
If your lobster tails are frozen, thaw them in the refrigerator overnight. This is crucial. If you thaw them too quickly, the meat can become mushy. If you don’t have time, you can thaw them in cold water, but change the water every 15 minutes. Once thawed, pat them dry with paper towels. Moisture is the enemy of good browning, so dry them well.
Step 2: Butterfly the Tails
This is the most important step for even cooking. Turn the lobster tail upside down so the smooth, curved side is facing up. Using kitchen shears, cut straight down the center of the top shell, starting from the tail end and cutting all the way to the fin. Be careful not to cut into the meat.
Next, reach your fingers under the meat and gently lift it out, keeping it attached at the tail end. Lay the meat on top of the shell. You can use a toothpick to secure it if it wants to curl back down. This “butterflying” method exposes more meat to the heat and allows the garlic butter to soak in.
Step 3: Make the Garlic Butter Sauce
In a small saucepan over medium-low heat, melt the butter. Once melted, add the minced garlic, red pepper flakes, and chopped parsley. Stir constantly for about 1-2 minutes. You want the garlic to become fragrant but not brown. Browned garlic tastes bitter and ruins the sauce.
If you’re using white wine, add it now and let it simmer for 30 seconds to cook off the alcohol. Remove from heat and set aside. The sauce should be golden and smell amazing. If it starts to splatter, lower the heat.
Step 4: Broil the Lobster
Preheat your broiler on high. Place the butterflied lobster tails on a foil-lined baking sheet, meat-side up. Spoon half of the garlic butter over the meat. Put the baking sheet in the oven, about 4-6 inches from the broiler element.
Broil for 5-8 minutes. Watch it closely! Lobster cooks fast. You want the meat to turn opaque and white, with just a hint of golden brown on top. The edges might curl slightly, which is normal. Do not overcook it, or it will become rubbery.
Step 5: Baste and Serve
Halfway through cooking, take the pan out and baste the lobster with the remaining garlic butter. This adds extra flavor and keeps the meat moist. After the final minute, give it one last baste.
Remove from the oven and let rest for 2 minutes. This allows the juices to redistribute. Serve immediately with lemon wedges and extra garlic butter on the side for dipping. It’s that simple.
Expert Tips & Tricks
Here’s everything I’ve learned from making this dozens of times. These tips will save you from my mistakes.
- Don’t Skip the Thawing — Cooking frozen lobster tails directly in the oven leads to uneven cooking. The outside might burn while the inside is still raw. Always thaw first.
- Keep an Eye on the Broiler — Broilers vary wildly. Some run hot, some run cool. Start checking at 5 minutes. If your lobster is browning too fast, move the pan to a lower rack.
- Use Fresh Garlic — I cannot stress this enough. Jarred garlic has preservatives that change the flavor profile. Fresh garlic gives that bright, pungent kick that defines this dish.
- Butter Temperature Matters — Make sure your garlic butter is warm, not scalding hot, when you baste. If it’s too hot, it can cook the surface of the lobster prematurely.
- Rest the Meat — It’s tempting to dig in immediately, but letting the lobster rest for 2 minutes ensures the juices stay inside the meat. It’s a small step that makes a big difference.
- Save the Shells — Don’t throw away the shells! You can use them to make lobster bisque or stock later. They’re packed with flavor.
Common Mistakes to Avoid
Mistake: Overcooking — Fix: Lobster is done when it’s opaque and white. If it’s translucent or rubbery, it’s undercooked or overcooked. Use a thermometer if you’re unsure.
Mistake: Burning the Garlic — Fix: Keep the heat low when melting the butter. Garlic burns quickly. If you see it turning brown, remove from heat immediately.
Mistake: Not Drying the Meat — Fix: Wet lobster steams instead of broiling. Pat it dry with paper towels before adding the butter.
Variations & Substitutions
Once you’ve nailed the basic version, here’s how you can mix it up. I’ve tried all of these, and they’re all delicious.
Herb-Infused Garlic Butter
Add 1 teaspoon of dried thyme or rosemary to the butter mixture. These herbs pair beautifully with lobster and add a rustic, earthy flavor. It’s a great change from the classic parsley version.
Spicy Cajun Lobster
Swap the red pepper flakes for 1 teaspoon of Cajun seasoning. Add a splash of hot sauce to the butter. This gives the dish a Southern, spicy kick. It’s amazing with corn on the cob.
Lemon Herb Lobster
Add the zest of one lemon to the butter mixture. Increase the lemon juice to 2 tablespoons. This version is lighter and brighter. It’s perfect for summer dinners.
Wine-Infused Garlic Butter
Add 2 tablespoons of dry white wine to the butter mixture before adding the garlic. Let it reduce for a minute before adding the garlic. This adds a sophisticated, restaurant-quality depth to the sauce.
Dietary Modifications
Gluten-Free — This recipe is naturally gluten-free. Just make sure your butter and wine are certified gluten-free if you’re celiac.
Dairy-Free — Substitute butter with ghee or olive oil. The flavor will be slightly different, but it still works well.
Keto/Low-Carb — This recipe is already low-carb. Lobster is pure protein, and the sauce is fat-based. Perfect for keto diets.
Serving & Storage
How to serve this broiled garlic butter lobster tails better than takeout dish?
Side Dishes
Lobster is rich, so pair it with light, fresh sides. I love serving it with:
- Grilled Asparagus — The char complements the broiled lobster perfectly.
- Rice Pilaf — A simple butter rice soaks up the extra garlic butter.
- Caesar Salad — A classic pairing. The crisp lettuce cuts through the richness.
- Roasted Potatoes — Crispy roasted potatoes are a hearty addition.
Wine Pairing
I’m not a wine expert, but my wine-snob friend says a crisp Sauvignon Blanc or a buttery Chardonnay works great. The acidity in the wine balances the richness of the butter.
Storage
Refrigerator: Store leftovers in an airtight container for up to 2 days. The lobster meat will continue to cook slightly, so reheat gently.
Reheating: The best way to reheat is in a 350°F oven for 5-7 minutes. Do not microwave it, or the meat will become rubbery. Add a splash of water or broth to the container to keep it moist.
Freezing: I don’t recommend freezing cooked lobster tails. The texture suffers. It’s best to freeze raw tails and cook them fresh.
Nutrition Information
I’m not a nutritionist, but here’s the breakdown if you’re tracking. This is per tail (6oz), without sides.
- Calories: ~250-300
- Protein: 20g
- Fat: 15g (mostly from butter)
- Carbs: 1g
- Sodium: 400mg (varies by butter)
Look, this is comfort food with butter. It’s not a diet recipe. But it’s high in protein and low in carbs. When I want to make it lighter, I use less butter and more lemon juice. But usually? I just enjoy it in moderation.
Final Thoughts
So that’s my go-to broiled garlic butter lobster tails better than takeout recipe. I’ve probably talked your ear off at this point, but when you make a recipe this often, you have a lot to say about it.
This has saved weeknight dinners more times than I can count. It’s my answer to “what’s for dinner” when I’m tired, don’t want takeout, and still want something that tastes really good. My kids are happy, my husband’s happy, and I’m happy because I’m not stressed about cooking.
Make it yours! Try different herbs, adjust the garlic, or add some spice. The best recipes are the ones you adapt to your family’s tastes.
If you make this, drop a comment and let me know what you think! I love hearing how recipes turn out in your kitchen. And if something doesn’t work, tell me that too—I’m here to help troubleshoot.
Happy cooking! And I hope your kitchen smells half as good as mine does right now.
Frequently Asked Questions
Can I use fresh lobster tails instead of frozen?
Absolutely! Fresh lobster tails are even better. Just make sure they’re fresh, not previously frozen. The cooking time is the same. Fresh tails have a brighter, sweeter flavor.
How do I know when the lobster is done?
The meat should be opaque and white, not translucent. The internal temperature should reach 145°F (63°C). If you don’t have a thermometer, look for the color change. Overcooked lobster is rubbery, so err on the side of slightly undercooked.
Can I grill the lobster tails instead of broiling?
Yes! Grill them on medium-high heat, meat-side down, for 5-7 minutes. Baste with garlic butter while grilling. Grilling adds a nice smoky flavor that’s delicious.
Why is my lobster rubbery?
Overcooking is the #1 cause. Lobster cooks very quickly. Check it at 5 minutes. If it’s still translucent, give it another minute. Also, make sure you’re not broiling too close to the heat source.
Can I make the garlic butter ahead of time?
Yes! You can make the garlic butter up to 3 days in advance. Store it in the fridge in an airtight container. Reheat gently before using. This saves time on busy nights.
What if I don’t have a broiler?
You can bake the lobster at 450°F (230°C) for 10-12 minutes. It won’t get the same golden-brown top, but it will still be delicious. Broiling just adds that extra caramelization.
Is lobster healthy?
Yes! Lobster is lean protein, low in fat, and high in omega-3 fatty acids. It’s a great choice for a healthy diet. The garlic butter adds some fat, but it’s still a nutritious meal.
Pin This Recipe!
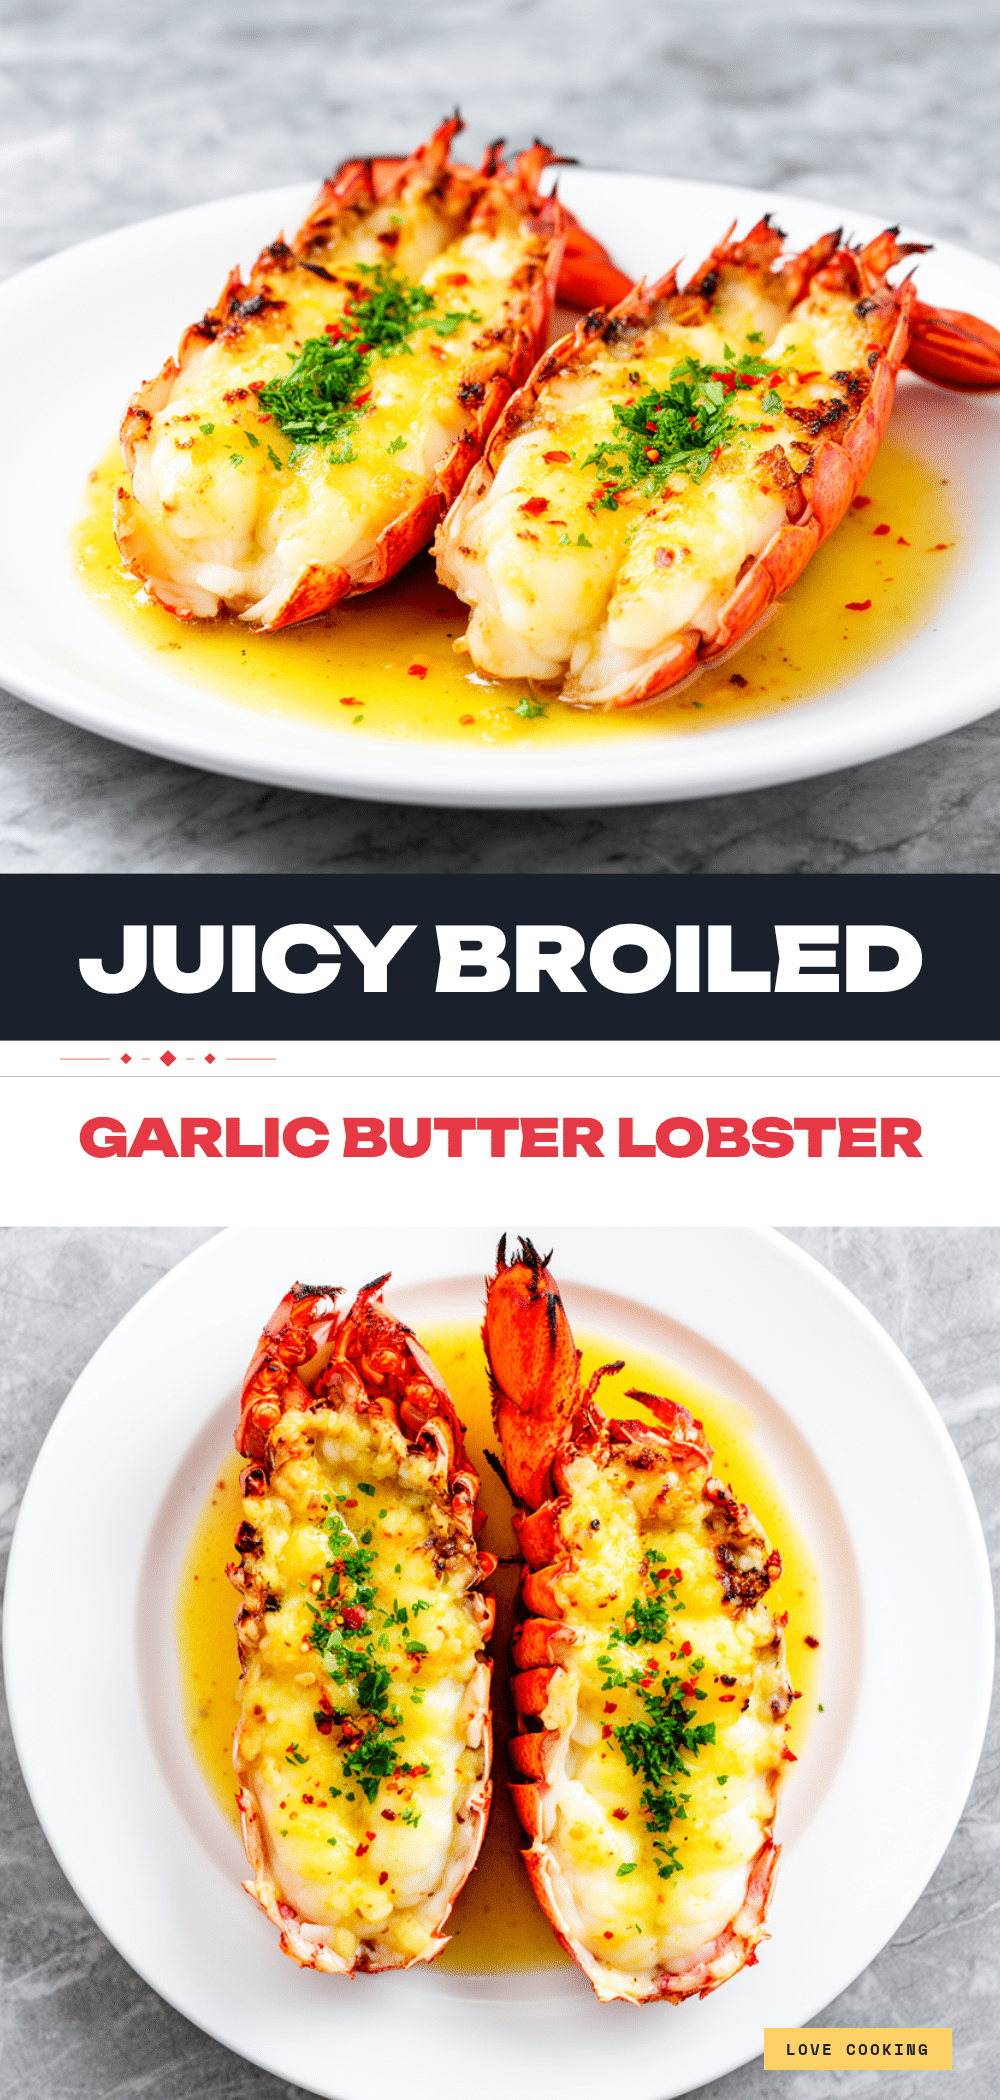
Broiled Garlic Butter Lobster Tails: 5-Min Easy Restaurant Style
- Total Time: 20 minutes
- Yield: 2-4 servings 1x
Description
Achieve restaurant-quality lobster tails at home with this simple, fast broiled garlic butter recipe. Tender, juicy, and infused with rich garlic sauce in under 20 minutes.
Ingredients
- 2–4 lobster tails (about 6oz each), thawed
- 1/2 cup (113g) unsalted butter
- 4–6 cloves garlic, minced
- 2 tablespoons fresh parsley, chopped
- 1 tablespoon lemon juice
- 1/4 teaspoon red pepper flakes
- Salt and black pepper to taste
- 2 tablespoons dry white wine (optional)
Instructions
- Thaw frozen lobster tails in the refrigerator overnight or in cold water. Pat dry with paper towels.
- Butterfly the tails by cutting straight down the center of the top shell with kitchen shears. Lift the meat out and lay it on top of the shell, securing with a toothpick if necessary.
- In a small saucepan over medium-low heat, melt the butter. Add minced garlic, red pepper flakes, and parsley. Stir for 1-2 minutes until fragrant but not browned.
- If using, add white wine and simmer for 30 seconds. Remove from heat.
- Preheat oven broiler on high. Place lobster tails meat-side up on a foil-lined baking sheet.
- Spoon half of the garlic butter over the meat. Broil for 5-8 minutes, watching closely to prevent burning.
- Halfway through cooking, baste the lobster with the remaining garlic butter.
- Remove from oven and let rest for 2 minutes before serving with lemon wedges.
Notes
Do not overcook the lobster as it will become rubbery. The meat is done when opaque and white, reaching an internal temperature of 145°F. Use fresh garlic for best flavor. If using frozen tails, ensure they are fully thawed before cooking.
- Prep Time: 15 minutes
- Cook Time: 5-8 minutes
- Category: Main Course
- Cuisine: American
Nutrition
- Serving Size: 1 lobster tail (6oz)
- Calories: 275
- Sodium: 400
- Fat: 15
- Saturated Fat: 9
- Carbohydrates: 1
- Protein: 20
Keywords: lobster tails, garlic butter lobster, broiled lobster, seafood recipe, easy dinner, restaurant style lobster, gluten-free, keto-friendly



