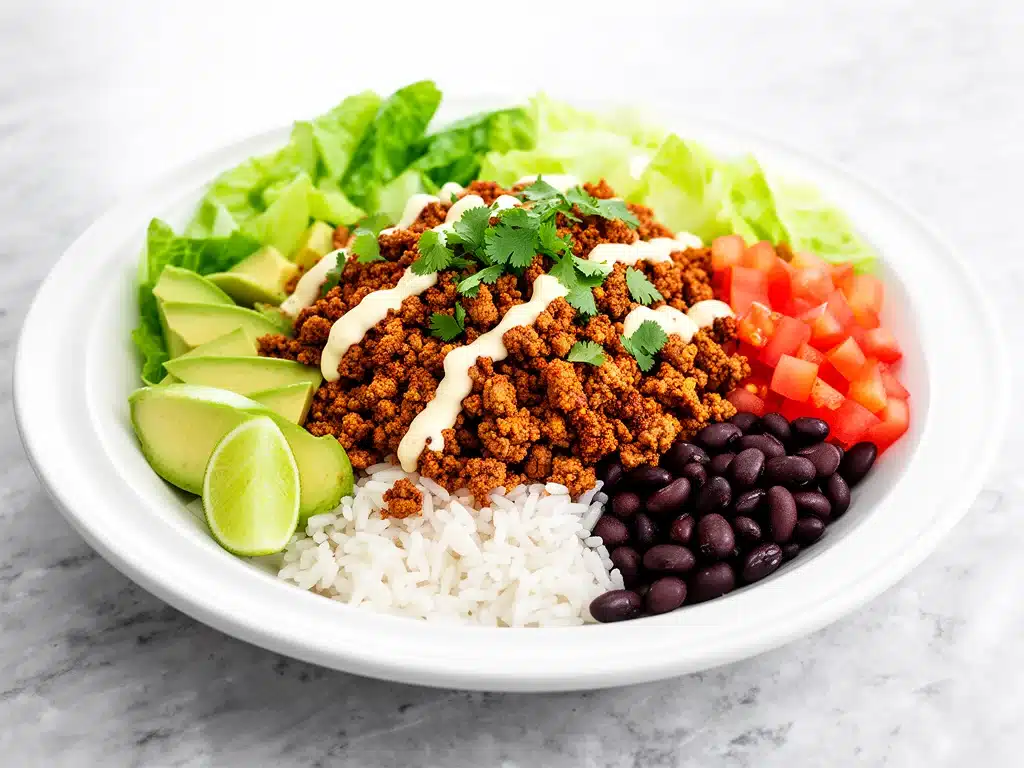
I have a confession to make. Last Tuesday, I was exhausted. You know that specific kind of tired where your brain feels like it’s been put through a blender set to “mush”? I came home, stared at my fridge, and then immediately opened the delivery app. I was about to order the same $18 taco bowl from the place down the street—the one with the slightly greasy rice and the sad, limp lettuce. But then I saw the total. $18. For food that would be cold by the time I took the first bite.
Something snapped. I didn’t want to spend $18 for mediocrity. I wanted food that actually tasted good, that would fill me up, and that wouldn’t leave me feeling like a human brick for the rest of the evening. So, I closed the app, grabbed a package of ground turkey, and decided to make my own High-Protein Ground Turkey Taco Bowls better than takeout.
I’m not going to lie to you. The first time I made this, I was skeptical. Ground turkey has a reputation. People think it’s dry, bland, or just… sad compared to beef. But here’s the thing: I was wrong. When you season it right and cook it with a little bit of patience, turkey is incredibly juicy and takes on flavor like a sponge. Plus, the protein punch? It’s insane. I ate this bowl and didn’t crash an hour later. I felt energized.
This recipe has become my absolute lifeline on weeknights. It’s faster than waiting for a delivery driver who can’t find my apartment, it costs a fraction of the price, and it tastes so much better because I control the freshness. I’ve made this version at least fifteen times in the last three months, tweaking the spice blend and the toppings until it was perfect. It’s become my go-to answer for “what’s for dinner?” when I’m tired, broke, or just don’t feel like cooking something complicated. If you’re tired of the takeout trap, this is your new best friend.
Why You’ll Love This Ground Turkey Taco Bowl Recipe
There are about a dozen reasons I keep coming back to this recipe, but let’s be real about the big ones. This isn’t just another healthy recipe that tastes like cardboard. It’s vibrant, savory, and genuinely satisfying. Here’s why this High-Protein Ground Turkey Taco Bowls better than takeout deserves a spot in your weekly rotation:
- Lightning Fast — Seriously, if you can chop an onion and brown meat, you can make this. From fridge to fork, it takes about 15 minutes. I make this on nights when I get home at 7pm and still want to be in pajamas by 8:30. It’s faster than waiting for a pizza to arrive.
- Stupid Simple Ingredients — You probably have 90% of these items in your pantry right now. Ground turkey, taco seasoning (or homemade), rice, beans, and some fresh toppings. No weird, hard-to-find gadgets or exotic spices you’ll only use once.
- Protein Powerhouse — This bowl is packed with protein. Ground turkey is lean but filling, and when you add black beans, you’re getting a double dose of plant-based protein too. This keeps me full for hours without that heavy, sluggish feeling you get from a heavy cream-based pasta or a greasy burger.
- Customizable for Everyone — My husband likes his extra spicy. My teenager prefers it mild with extra cheese. I like it loaded with veggies. Because everything is in separate bowls, everyone builds their own perfect bowl. It eliminates the “what do you want for dinner?” argument entirely.
- Budget-Friendly — Feeds 4 people for under $20. That’s less than one large pizza with toppings, and honestly, the leftovers are better quality too. I deliberately make extra for lunch because it reheats beautifully (more on that later).
- Meal Prep Friendly — I batch-cook the turkey and rice on Sundays. By Wednesday, dinner is basically just assembly time. It’s saved me from ordering takeout more times than I can count.
This is my go-to when I need dinner to just work. No complicated techniques, no weird ingredients, just reliable, delicious food that makes everyone happy and leaves you feeling good about what you ate.
Ingredients You’ll Need for the Best Taco Bowls
Here’s the best part: you probably have most of this already. I’m particular about a few things here, and I’ll tell you exactly why. This looks like a standard taco night list, but the quality of a few key items makes the difference between “meh” and “wow.”
For the Protein Base
Ground turkey (1.5 pounds / 680g) — I use 93% lean. 99% lean can get dry if you overcook it, and 80% has too much fat for the vibe I’m going for. 93% is the sweet spot. It stays juicy but isn’t greasy. Don’t buy the pre-seasoned packs; they’re full of junk. Season it yourself.
Taco seasoning (2-3 tablespoons) — I have a homemade blend I swear by (paprika, cumin, chili powder, garlic powder, onion powder, oregano, salt, pepper). But store-bought works fine if you check the label and avoid ones with excessive sodium or anti-caking agents. If you want to see how I handle spices, check out my hot honey ground beef and sweet potato bowl for similar flavor profiles.
Onion (1 medium yellow, diced / about 150g) — Sweet onions work too, but yellow gives better depth. White onions are too sharp for this application. Diced small so it cooks evenly with the meat.
Garlic (4 cloves, minced / about 2 tablespoons) — Yes, four cloves. Don’t skimp. Fresh only—no jarred garlic in this recipe. It changes the flavor profile entirely.
For the Bowls
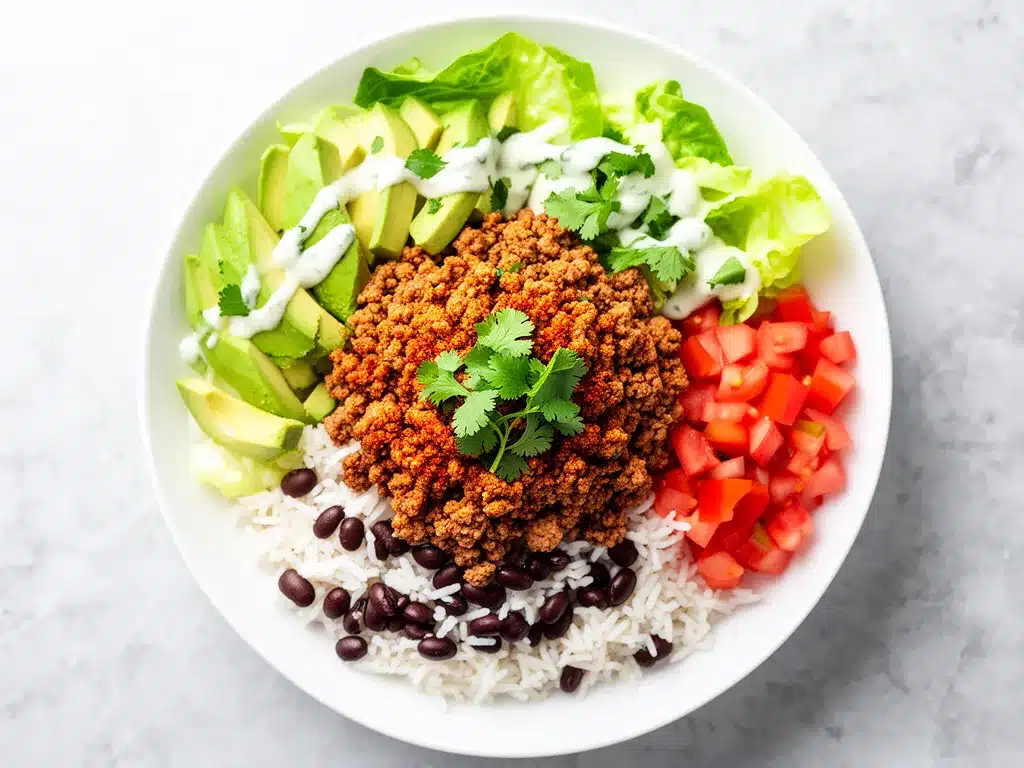
Long-grain white rice (1.5 cups uncooked / about 280g) — I use jasmine rice for its slight fragrance, but basmati or regular long-grain works too. Brown rice is healthier but takes longer to cook, which throws off the 15-minute timeline. If you use brown rice, start it 10 minutes before the meat.
Black beans (1 can / 15oz, drained and rinsed) — Canned is fine. Just rinse them well to remove that metallic tin taste. You can also use pinto beans or kidney beans if that’s what you have.
Corn (1 cup frozen or canned / about 150g) — Adds sweetness and crunch. Frozen corn is better because it’s sweeter, but canned works in a pinch.
For the Toppings
Shredded cheese (1 cup / 100g) — Mexican blend or cheddar. I grate my own from a block because pre-shredded has cellulose that prevents melting. It’s worth the 2 minutes.
Avocado (2 medium, sliced or diced) — The creamy element is non-negotiable. If you’re in a rush, guacamole works. If you have time, slice it fresh. It adds healthy fats that keep you satisfied.
Tomatoes (2 medium Roma, diced / about 300g) — Adds acidity and freshness. Roma tomatoes are less watery than beefsteak, so they don’t make the bowl soggy.
Lettuce (2 cups, shredded romaine) — Romaine is crunchier and holds up better than iceberg or butter lettuce. Toss it in right before serving so it stays crisp.
Lime (2 limes) — Fresh lime juice is the secret weapon. It cuts through the richness of the cheese and turkey. Squeeze it over everything.
Fresh cilantro (½ cup, chopped) — Optional if you’re one of those people who thinks cilantro tastes like soap, but for the rest of us, it’s essential.
Optional Add-ins
Sour cream or Greek yogurt — Greek yogurt is higher protein and tangier. I use it when I want to keep it light.
Jalapeños — Fresh or pickled. For heat lovers.
Red onion — Thinly sliced for a sharper bite.
Equipment Needed
You don’t need fancy equipment for this. Here’s what I actually use. Most of it you already have in your kitchen drawer.
Large skillet or Dutch oven — I use a 12-inch stainless steel skillet. It needs to be wide enough to spread the turkey out so it browns instead of steams. My ancient cast-iron skillet works too, but stainless is easier for cleaning.
Saucepan with lid — For cooking the rice. Any size works as long as it fits 1.5 cups of rice and 3 cups of water.
Sharp knife — For chopping onions, garlic, tomatoes, and avocado. Dull knives make you cry more—learned this the hard way with an onion.
Cutting board — Any size works. I use plastic for easier cleanup, but wood is fine too.
Wooden spoon or spatula — For stirring the meat. Silicone works too. Don’t use metal on non-stick.
Colander — For draining the beans and corn. Or just use the lid to drain—I do this when I’m lazy.
Measuring cups and spoons — Pretty standard stuff. Dollar store versions work fine.
Optional but nice:
- Rice cooker — If you have one, use it. Set it and forget it while you cook the meat.
- Microplane — For zesting the lime if you want that extra aroma.
- Large serving bowls — Or just use your regular dinner plates. No special plating needed.
How to Make It: Step-by-Step
Alright, let’s make this! I’m walking you through exactly how I do it, including the little tricks I’ve picked up over dozens of attempts. This is designed to be done in about 15 minutes, so we’re going to move fast.
Step 1: Start the Rice (5-8 minutes prep, 15-20 minutes cook)
Before you even touch the meat, get the rice going. Rinse 1.5 cups of long-grain white rice under cold water until the water runs clear. This removes excess starch and prevents mushy rice. Combine the rinsed rice with 3 cups of water and a pinch of salt in a saucepan. Bring it to a boil, then reduce heat to low, cover tightly, and simmer for 15 minutes. Turn off the heat and let it sit, covered, for 5 more minutes. Fluff with a fork. If you’re short on time, use a microwave rice pouch, but the texture isn’t quite the same.
Step 2: Prep Your Veggies (5 minutes)
While the rice cooks, chop your onion, mince your garlic, dice your tomatoes, and shred your lettuce. Have your beans drained and rinsed. Grate your cheese. This seems fussy, but it makes the actual cooking way less stressful. Once you start cooking the meat, things move fast. Having everything ready means you’re just assembling, not chopping mid-sauté.
Step 3: Brown the Turkey (8-10 minutes)
Heat your large skillet over medium-high heat. Add a teaspoon of oil (optional, since turkey has some fat). Add the diced onion and cook for 2-3 minutes until it starts to soften. Add the minced garlic and cook for 30 seconds until fragrant. Add the ground turkey, breaking it up with your spoon as it cooks. Cook for 5-7 minutes, until the meat is no longer pink. Don’t let it burn, but don’t undercook it either. You want a nice brown crust on some of the bits.
Step 4: Season and Simmer (3-4 minutes)
Once the meat is browned, drain any excess liquid from the pan if there’s a lot of it (but leave some for flavor). Sprinkle the taco seasoning over the meat. Add ½ cup of water (or broth if you have it). Stir well to combine. Let it simmer for 2-3 minutes until the sauce thickens and clings to the meat. Taste and adjust salt if needed. This is where the magic happens—the seasoning penetrates the meat.
Step 5: Warm the Beans and Corn
While the turkey simmers, add the drained black beans and corn to a small saucepan with a splash of water. Heat over medium for 2-3 minutes until warm. Alternatively, microwave them in a bowl for 1 minute. You just want them hot, not cooking further.
Step 6: Assemble the Bowls
Fluff the rice. Divide the rice among 4 bowls. Top with the seasoned turkey, warm beans and corn, diced tomatoes, shredded lettuce, and a generous handful of cheese. Slice the avocado on top. Squeeze fresh lime juice over everything. Garnish with cilantro.
Total Time: About 20-25 minutes (10 minutes active, 15 minutes mostly hands-off while rice cooks).
Expert Tips & Tricks for Perfect Bowls
Here’s everything I’ve learned from making this dozens of times. These tips will save you from my mistakes.
The Game-Changers
Don’t Crowd the Pan
If you’re cooking a large batch, cook the turkey in two batches. Crowding the pan steams the meat instead of browning it. Browned meat has flavor. Steamed meat is bland. I learned this the hard way with a gray, sad-looking batch of turkey. Now I use my biggest skillet.
Season in Layers
Don’t just dump the seasoning on at the end. Season the onions when they cook, and season the meat when it browns. This builds depth. If you wait until the end, the spices just sit on top.
Use Low-Sodium Broth
If you add liquid to the turkey, use low-sodium chicken broth instead of water. It adds richness. Then control the salt yourself at the end. Store-bought taco seasoning can be salty, so taste before adding extra salt.
Common Mistakes (and how to avoid them)
Mistake: Rice is mushy
Fix: You didn’t rinse it enough, or you didn’t let it rest after cooking. Always rinse until water is clear. Always let it sit covered for 5 minutes after turning off the heat.
Mistake: Turkey is dry
Fix: You overcooked it. Turkey cooks fast. As soon as it’s no longer pink, add the seasoning and liquid. The liquid helps keep it moist. Don’t walk away from the pan.
Mistake: Bowl is too dry
Fix: Add more lime juice or a dollop of sour cream/Greek yogurt. The acidity and fat balance the lean meat.
Pro Tricks I’ve Learned
For Restaurant-Quality Finish
Toast the spices in the dry pan for 30 seconds before adding water. It releases their essential oils. It’s a tiny step, but it makes a huge difference in aroma.
For Better Texture
Toss the lettuce with a tiny bit of olive oil and lime juice before putting it in the bowl. It keeps it crisp and adds flavor.
Make-Ahead Strategy
Make the turkey and rice ahead and store in the fridge for up to 3 days. Assemble bowls fresh. The beans and veggies are best fresh, but you can prep them too.
Variations & Substitutions
Once you’ve nailed the basic version, here’s how you can mix it up. I’ve tried all of these.
Protein Swaps
Ground Chicken — Works exactly the same. Slightly milder flavor, but same texture.
Ground Beef — Use 90% lean. It’s richer and juicier, but higher in fat. If you use beef, you might not need the extra oil in step 3.
Plant-Based Crumbles — Use your favorite veggie ground. Follow package instructions. Season heavily since they absorb flavor well.
Carb Swaps
Cauliflower Rice — For low-carb. Sauté it for 5 minutes with the onions. It’s lighter and less filling.
Quinoa — Higher protein than rice. Cooks in 15 minutes. Slightly nutty flavor pairs well with taco spices.
No Rice — Just make it a salad bowl. Double the beans and veggies. Add extra avocado.
Flavor Variations
Fiesta Style — Add diced red bell pepper with the onions. Add corn and black beans.
Southwest Style — Add a can of diced green chiles to the turkey. Top with Monterey Jack cheese.
BBQ Turkey — Swap taco seasoning for BBQ sauce and smoked paprika. Top with coleslaw mix.
Dietary Modifications
Gluten-Free — All ingredients are naturally gluten-free. Just check your taco seasoning label for hidden gluten.
Dairy-Free — Skip the cheese and sour cream. Use avocado for creaminess. Most taco seasonings are dairy-free.
Vegan — Use plant-based ground, skip cheese, use vegetable broth. Add extra beans for protein.
Serving & Storage
How to Serve
I usually serve this straight from the skillet at the dinner table—it looks rustic and stays warm. But here are other ways I’ve enjoyed it:
- Side Dishes: Garlic bread (obviously), simple green salad with balsamic vinaigrette, or roasted broccoli.
- Toppings Bar: When I have guests, I put out: extra cheese, red pepper flakes, fresh cilantro, lime wedges, crispy bacon bits. Everyone customizes their bowl.
- Wine Pairing: Not a wine expert, but my wine-snob friend says Pinot Grigio or a light Red (like Grenache) works great with this.
Storage Instructions
Refrigerator: Store components separately in airtight containers for up to 4 days. The turkey keeps well. The rice can get hard, so add a splash of water when reheating. The veggies are best fresh.
Reheating: Best method: Add turkey and rice to a skillet with a splash of water or broth over low heat. Stir until heated through. Microwave method: Heat in 30-second intervals, stirring between. Add a splash of water if it’s too dry.
Freezing: Turkey and rice freeze well for up to 3 months. Thaw in fridge and reheat. Do not freeze the beans or veggies—they get mushy. Do not freeze the avocado or lettuce.
Meal Prep: Make the turkey and rice on Sunday. Store in the fridge. Assemble bowls fresh each night. Takes 5 minutes and tastes way better than fully reheated leftovers.
Nutrition Information
I’m not a nutritionist, but here’s the breakdown if you’re tracking. This is per serving based on 4 bowls.
| Nutrient | Amount |
|---|---|
| Calories | 450 |
| Protein | 32g |
| Carbs | 40g |
| Fiber | 8g |
| Sugar | 4g |
| Fat | 16g |
| Sodium | 600mg |
What’s Good: High protein from turkey and beans. Good fiber from beans and veggies. Lower in saturated fat than beef tacos.
What to Know: Sodium can vary based on taco seasoning. Use low-sodium seasoning and broth to reduce. Contains dairy if you add cheese.
My Take: Look, this is comfort food. It’s not a diet recipe. But it’s way better than takeout, costs less, and I know exactly what’s in it. When I want to make it lighter, I use less cheese and more veggies. But usually? I just eat a reasonable portion and enjoy it.
Final Thoughts
So that’s my go-to High-Protein Ground Turkey Taco Bowls better than takeout! I’ve probably talked your ear off at this point, but when you make a recipe this often, you have a lot to say about it.
This has saved weeknight dinners more times than I can count. It’s my answer to “what’s for dinner” when I’m tired, don’t want takeout, and still want something that tastes really good. My kids are happy, my husband’s happy, and I’m happy because I’m not stressed about cooking.
Make it yours! Try different add-ins, swap in your favorite vegetables, adjust the garlic (though more is always better in my opinion). The best recipes are the ones you adapt to your family’s tastes.
If you make this, drop a comment and let me know what you think! I love hearing how recipes turn out in your kitchen. And if something doesn’t work, tell me that too—I’m here to help troubleshoot.
Happy cooking! And I hope your kitchen smells half as good as mine does right now.
Frequently Asked Questions
Can I use ground chicken instead of turkey?
Absolutely. Ground chicken works exactly the same way. It’s slightly milder, so you might want to add an extra teaspoon of taco seasoning. Same cooking time and method.
Why did my turkey turn out dry?
Usually means you overcooked it. Turkey cooks very fast. As soon as it’s no longer pink, add your liquid (water or broth) and seasoning. The liquid steams it slightly and keeps it moist. Don’t walk away from the pan!
Can I make this ahead for a dinner party?
Sort of. Make the turkey and rice up to 2 days ahead and store in the fridge. Warm them up right before serving. Assemble the bowls fresh with cold veggies and avocado. It won’t be quite as good as fresh, but it’s close and saves you stress during the party. I do this all the time.
Can I use brown rice?
You can, but it takes longer to cook. Start the rice 10-15 minutes before you start the meat. Or use a rice cooker. The flavor is nuttier and the texture is chewier, which some people prefer.
How do I reheat leftovers without it getting dry?
Add a splash of water or broth to a skillet, add your leftover turkey and rice, and heat gently over low heat, stirring frequently. The extra liquid brings back the moisture. Microwave sort of works but tends to dry it out. If you do microwave, definitely add a splash of water first and heat in short bursts, stirring between.
Can I double this recipe?
Yes! Double everything and use your biggest skillet. The cooking times stay the same. I do this when I’m meal-prepping or feeding a crowd. Just make sure your skillet is big enough for the meat—you might need to cook in two batches.
Pin This Recipe!
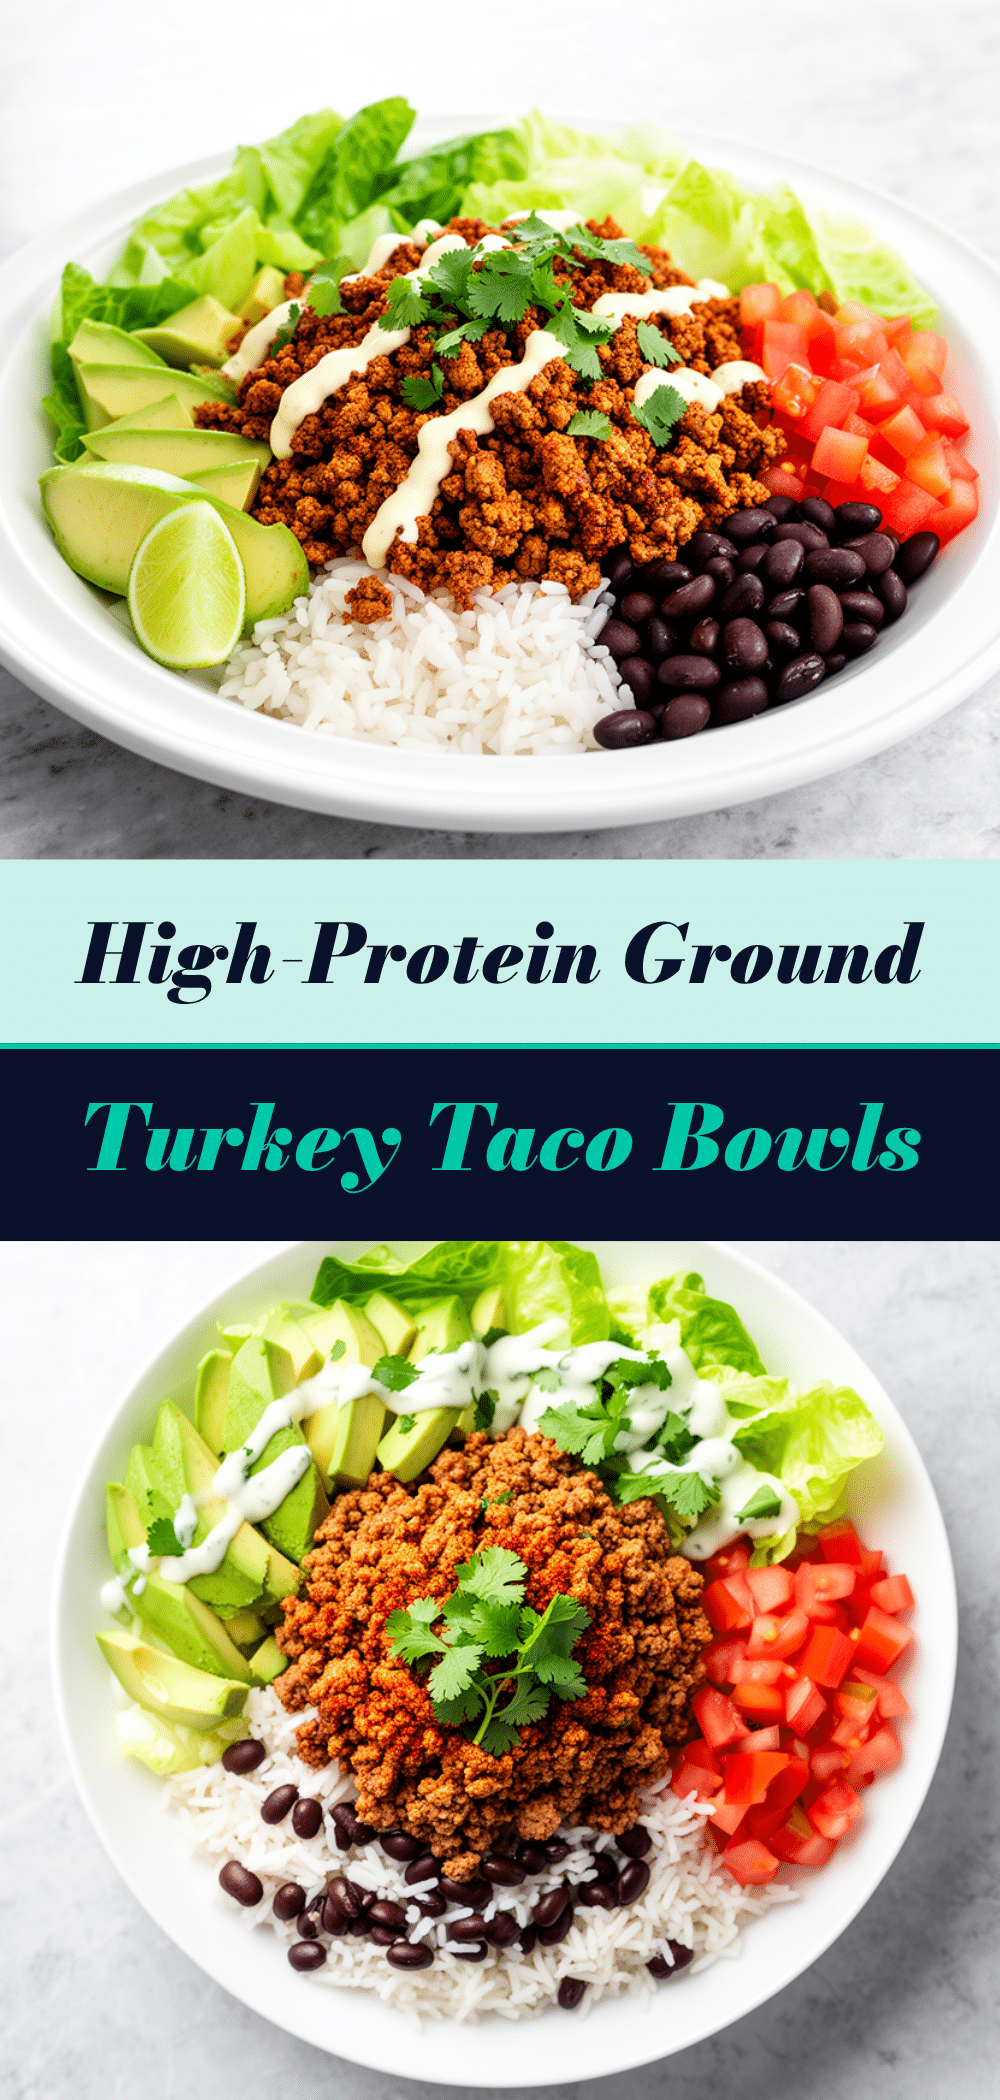
High-Protein Ground Turkey Taco Bowls
- Total Time: 25 minutes
- Yield: 4 servings 1x
Description
A lightning-fast, budget-friendly weeknight meal that delivers restaurant-quality flavor without the takeout price. Packed with lean protein and fresh toppings, these taco bowls are customizable, meal-prep friendly, and ready in about 20 minutes.
Ingredients
- 1.5 pounds ground turkey (93% lean)
- 2–3 tablespoons taco seasoning (homemade or store-bought)
- 1 medium yellow onion, diced
- 4 cloves garlic, minced
- 1.5 cups long-grain white rice (uncooked)
- 3 cups water (for rice)
- 1 can (15oz) black beans, drained and rinsed
- 1 cup corn (frozen or canned)
- 1 cup shredded cheese (Mexican blend or cheddar)
- 2 medium avocados, sliced or diced
- 2 medium Roma tomatoes, diced
- 2 cups shredded romaine lettuce
- 2 limes, juiced
- ½ cup fresh cilantro, chopped
- 1 teaspoon oil (optional)
- ½ cup water or low-sodium chicken broth (for simmering turkey)
Instructions
- Rinse 1.5 cups of long-grain white rice under cold water until clear. Combine with 3 cups of water and a pinch of salt in a saucepan.
- Bring rice to a boil, then reduce heat to low, cover tightly, and simmer for 15 minutes. Turn off heat and let sit covered for 5 minutes. Fluff with a fork.
- While rice cooks, prep vegetables: dice onion, mince garlic, dice tomatoes, and shred lettuce. Drain and rinse beans.
- Heat a large skillet over medium-high heat. Add oil if desired. Sauté diced onion for 2-3 minutes until soft.
- Add minced garlic and cook for 30 seconds until fragrant.
- Add ground turkey to the skillet, breaking it up with a spoon. Cook for 5-7 minutes until no longer pink and browned.
- Drain excess liquid if necessary. Sprinkle taco seasoning over the meat and add ½ cup water or broth. Stir to combine.
- Simmer the turkey mixture for 2-3 minutes until the sauce thickens. Taste and adjust salt if needed.
- Warm the black beans and corn in a small saucepan with a splash of water over medium heat for 2-3 minutes, or microwave for 1 minute.
- Assemble bowls by dividing rice among 4 bowls. Top with seasoned turkey, warm beans and corn, tomatoes, lettuce, and cheese.
- Top with sliced avocado, squeeze fresh lime juice over everything, and garnish with cilantro.
Notes
Do not crowd the pan when browning turkey to ensure proper browning rather than steaming. Season in layers for better flavor depth. If using brown rice, start it 10-15 minutes before the meat. Store components separately in the fridge for up to 4 days. Turkey and rice freeze well for up to 3 months.
- Prep Time: 10 minutes
- Cook Time: 15 minutes
- Category: Main Course
- Cuisine: Mexican
Nutrition
- Serving Size: 1 bowl
- Calories: 450
- Sugar: 4
- Sodium: 600
- Fat: 16
- Carbohydrates: 40
- Fiber: 8
- Protein: 32
Keywords: ground turkey, taco bowls, high protein, healthy dinner, quick meals, meal prep, weeknight dinner, gluten-free options



