It was 6:45 PM on a Tuesday in October, and the air outside was already turning crisp. Inside, my kitchen was a disaster zone of half-packed school lunches and laundry that had been sitting on the chair for three days. I was staring into the pantry, feeling that specific brand of evening panic where you know you need to provide a dessert that feels thoughtful but definitely does not involve standing over a mixing bowl for an hour.
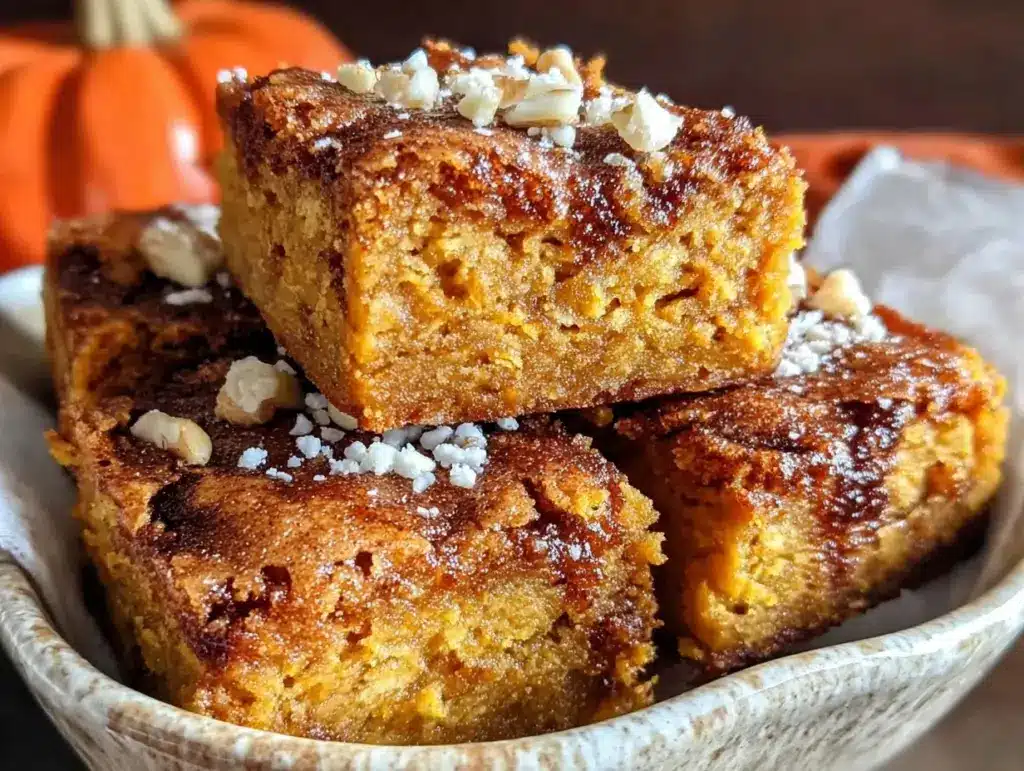
That was the moment I perfected these fall cookie bars with brown butter. They are the ultimate solution for busy parents who want to serve something warm, spiced, and genuinely delicious without spending their entire evening in the kitchen. I’ve made this batch at least twenty times since that chaotic Tuesday, and I can confidently say they are the easiest, most rewarding treat you can pull together when the clock is ticking.
There’s something about the smell of brown butter hitting the flour that makes a house feel like a home. It’s nutty, warm, and instantly comforting—perfect for those short, dark evenings when everyone just wants to curl up with a mug of something hot. And the best part? You don’t need fancy ingredients or expensive equipment. Just pantry staples, a few minutes of prep, and a baking sheet. If you’re looking for a budget-friendly way to bring the cozy fall vibe to your table, these bars are your new best friend. They freeze well, they travel well, and they disappear fast.
Why You’ll Love This Recipe
I know, another cookie bar recipe? But hear me out. These aren’t just any bars. They’re the reason I stopped buying store-bought desserts and started actually enjoying baking again. Here’s why this fall cookie bars with brown butter recipe has earned a permanent spot in my weekly rotation:
- Stupid Simple Technique — The brown butter is the only “special” step, and it’s actually easier than it sounds. You just melt the butter and wait for it to turn golden brown. It takes five minutes. I’ve made these bars while helping my youngest with math homework. It’s that hands-off.
- Pantry-Driven — You likely have everything you need right now. Flour, sugar, butter, eggs, and spices. No weird ingredients you have to drive to three different stores to find. This is true budget cooking—making something special out of what you already have.
- Perfectly Portable — Unlike traditional cookies that crumble everywhere, these bars hold their shape. I pack them in my kids’ lunchboxes, bring them to PTA meetings, and toss them in the car for road trips. They don’t get squished. They don’t melt in the heat. They just work.
- Meal-Prep Friendly — I bake a double batch on Sunday. One tray stays in the fridge for the week, and the other gets frozen. When Wednesday hits and I’m exhausted, I pull a handful out, microwave them for 15 seconds, and suddenly dinner feels like a celebration. It’s a small win that makes a big difference.
- Kid-Approved (Even the Picky Ones) — My oldest claims he doesn’t like “sweet things after dinner,” but I’ve caught him sneaking these bars at 10 PM. The brown sugar and cinnamon flavor is comforting without being overly sugary. They taste like autumn in a bite.
This is my go-to when I need to feed a crowd on a budget or just want to make my kitchen smell amazing without the stress. It’s reliable, it’s cheap, and it tastes like you put in way more effort than you actually did.
Ingredients You’ll Need
Here’s the best part: this ingredient list is shorter than most dinner recipes. I’m particular about a few things here, but mostly, you can swap these out based on what’s in your pantry. I’ve listed US and metric measurements so everyone can follow along.
For the Base and Dough
Unsalted butter (1 cup / 226g) — This is where the magic happens. You’re going to brown this. Use real butter, not margarine. The milk solids in real butter are what give you that deep, nutty flavor. I usually buy the 4-stick packs when they’re on sale.
All-purpose flour (2 ½ cups / 315g) — Standard flour works perfectly. I don’t see a need to spend extra on cake flour here. Just make sure it’s not expired, or your bars won’t rise properly.
Baking powder (1 teaspoon) — Fresh baking powder is key. If yours has been sitting in the back of the cupboard since 2022, toss it. I keep a fresh canister because it makes a huge difference in texture.
Salt (½ teaspoon) — Even though we’re using unsalted butter, you need this to balance the sweetness. Don’t skip it.
For the Sweetness
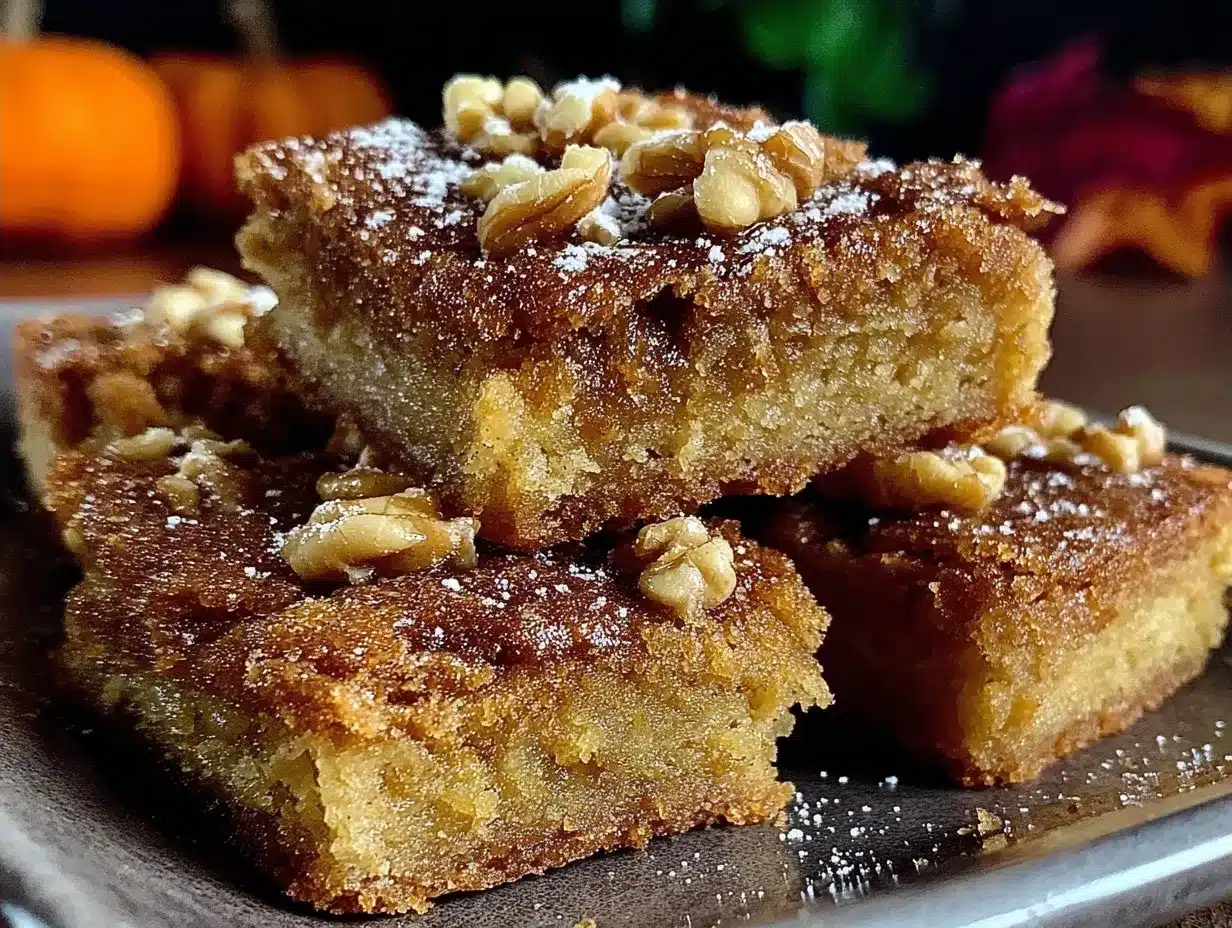
Light brown sugar (1 cup / 200g, packed) — This gives the bars their chewiness and that molasses-like depth. Dark brown sugar works too, but it’s stronger and might overpower the fall spices. Light is safer for most palates.
Granulated white sugar (½ cup / 100g) — This helps create those crispy edges. I like the contrast between the chewy center and the crisp edge.
Large egg (1, room temperature) — Room temp eggs incorporate better into the batter. If you forgot, just drop the egg in a bowl of warm water for 5 minutes. It’s a lifesaver.
Vanilla extract (1 teaspoon) — Use real vanilla, not imitation. It’s one of those cheap upgrades that makes the flavor taste expensive.
For the Fall Flavor
Pumpkin pie spice (2 teaspoons) — Or, make your own mix: 1 tsp cinnamon, ½ tsp ginger, ¼ tsp nutmeg, and a pinch of cloves. I usually just buy the pre-mixed because it’s cheaper and consistent. Adjust to taste—if you love cinnamon, add more.
Optional Add-ins — I love adding ½ cup of chopped pecans or walnuts for crunch. You can also stir in ½ cup of mini chocolate chips or white chocolate chips. I keep it simple with just the spices, but feel free to get creative. These are budget-friendly because you’re not buying fancy mix-ins.
Equipment Needed
You don’t need fancy gadgets for this. Here’s what I actually use:
Medium saucepan — For browning the butter. I use a stainless steel saucepan because I can see the color change clearly. A light-colored pan is best so you don’t burn the butter by accident.
Large mixing bowl — Any bowl that’s big enough to hold the dough. I use a 4-quart bowl.
9×9 inch baking pan — This is the standard size for bars. If you only have a 9×13, double the recipe. Don’t try to squeeze this batch into a 9×13; they’ll be too thin and dry.
Parchment paper — This is non-negotiable for me. It makes cleanup instant. Just line the pan and let the paper hang over the edges so you can lift the bars out later.
Whisk and spatula — Standard tools. No need for a mixer. You can do this entirely by hand.
Cooling rack — To cool the bars before cutting. Cutting them warm is tempting, but they’re messy. Let them set for at least 20 minutes.
How to Make It: Step-by-Step
Alright, let’s make these! I’m walking you through exactly how I do it, including the little tricks I’ve picked up over the years.
Step 1: Brown the Butter (5 minutes)
Start by melting the butter in your saucepan over medium heat. Stir it constantly. It will foam up and then settle down. Keep watching—it’s going to change from yellow to golden to a deep amber color. You’ll smell it before you see it. It smells like toasted nuts. As soon as you see the brown bits at the bottom and smell that nuttiness, take it off the heat immediately. Pour it into a heat-proof bowl and let it cool for 5 minutes. If you add it to the sugar while it’s boiling hot, you’ll cook the eggs later. Patience pays off here.
Step 2: Mix the Wet Ingredients (2 minutes)
In your large mixing bowl, whisk together the cooled brown butter, brown sugar, and white sugar. Whisk vigorously for about a minute. You want it to look glossy and combined. Then, add the egg and vanilla. Whisk again until it’s smooth. This step develops the structure, so don’t rush it.
Step 3: Add the Dry Ingredients (1 minute)
Stir in the flour, baking powder, salt, and pumpkin pie spice. Mix until just combined. Do not overmix! Once the flour disappears, stop. Overmixing makes the bars tough. I usually switch to a spatula at this point to gently fold everything together. If you’re adding nuts or chocolate chips, fold them in now.
Step 4: Bake (20-25 minutes)
Preheat your oven to 350°F (175°C). Pour the batter into your lined 9×9 pan. Spread it out evenly with your spatula. Bake for 20-25 minutes. You’ll know it’s done when the edges are golden brown and the center is set but still has a slight jiggle. A toothpick inserted in the center should come out with moist crumbs, not wet batter. If it’s clean, you might have overbaked it.
Step 5: Cool and Cut (30 minutes)
Let the bars cool in the pan for at least 20 minutes. Then, lift them out using the parchment paper and transfer to a cutting board. Cut into squares or rectangles. Dust with a little powdered sugar if you want to look fancy, but they’re delicious plain.
Expert Tips & Tricks
Here’s everything I’ve learned from making these dozens of times. These tips will save you from my mistakes.
Watch the Butter Like a Hawk
Brown butter burns fast. One minute it’s perfect, the next it’s bitter. If you smell burning, throw it out. It’s not worth ruining the whole batch. If you’re unsure, err on the side of lighter brown. You can always brown it more next time.
Room Temperature Egg
I know it’s a hassle, but a cold egg can seize the butter mixture, creating little lumps. Let your egg sit on the counter for 15 minutes before you start. It’s a small step that ensures a smooth batter.
Don’t Overbake
These bars continue to cook slightly after you take them out of the oven. Pull them when the center looks just barely set. They will firm up as they cool. Overbaked bars are dry and crumbly, and nobody wants that.
Double the Batch for Freezing
This is my #1 money-saving tip. Bake two pans. Eat one. Wrap the second pan tightly in plastic wrap and foil, then freeze it. When you need dessert, thaw it overnight in the fridge. It tastes just as good as fresh. This saves you from impulse takeout orders.
Customize the Spice
If you don’t have pumpkin pie spice, use 1 ½ teaspoons cinnamon and ½ teaspoon ginger. It’s a close enough substitute. I’ve also made these with just cinnamon and nutmeg, and they were great. Don’t let a missing ingredient stop you.
Variations & Substitutions
Once you’ve nailed the basic version, here’s how you can mix it up. I’ve tried all of these.
Apple Cinnamon Version
Fold in 1 cup of finely diced apples (Granny Smith or Honeycrisp) and increase the cinnamon to 2 teaspoons. The apples get soft and caramelized inside the bars. It’s like an apple pie in bar form.
Chocolate Chip Brown Butter
Skip the pumpkin spice and add 1 cup of semi-sweet chocolate chips. The nuttiness of the brown butter pairs perfectly with chocolate. This is my husband’s favorite variation.
Gluten-Free Option
Use a 1:1 gluten-free flour blend (like Bob’s Red Mill or King Arthur). It works perfectly in this recipe. No texture change that I can detect.
Dairy-Free Version
Use a high-quality vegan butter stick (not tub margarine) and check your chocolate chips. Most bars are naturally dairy-free if you swap the butter. I use Earth Balance sticks, and they brown beautifully.
Protein Boost
Stir in ½ cup of protein powder (vanilla or chocolate) and add 2-3 tablespoons of milk if the dough gets too dry. It’s not as tender, but it’s a decent snack option.
Serving & Storage
How to Serve
I usually serve these warm. Microwave a square for 10-15 seconds. It melts the butter slightly and makes it super soft. Serve with a glass of cold milk or a cup of coffee. For a dinner party, pair these with a simple fruit platter. They’re rich, so you don’t need much dessert.
Leftover Storage
Store in an airtight container at room temperature for up to 4 days. If your house is hot, keep them in the fridge. They’ll last longer but might get firmer. Bring to room temp before eating.
Freezing
These freeze beautifully. Wrap individual bars in plastic wrap, then put them in a freezer bag. They’ll last for 3 months. Thaw at room temp for 30 minutes. I keep a stash in the freezer for those “I have nothing” nights.
Meal Prep Tip
Make a double batch on Sunday. Keep one pan in the fridge for the week’s lunches. Keep the other frozen. This way, you always have dessert ready to go. It’s a small habit that reduces food waste and stress.
Nutrition Information
I’m not a nutritionist, but here’s the breakdown if you’re tracking. These are rich bars, so portion control matters.
Per bar (makes 16 bars):
- Calories: 220
- Fat: 12g
- Carbs: 28g
- Sugar: 18g
- Protein: 3g
Look, this is a treat. It’s not a health food. But it’s homemade, so you know exactly what’s in it. No preservatives, no weird additives. Just real ingredients. If you’re watching sugar, cut the bars in half and share. Or just enjoy them as a special weekend treat. Balance is key.
Final Thoughts
So that’s my go-to fall cookie bars with brown butter! I’ve probably talked your ear off at this point, but when you make a recipe this often, you have a lot to say about it. These bars have saved me more times than I can count. They’re my answer to “what’s for dessert” when I’m tired, broke, and don’t want to order delivery.
They’re cheap, they’re easy, and they taste like home. Make them your own! Add nuts, swap the spices, or just enjoy them plain. The best recipes are the ones you adapt to your life. If you make this, drop a comment and let me know how they turned out! I love hearing how recipes work in your kitchen.
Happy baking! And I hope your kitchen smells half as good as mine does right now.
Frequently Asked Questions
Can I use salted butter instead of unsalted?
You can, but reduce the added salt in the recipe to ¼ teaspoon. Salted butter varies in salt content, so it’s harder to control. If you use salted butter, taste the dough before baking (if you’re brave enough) to check the salt level. But honestly, unsalted is better for browning.
Why did my brown butter smell burnt?
It probably did. Brown butter burns very quickly. If it smells sharp or acrid, toss it and start over. You can’t fix burnt butter. Next time, take it off the heat a second earlier. It’s better to be slightly under-browned than burnt.
Can I bake these in a different pan size?
If you use a 9×13 pan, double the recipe. If you use an 8×8 pan, the bars will be thicker and might need 5 extra minutes in the oven. Keep an eye on the color. The baking time will change based on the pan size.
Can I make these ahead for a party?
Yes! These actually taste better the next day as the flavors meld. Bake them a day ahead, store them in an airtight container, and bring them to room temperature before serving. They travel well too, so they’re great for potlucks.
Do I have to use pumpkin pie spice?
No. You can use just cinnamon, or a mix of cinnamon, ginger, and nutmeg. Pumpkin pie spice is convenient, but it’s not mandatory. Adjust the spices to your liking. I’ve made these with just cinnamon and they were delicious.
How do I store leftovers?
Keep them in an airtight container at room temperature for up to 4 days. For longer storage, freeze them. They don’t do well in the fridge because the butter can make them stiff. Room temp is best for texture.
Pin This Recipe!
Fall Cookie Bars with Brown Butter
- Total Time: 35 minutes
- Yield: 16 servings 1x
Description
Easy, budget-friendly cookie bars featuring nutty brown butter and warm fall spices. Perfect for busy parents, these bars are simple to make, portable, and freeze well.
Ingredients
- 1 cup (226g) unsalted butter
- 2 ½ cups (315g) all-purpose flour
- 1 teaspoon baking powder
- ½ teaspoon salt
- 1 cup (200g) light brown sugar, packed
- ½ cup (100g) granulated white sugar
- 1 large egg, room temperature
- 1 teaspoon vanilla extract
- 2 teaspoons pumpkin pie spice
- Optional: ½ cup chopped pecans or walnuts
- Optional: ½ cup mini chocolate chips
Instructions
- Preheat oven to 350°F (175°C). Line a 9×9 inch baking pan with parchment paper.
- Melt the butter in a medium saucepan over medium heat. Stir constantly until it foams, settles, and turns a deep amber color with a nutty aroma. Remove from heat immediately and pour into a heat-proof bowl to cool for 5 minutes.
- In a large mixing bowl, whisk the cooled brown butter, brown sugar, and white sugar vigorously for about a minute until glossy.
- Add the egg and vanilla extract, whisking until smooth.
- Stir in the flour, baking powder, salt, and pumpkin pie spice until just combined. Do not overmix. Fold in optional add-ins if using.
- Pour batter into the prepared pan and spread evenly.
- Bake for 20-25 minutes, until edges are golden brown and the center is set but has a slight jiggle.
- Cool in the pan for at least 20 minutes before lifting out and cutting into squares.
Notes
Brown butter burns quickly, so watch it closely. Use room temperature eggs to prevent seizing. Bars continue to cook slightly after removal from the oven, so pull them when the center looks just barely set. They freeze well for up to 3 months.
- Prep Time: 10 minutes
- Cook Time: 25 minutes
- Category: Dessert
- Cuisine: American
Nutrition
- Serving Size: 1 bar
- Calories: 220
- Sugar: 18
- Sodium: 150
- Fat: 12
- Saturated Fat: 7
- Carbohydrates: 28
- Fiber: 1
- Protein: 3
Keywords: fall cookie bars, brown butter, easy dessert, budget-friendly, pumpkin spice, meal prep, kid-friendly



