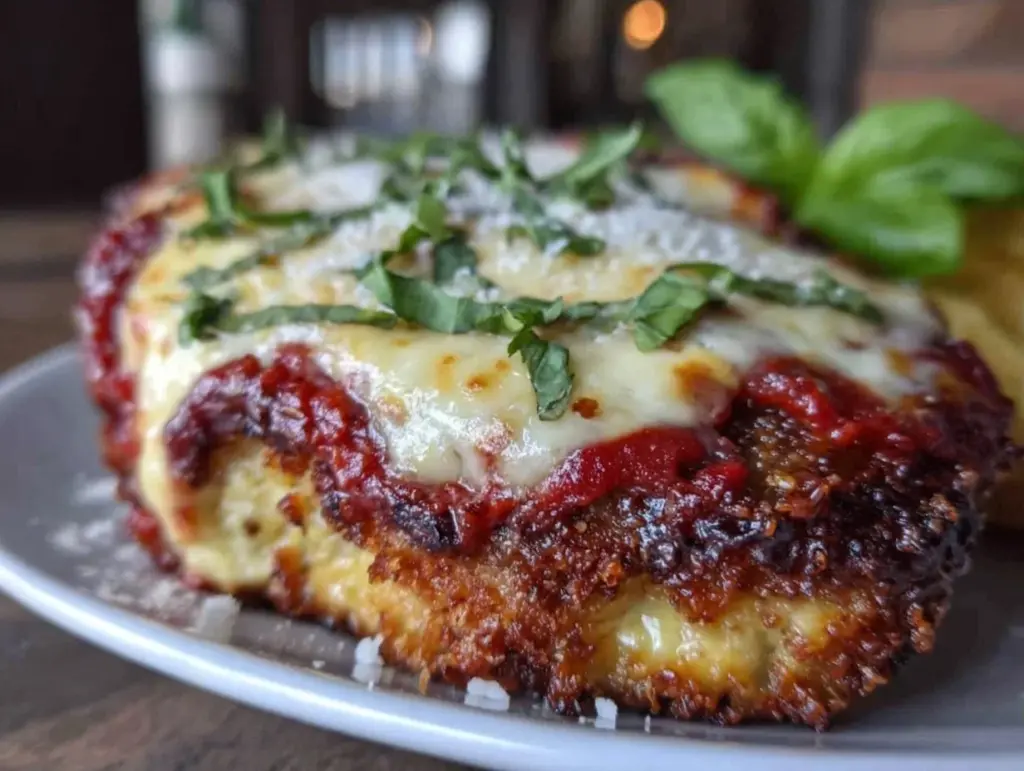
My husband walked into the kitchen last Tuesday, dropped his keys on the counter, and said, “Is that garlic and parmesan? Did you finally order takeout?” I laughed, told him no, and pointed to the oven. He looked skeptical. He’d been burned before by soggy, dry chicken cutlets that tasted like cardboard dipped in marinara. He’s been right about most of my dinner experiments, but this one? This one changed the game.
I’ve been trying to master a baked chicken parmesan that doesn’t require deep frying for months. I wanted that crunch without the mess of hot oil, and I wanted it to be cheap enough to make on a Friday night when the grocery budget is tight. After testing this recipe at least eight times (yes, eight—my freezer is full of test batches), I finally nailed it. The secret isn’t fancy equipment or expensive ingredients. It’s the panko crust and the baking rack trick. It’s crispy, it’s golden, it’s comforting, and it costs less than half of what you’d pay at a restaurant.
This baked chicken parmesan with crispy panko crust has become our go-to weeknight dinner. It’s the kind of meal that makes my kids ask for seconds, leaves my husband happy, and keeps the pantry stocked with things I actually buy regularly. If you’re tired of dry chicken or soggy breading, stick with me. I’m going to show you exactly how to get that restaurant-quality crunch at home, on a budget.
Why You’ll Love This Chicken Parmesan Recipe
Look, I know there are a million chicken parmesan recipes out there. Why make this one? Because it’s the only one that actually works for busy families without costing a fortune. Here’s why this version has earned a permanent spot in our weekly rotation:
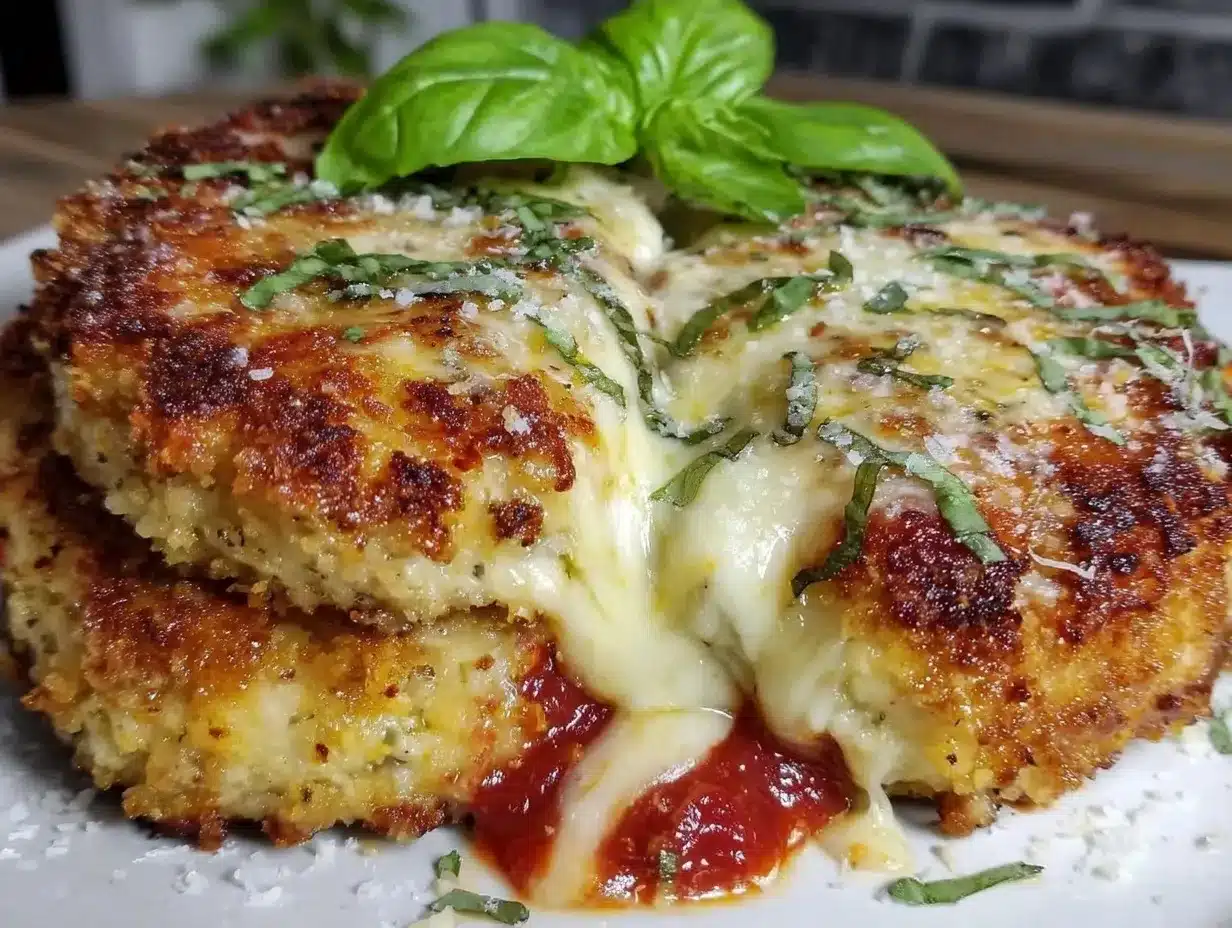
- Actually Crispy, Not Soggy — Most baked versions turn mushy after ten minutes in the oven. Not this one. The panko breadcrumb mixture creates a shatteringly crisp crust that stays crunchy even under the sauce. I’ve tested it with three different types of breadcrumbs, and panko is the only one that holds up.
- Way Cheaper Than Takeout — Ordering chicken parmesan for a family of four easily runs $40-$50. Making this at home costs about $15-$18, depending on sales. That’s a huge savings for a meal that tastes just as good, if not better.
- Fast Weeknight Friendly — Yes, you have to dredge the chicken, but it takes about 20 minutes of active work. The rest is just baking. I can get this on the table in 45 minutes, which is rare for a “fancy” dinner.
- Kid-Approved Crunch — My picky eater who usually only eats nuggets loves this. The crunchy coating is familiar and fun, and the melted cheese on top is a guaranteed win. No hiding vegetables here, just honest, delicious comfort food.
- Great for Meal Prep — These freeze beautifully. I often double the batch, bake them fully, and freeze them for those nights when I’m too tired to cook. Reheats in 15 minutes and tastes fresh.
This isn’t just a recipe; it’s a stress-reliever. When I’m overwhelmed with work and the kids are hungry, this is the dinner that saves me. It’s reliable, it’s tasty, and it makes everyone feel like they’re eating something special.
Ingredients You’ll Need
Here’s the best part: you probably already have most of these items in your kitchen. This recipe relies on pantry staples and affordable cuts of chicken. I’m particular about two things here: the breadcrumbs and the cheese. Don’t skimp on quality there, but you don’t need to buy anything fancy.
For the Chicken & Crust
Chicken breasts (4 large, about 1.5 lbs / 700g) — I use boneless, skinless chicken breasts. They’re lean and cook evenly. If you’re on a tight budget, look for family packs on sale. You can also use chicken thighs for a juicier result, though the cooking time will be slightly longer.
Panko breadcrumbs (1.5 cups / 120g) — This is non-negotiable. Regular breadcrumbs are too fine and get soggy. Panko has those flat, flaky shards that create air pockets for crunch. Japanese-style panko is best, but any brand works. Check the Asian aisle or the baking aisle.
All-purpose flour (½ cup / 60g) — This helps the egg wash stick to the chicken. Plain, simple stuff from the baking aisle.
Eggs (2 large) — Beaten with a fork. Room temperature works best, but straight from the fridge is fine. Whisk them well so there are no lumps.
Italian seasoning (1 tablespoon) — A mix of dried oregano, basil, and thyme. I buy a large jar because I use it in chicken and dumplings and other dishes too. If you don’t have it, use ½ teaspoon each of dried basil, oregano, and thyme.
Salt and black pepper — To taste. Season the chicken well before dredging.
Garlic powder (1 teaspoon) — Adds depth to the crust. Fresh garlic can burn in the oven, so powder is safer here.
For the Sauce & Topping
Marinara sauce (2 cups / 500g) — I use a good-quality jarred sauce like Rao’s or Classico, or my homemade honey garlic chicken base if I’m feeling fancy. Check for added sugar; some brands are too sweet. You want savory and tangy.
Mozzarella cheese (2 cups / 200g, shredded) — Buy a block and shred it yourself. Pre-shredded cheese has cellulose that prevents it from melting smoothly. You want that gooey, stretchy melt, not grainy cheese.
Parmesan cheese (½ cup / 50g, grated) — Freshly grated from a block is best. It adds a salty, nutty kick that balances the sweet sauce.
Extra virgin olive oil (2 tablespoons) — For brushing the top to help it brown. You don’t need much; just a light drizzle.
Fresh basil (optional, for garnish) — Adds color and freshness. Dried basil works in a pinch, but fresh is nicer.
Substitutions & Tips
- Gluten-free? Use gluten-free panko breadcrumbs. They’ve gotten much better in recent years. I’ve used brands like Schär and they work well.
- Dairy-free? Skip the cheese or use a vegan mozzarella alternative. The crust will still be crunchy without the cheese topping.
- Cheaper chicken? Use chicken thighs. They’re often cheaper and stay juicier. Just adjust the baking time by 5 minutes.
Equipment Needed
You don’t need fancy gadgets for this. Here’s what I actually use, and what you can skip.
Baking sheet — A standard 18×13 inch sheet pan. I use two if I’m making a double batch. Line it with parchment paper for easy cleanup. I hate scrubbing baked-on cheese.
Wire cooling rack — This is the secret weapon. Place the rack on top of the baking sheet. It allows air to circulate under the chicken, keeping the bottom crispy. If you don’t have one, just place the chicken directly on the parchment, but brush the bottom with oil too.
Three shallow dishes — For the dredging station: one for flour, one for eggs, one for breadcrumbs. You can use pie plates or shallow bowls.
Meat mallet or rolling pin — To pound the chicken breasts to even thickness. Uneven chicken cooks unevenly, leading to dry edges and raw centers. I use a heavy skillet if I don’t have a mallet.
Grater — For the cheese. A box grater works fine. Microplane is faster but not necessary.
Tongs — For flipping the chicken if needed, though this recipe mostly bakes undisturbed.
How to Make It: Step-by-Step
Alright, let’s get cooking! I’m walking you through exactly how I do it, including the little tricks I’ve picked up over time. This process is straightforward, but attention to detail makes the difference between good and great.
Step 1: Prep the Chicken (5 minutes)
Start by preheating your oven to 400°F (200°C). Line a baking sheet with parchment paper and place a wire rack on top. This setup is crucial for crispiness. Next, take your chicken breasts and place them between two sheets of plastic wrap or in a zip-top bag. Use a meat mallet, rolling pin, or heavy pan to pound them to an even ½-inch thickness. This ensures they cook evenly. Season both sides generously with salt, pepper, and half of the Italian seasoning.
Step 2: Set Up Your Dredging Station (3 minutes)
Get three shallow dishes ready. In the first, mix the flour with the remaining Italian seasoning and garlic powder. In the second, beat the eggs with a splash of milk (optional, for richness) and a pinch of salt. In the third, combine the panko breadcrumbs with a little salt and pepper. Having everything prepped before you touch the chicken makes the process smooth and less messy.
Step 3: Bread the Chicken (5 minutes)
Dredge each chicken breast in the flour mixture, shaking off any excess. Then dip it into the egg wash, letting the excess drip off. Finally, press it firmly into the panko breadcrumbs. Use your hands to press the crumbs onto the chicken so they stick well. Place the breaded chicken on a separate plate. Repeat with the remaining chicken. You want a thick, even coating of crumbs.
Step 4: Bake the Crust (15 minutes)
Arrange the breaded chicken on the wire rack. Lightly spray or brush the tops with olive oil. This helps the panko turn golden brown in the oven. Bake for 15 minutes. The chicken should be starting to firm up, and the crust should be lightly golden. Do not skip this step—baking the crust first prevents it from getting soggy under the sauce.
Step 5: Add Sauce and Cheese (2 minutes)
Remove the pan from the oven. Spoon about ¼ cup of marinara sauce over each chicken breast. Spread it gently to the edges, but don’t drown it. Sprinkle a generous amount of shredded mozzarella and a little parmesan over the sauce. Return to the oven and bake for another 10-12 minutes, or until the cheese is bubbly and golden, and the chicken reaches an internal temperature of 165°F (74°C).
Step 6: Rest and Serve (5 minutes)
Remove from the oven and let the chicken rest for 5 minutes. This allows the juices to redistribute, keeping the meat moist. Garnish with fresh basil if you have it. Serve immediately with your favorite sides.
Total Time: About 45 minutes (15 minutes active, 30 minutes baking)
Expert Tips & Tricks
Here’s everything I’ve learned from making this dozens of times. These tips will save you from my mistakes.
Don’t Skip the Rack
I know it’s one more dish to wash, but placing the chicken on a wire rack is the single most important step for crispiness. Without it, the bottom of the chicken steams in its own juices and gets soggy. If you don’t have a rack, flip the chicken halfway through baking and brush the bottom with oil.
Pound Evenly
Chicken breasts are naturally uneven—thick at one end, thin at the other. If you bake them as-is, the thin end dries out before the thick end cooks. Pounding them to an even thickness ensures uniform cooking. It takes 2 minutes and makes a huge difference.
Press the Breadcrumbs
When breading, don’t just sprinkle the panko on top. Press it in with your fingers. You want it to adhere firmly. If the crumbs fall off in the oven, you lose that crunch. A gentle but firm press works best.
Use Block Cheese
Pre-shredded cheese contains anti-caking agents that prevent it from melting smoothly. You’ll end up with dry, separate shreds instead of a gooey blanket of cheese. Buy a block of mozzarella and shred it yourself. It takes 3 minutes and is worth every second.
Don’t Over-Sauce
It’s tempting to drown the chicken in sauce, but too much moisture will soften the crust. Stick to about ¼ cup per breast. You want to taste the crispy chicken, not just the sauce.
Variations & Substitutions
Once you’ve nailed the basic version, here’s how you can mix it up. I’ve tried all of these, and they all work well.
- Chicken Parm Sliders — Use small chicken cutlets, top with sauce and cheese, and bake. Serve on slider buns with a little extra sauce. Great for kids’ lunches or parties.
- Veggie Parmesan — Swap the chicken for thick slices of eggplant or zucchini. Bread them the same way and bake. Add a dollop of ricotta instead of mozzarella for a different flavor profile.
- Spicy Parmesan — Add red pepper flakes to the panko mixture or use a spicy marinara sauce. Adds a nice kick without overwhelming the dish.
- Lemon Herb — Add lemon zest to the breadcrumbs and serve with a squeeze of fresh lemon juice. Brightens up the rich flavors.
- Gluten-Free — Use gluten-free panko and ensure your marinara is certified gluten-free. Most jars are, but check the label.
Serving & Storage
How to Serve: I usually serve this with spaghetti, garlic bread, or a simple green salad. It pairs well with roasted vegetables like broccoli or asparagus. For a lighter meal, serve over zucchini noodles.
Storage: Store leftovers in an airtight container in the refrigerator for up to 4 days. The crust will soften slightly, but the flavor remains great.
Reheating: To keep the crust crispy, reheat in the oven or air fryer at 375°F for 10-12 minutes. Avoid the microwave, as it will make the breading soggy. If you must use the microwave, do it for short bursts and follow up with a quick toast in a dry skillet.
Freezing: You can freeze the baked chicken parmesan. Let it cool completely, then wrap individually in plastic wrap and aluminum foil. Freeze for up to 3 months. Reheat from frozen in the oven at 375°F for 20-25 minutes.
Meal Prep Tip: Double the batch. Make twice as much chicken, bake them all, and freeze half. When you’re too tired to cook, just thaw one piece and reheat. It’s a lifesaver for busy weeks.
Nutrition Information
I’m not a nutritionist, but here’s the breakdown if you’re tracking. This is per serving (1 chicken breast with sauce and cheese), based on 4 servings.
- Calories: 450
- Protein: 40g
- Carbs: 25g
- Fat: 20g
- Fiber: 2g
- Sugar: 6g
- Sodium: 800mg
This is a protein-rich meal with moderate carbs. The sodium is higher due to the cheese and sauce, so if you’re watching salt, use low-sodium marinara and reduce the added salt in the breading. Overall, it’s a balanced, satisfying dinner that fits into most diets.
Final Thoughts
So that’s my go-to baked chicken parmesan! It’s become a staple in our house because it’s reliable, delicious, and budget-friendly. I love that I can make something that feels fancy without spending hours in the kitchen or a fortune at the store. My kids love the crunch, my husband loves the taste, and I love that it’s one less thing to worry about on busy weeknights.
Make it yours! Try different herbs, swap the sauce, or add some veggies. The best recipes are the ones you adapt to your family’s tastes. If you make this, drop a comment and let me know how it turned out! I love hearing how recipes work in your kitchen. And if something doesn’t work, tell me that too—I’m here to help troubleshoot.
Happy cooking! And I hope your kitchen smells half as good as mine does right now.
Frequently Asked Questions
Can I use chicken thighs instead of breasts?
Yes! Chicken thighs are juicier and often cheaper. Use boneless, skinless thighs and adjust the baking time. They may need 5 extra minutes in the oven. Just make sure they reach 165°F internally.
Why is my chicken parmesan soggy?
This usually happens if the chicken isn’t poned evenly, if the breading isn’t pressed firmly, or if you add too much sauce. Using a wire rack is also crucial. If your crust is soggy, try baking it longer before adding the sauce, or use less sauce next time.
Can I make this ahead of time?
You can bread the chicken and store it in the fridge for up to 24 hours before baking. Just cover it tightly. Assemble with sauce and cheese right before baking. This saves time on busy nights.
Is this recipe gluten-free?
Not as written, but it can be. Use gluten-free panko breadcrumbs and check your marinara sauce for gluten. Most sauces are gluten-free, but some thickening agents contain wheat.
How do I reheat leftovers without them getting dry?
Avoid the microwave. Reheat in the oven at 375°F for 10-12 minutes, or in an air fryer for 5-7 minutes. This restores the crispiness. If you must use the microwave, cover with a damp paper towel to add moisture, but expect a softer crust.
Pin This Recipe!
Baked Chicken Parmesan: Best Budget-Friendly Family Dinner
- Total Time: 45 minutes
- Yield: 4 servings 1x
Description
A crispy, budget-friendly baked chicken parmesan recipe that uses a panko crust and wire rack method to achieve restaurant-quality crunch without deep frying.
Ingredients
- 4 large boneless, skinless chicken breasts (about 1.5 lbs / 700g)
- 1.5 cups (120g) panko breadcrumbs
- ½ cup (60g) all-purpose flour
- 2 large eggs, beaten
- 1 tablespoon Italian seasoning
- 1 teaspoon garlic powder
- Salt and black pepper to taste
- 2 cups (500g) marinara sauce
- 2 cups (200g) shredded mozzarella cheese
- ½ cup (50g) grated parmesan cheese
- 2 tablespoons extra virgin olive oil
- Fresh basil for garnish (optional)
Instructions
- Preheat oven to 400°F (200°C). Line a baking sheet with parchment paper and place a wire rack on top.
- Place chicken breasts between plastic wrap or in a zip-top bag and pound to an even ½-inch thickness. Season both sides with salt, pepper, and half of the Italian seasoning.
- Set up three shallow dishes: one with flour mixed with remaining Italian seasoning and garlic powder; one with beaten eggs; one with panko breadcrumbs mixed with salt and pepper.
- Dredge each chicken breast in the flour mixture, shaking off excess. Dip into the egg wash, then press firmly into the panko breadcrumbs to coat evenly.
- Arrange breaded chicken on the wire rack. Lightly brush or spray tops with olive oil.
- Bake for 15 minutes until the crust is lightly golden and chicken is firming up.
- Remove from oven. Spoon about ¼ cup marinara sauce over each breast. Sprinkle with mozzarella and parmesan cheese.
- Return to oven and bake for another 10-12 minutes until cheese is bubbly and golden, and chicken reaches an internal temperature of 165°F (74°C).
- Let rest for 5 minutes before serving. Garnish with fresh basil if desired.
Notes
Use a wire rack to ensure the bottom of the chicken stays crispy. Pound chicken to even thickness for uniform cooking. Shred cheese from a block for better melting. Avoid microwaving leftovers to prevent soggy breading; reheat in oven or air fryer.
- Prep Time: 15 minutes
- Cook Time: 30 minutes
- Category: Main Course
- Cuisine: Italian
Nutrition
- Serving Size: 1 chicken breast wit
- Calories: 450
- Sugar: 6
- Sodium: 800
- Fat: 20
- Carbohydrates: 25
- Fiber: 2
- Protein: 40
Keywords: baked chicken parmesan, budget dinner, family dinner, crispy chicken, panko crust, weeknight meals, gluten-free option



