Last Tuesday, I was in a bind. My daughter’s school had a surprise “dessert for everyone” day, and I was stuck at work until 6:30 PM. The grocery store was closed, and my pantry was basically just empty cereal boxes and a sad jar of pickles. I had one option: improvise with whatever was hiding in the back of my freezer.
There, tucked behind the frozen peas, was a bag of blackberries that had been there since summer. They were a little frosty, but they smelled sweet. I also had butter, flour, sugar, and oats. I didn’t have time to make a pie crust (which I’m not great at anyway). I didn’t have time to wait for a cake to cool. So, I threw everything into a square pan and hoped for the best.
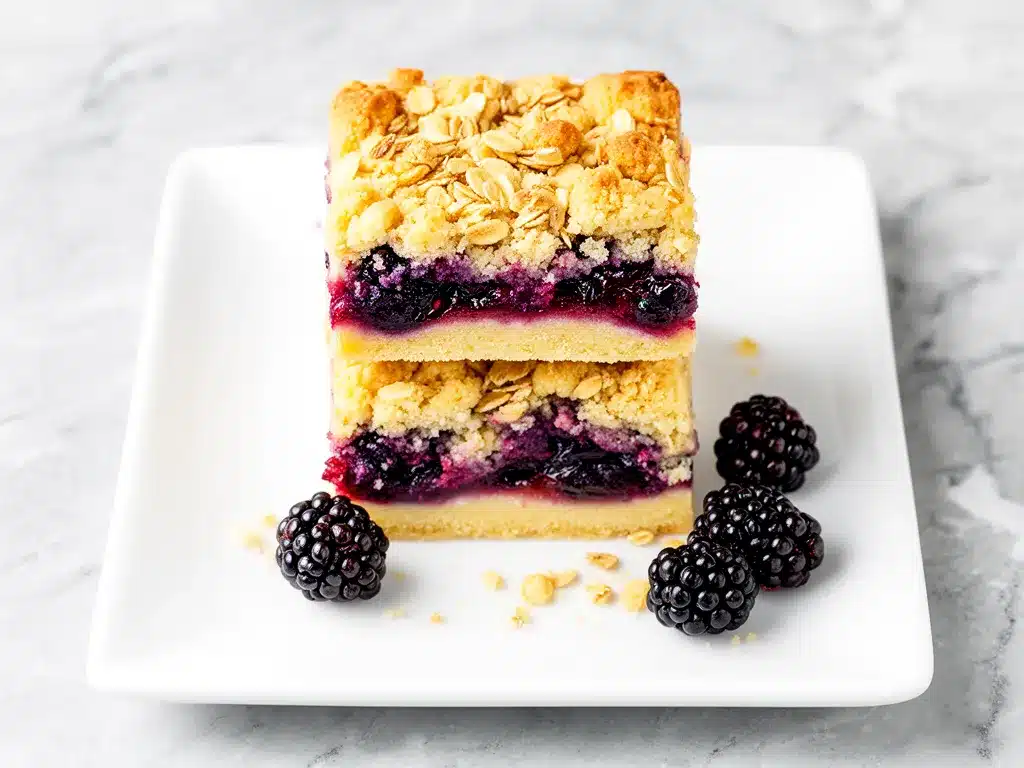
Twenty minutes later, the smell hit me. It wasn’t just “okay.” It was incredible. A deep, fruity aroma mixed with that rich, toasted butter scent that makes your stomach growl before you even take a bite. When I pulled the pan out, the top was golden and crumbly, and the filling was bubbling like crazy.
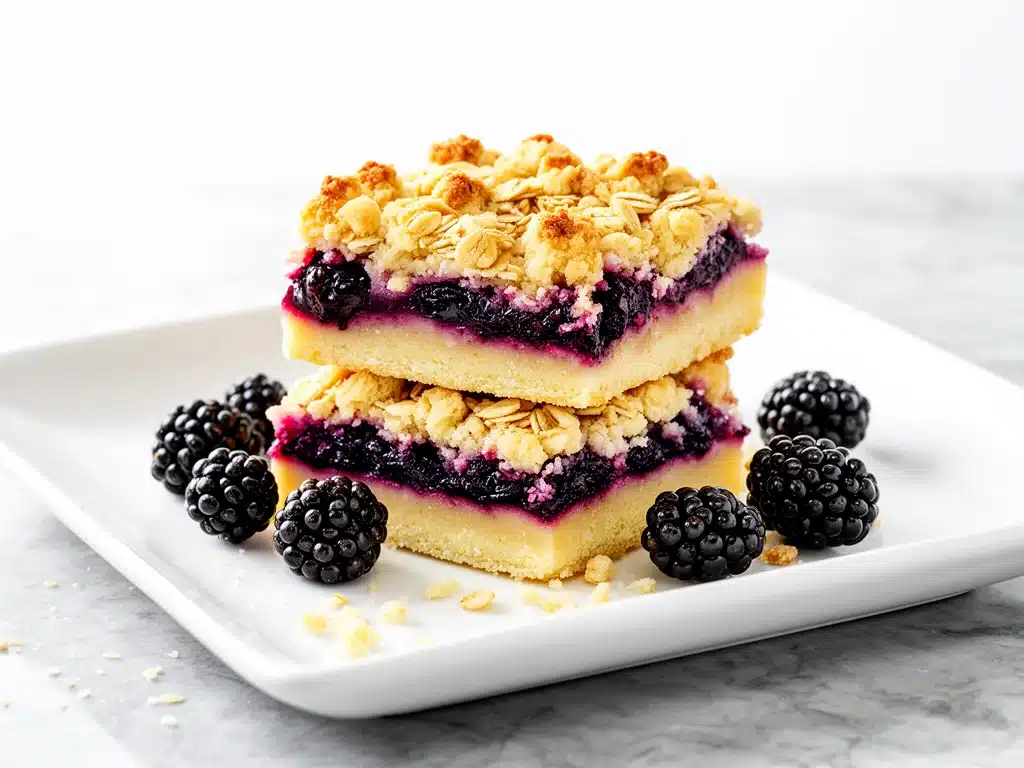
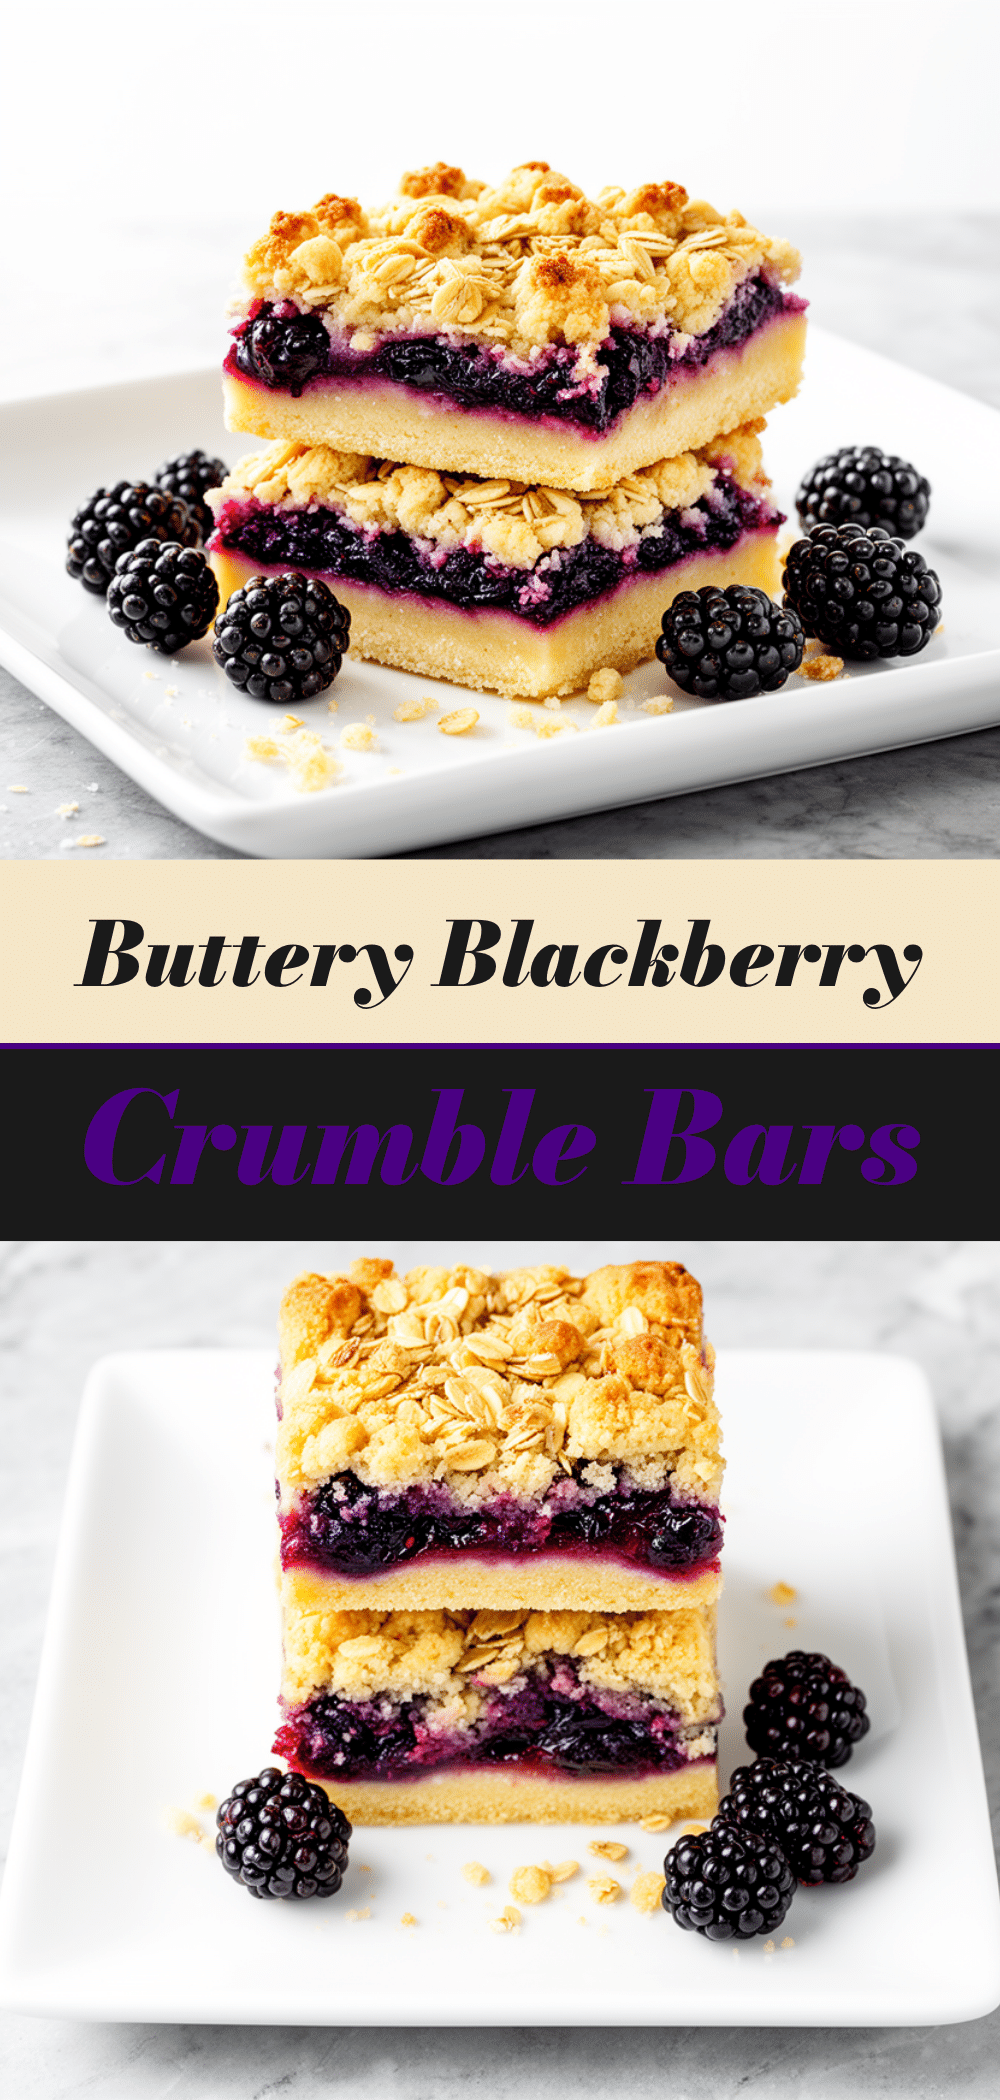
My daughter came home, saw me standing there with a square pan of warm dessert, and asked if I’d bought them. I told her I made them in 20 minutes with stuff we already had. She didn’t believe me until she tasted it. Now, these **Buttery Blackberry Crumble Bars** are my emergency go-to. They’re sweet, tart, buttery, and require zero special equipment. If you’re tired of complicated desserts that take all weekend, this is the one you need.
Why You’ll Love These Blackberry Crumble Bars
There are about ten reasons I keep making these, but let’s be real: you’re here because you want dessert that actually works on a Tuesday night. Here’s why this recipe has earned a permanent spot in my weekly rotation:
**Stupid Simple** — Seriously, if you can melt butter and mix flour, you can make these. There’s no rolling pins, no complex layering, and no waiting for oven racks to center themselves. I’ve walked my teenage son through it over FaceTime while he was at college.
**Lightning Fast** — 20 minutes from start to finish. That’s it. I make these on weeknights when I get home exhausted and want something sweet but don’t have the energy to wash a mountain of dishes.
**Pantry-Friendly** — You probably have 90% of these ingredients already. I keep blackberry jam or frozen berries on hand specifically for these bars because they come together so fast.
**Crowd-Pleaser** — I’ve served these to my vegetarian sister, my gluten-free neighbor (with a swap), and my husband who claims he “doesn’t like fruit desserts.” He ate three. In one sitting.
**Makes Amazing Leftovers** — Actually tastes better the next day. The flavors meld together, and the crumble gets even crunchier. I deliberately make extra for breakfast with a dollop of Greek yogurt (seriously, try it).
**Budget-Smart** — Feeds 9-12 people for under $10. That’s less than one slice of cheesecake at a fancy restaurant.
This is my go-to when I need dinner to just work, or when I need a last-minute treat that looks like I put in more effort than I actually did. No complicated techniques, just reliable, delicious food that makes everyone happy.
Ingredients You’ll Need
Here’s the best part: you probably have most of this already. I’m particular about three ingredients here, and I’ll tell you exactly why.
**For the Crumble Topping:**
**Unsalted butter** (½ cup / 115g, melted) — This is the star. Don’t use margarine. Use real, salty butter if you prefer, but reduce the added salt in the recipe. Melted butter makes the topping crispier and faster.
**All-purpose flour** (1 cup / 120g) — Standard stuff. I use Gold Medal because it’s consistent. Self-rising flour will make them too cakey, so stick to plain.
**Old-fashioned rolled oats** (½ cup / 45g) — These give the crumble texture. Instant oats get too mushy. Don’t skip this; it’s what makes it a “crumble” and not just a cookie bar.
**Brown sugar** (½ cup / 100g, packed) — Gives that deep, molasses-rich flavor. Light or dark both work, but dark adds a bit more depth.
**Granulated sugar** (¼ cup / 50g) — Balances the brown sugar so it’s not too heavy.
**Cinnamon** (1 teaspoon) — Warmth is key. Don’t skimp.
**Salt** (¼ teaspoon) — Cuts the sweetness. Crucial.
**For the Filling:**
**Blackberries** (2 cups / 300g, fresh or frozen) — Fresh is best, but frozen works perfectly fine. If you use frozen, don’t thaw them first—they’ll turn to mush.
**Sugar** (¼ cup / 50g) — To draw out the juices.
**Cornstarch** (1 tablespoon) — Thickens the juices so you don’t get a soggy bottom. This is non-negotiable for good bars.
**Lemon juice** (1 teaspoon) — Brightens up the dark berries. Adds a little zing.
**Personal Tips:**
– **Frozen vs. Fresh**: I buy frozen blackberries in bulk when they’re cheap. They’re picked at peak ripeness and flash-frozen. Fresh berries out of season are often mealy and bland.
– **Butter Quality**: Since butter is the main flavor, use good quality. I like Kerrygold or Plugra.
– **Substitutions**: No oats? Use more flour. No cornstarch? Use tapioca starch or arrowroot powder.
Equipment Needed
You don’t need fancy equipment for this. Here’s what I actually use.
**8×8 inch baking pan** — I use a glass Pyrex pan because I can see the bottom browning. Metal works too, but glass gives more even heat. Grease it well!
**Mixing bowls** — Two medium bowls. One for the crumble, one for the fruit.
**Whisk** — For mixing the dry ingredients and coating the berries.
**Spatula** — For spreading the filling.
**Parchment paper** — I line the pan with parchment, leaving an overhang on the sides. This is the #1 reason these bars come out clean. No scrubbing pans later.
**Optional but nice:**
– **Microplane** — For zesting a lemon if you want extra citrus aroma.
– **Measuring cups/spoons** — Standard stuff.
How to Make It: Step-by-Step
Alright, let’s make this! I’m walking you through exactly how I do it, including the little tricks I’ve picked up.
**Step 1: Prep Your Pan and Oven (2 minutes)**
Preheat your oven to 350°F (175°C). Line your 8×8 inch baking pan with parchment paper, leaving a “handle” on the long sides so you can lift the bars out later. Spray the parchment with non-stick spray or rub it with a little butter. This prevents sticking, which is the enemy of good crumble bars.
**Step 2: Make the Crumble Topping (5 minutes)**
In a medium bowl, mix the flour, rolled oats, brown sugar, granulated sugar, cinnamon, and salt. Pour in the melted butter. Use a fork or your fingers to mix it until it looks like coarse sand with some larger clumps. Don’t overmix—it should still be crumbly. Set aside.
**Step 3: Prepare the Blackberry Filling (3 minutes)**
In a separate bowl, toss the blackberries with the ¼ cup sugar, cornstarch, and lemon juice. Gently fold them so the berries don’t break too much. The cornstarch will turn into a thick syrup as it bakes, holding the juices in place.
**Step 4: Assemble the Bars (2 minutes)**
Spread half of the crumble mixture evenly into the bottom of the prepared pan. Press it down lightly with your fingers—it doesn’t need to be a solid crust, just a base layer. Pour the blackberry mixture over the bottom crumble. Spoon the remaining crumble on top, covering the berries as much as possible. You don’t need to be perfect; rustic looks good here.
**Step 5: Bake (20-25 minutes)**
Place the pan in the oven and bake for 20-25 minutes. You’ll know it’s done when the top is golden brown and the filling is bubbling vigorously through the crumble. If the top browns too fast, tent it with foil for the last 5 minutes.
**Step 6: Cool Completely (30+ minutes)**
This is the hardest part. Let the bars cool in the pan on a wire rack for at least 30 minutes, preferably 1 hour. If you cut them while hot, the filling will be runny and they’ll fall apart. Patience pays off.
**Step 7: Slice and Serve**
Lift the bars out using the parchment handle. Slice into 9 or 12 squares. Serve warm or at room temperature.
Total Time: About 35 minutes (5 active, 30 baking/cooling)
Expert Tips & Tricks
Here’s everything I’ve learned from making this dozens of times. These tips will save you from my mistakes.
**Don’t Skip the Cornstarch**
I once forgot the cornstarch and ended up with a soupy mess that soaked into the bottom crust. The cornstarch is what makes the filling glossy and firm. It’s tiny, but it matters.
**Use Frozen Berries (Yes, Really)**
I know people say fresh is better, but frozen blackberries are often sweeter and have more intense flavor because they’re picked at peak ripeness. They also release less water if you don’t thaw them. Just dump them in frozen.
**Press the Bottom Layer**
When you put the first half of the crumble in the pan, press it down firmly. This creates a barrier between the wet fruit and the dry pan, preventing a soggy bottom.
**Cool Completely**
I know you want to eat them now. But if you cut them hot, they’re just hot fruit mush. Let them set. The texture changes dramatically as they cool.
**Common Mistakes (and how to avoid them):**
**Mistake: Soggy bottom**
Fix: Press the bottom crumble layer firmly. Also, make sure your oven is fully preheated. A cool oven steams the crust instead of baking it.
**Mistake: Burnt top**
Fix: If your oven runs hot, check at 15 minutes. If it’s browning too fast, cover with foil.
**Mistake: Too dry**
Fix: Add an extra ½ cup of berries or a splash of water to the filling if your berries are very dry.
**Pro Tricks I’ve Learned:**
**For Extra Crunch**
Add ¼ cup of chopped pecans or walnuts to the crumble mixture. It adds a nice nutty contrast to the sweet berries.
**For Restaurant-Quality Finish**
Serve a warm bar with a scoop of vanilla ice cream or a dollop of whipped cream. The hot/cold contrast is addictive.
**Make-Ahead Strategy**
These store beautifully. Keep them in an airtight container at room temperature for up to 3 days. They actually taste better on day two as the flavors meld.
Variations & Substitutions
Once you’ve nailed the basic version, here’s how you can mix it up. I’ve tried all of these.
**Blueberry Lemon Version**
Swap blackberries for blueberries. Add lemon zest to the crumble instead of cinnamon. Bright and tart.
**Raspberry Dark Chocolate**
Use raspberries and add ½ cup dark chocolate chips to the crumble. Melty pockets of chocolate in berry bars? Yes please.
**Apple Cinnamon**
Use 3 cups diced apples instead of berries. Increase cinnamon to 2 teaspoons. Add a tablespoon of apple cider to the filling. Tastes like pie.
**Gluten-Free**
Use a 1:1 gluten-free flour blend and certified gluten-free oats. Everything else is naturally GF. I’ve used Bob’s Red Mill and it works great.
**Dairy-Free**
Replace butter with coconut oil (solid, melted) or a vegan butter stick. Use maple syrup instead of brown sugar if you want to avoid refined sugar.
**Different Proteins:**
– **Protein Powder**: Add 1 scoop vanilla protein powder to the crumble for a breakfast-ier bar.
– **Nut Butter**: Swirl a tablespoon of almond butter into the filling before baking.
Serving & Storage
I usually serve these straight from the pan at the dinner table—it looks rustic and stays warm. But here are other ways I’ve enjoyed them:
**Side Dishes:**
– A scoop of vanilla ice cream (classic)
– Greek yogurt (for a protein boost, similar to my Greek yogurt blueberry muffins)
– Whipped cream
– A drizzle of warm caramel sauce
**Toppings Bar:**
When I have guests, I put out: extra cinnamon, crushed nuts, chocolate chips, and fresh mint. Everyone customizes their bowl.
**Wine Pairing:**
Not a wine expert, but a sweet Riesling or a light Pinot Noir works great with these.
**Storage Instructions:**
**Refrigerator:**
Store in an airtight container for up to 4 days. The crumble will soften slightly, but they’re still good cold.
**Room Temperature:**
Keep in a sealed container for up to 3 days. They stay moist and tasty.
**Freezing:**
Yes, these freeze well! Freeze the whole pan, then slice. Or slice first and freeze individual bars on a baking sheet, then bag them. Thaw at room temperature. They taste almost as good as fresh.
**Reheating:**
Warm in the microwave for 20-30 seconds to soften the crumble and warm the fruit. Or bake at 350°F for 5 minutes for a fresh-out-of-the-oven taste.
**Pro tip:** If leftovers are drying out, cover with a damp paper towel when microwaving. It steams them just enough to keep them moist.
Nutrition Information
I’m not a nutritionist, but here’s the breakdown if you’re tracking.
**Per Serving (based on 12 bars):**
– Calories: 280
– Protein: 3g
– Carbs: 42g
– Fiber: 3g
– Sugar: 24g
– Fat: 12g
– Saturated Fat: 7g
– Cholesterol: 28mg
– Sodium: 120mg
– Calcium: 20mg
**What’s Good:**
– Fiber from oats and berries
– Antioxidants from blackberries
– Portable snack
**What to Know:**
– Higher in sugar from the topping and fruit
– Contains gluten and dairy
– Moderate calories
**My Take:**
“Look, this is a dessert bar with butter, sugar, and flour. It’s not a health food. But it’s way better than store-bought bars, and I know exactly what’s in it. When I want to make it lighter, I reduce the sugar in the crumble by half and load up on berries. But usually? I just enjoy a square and move on.”
**Dietary Notes:**
– Contains: gluten, dairy
– Can be made: gluten-free, vegetarian
– Not suitable for: vegan (without modifications), dairy-free (without modifications)
Final Thoughts
So that’s my go-to **Buttery Blackberry Crumble Bars**! I’ve probably talked your ear off at this point, but when you make a recipe this often, you have a lot to say about it.
This has saved weeknight desserts more times than I can count. It’s my answer to “what’s for dessert” when I’m tired, don’t want takeout, and still want something that tastes really good. My kids are happy, my husband’s happy, and I’m happy because I’m not stressed about baking.
Make it yours! Try different berries, swap in your favorite nuts, adjust the sugar. The best recipes are the ones you adapt to your family’s tastes.
If you make this, drop a comment and let me know what you think! I love hearing how recipes turn out in your kitchen. And if something doesn’t work, tell me that too—I’m here to help troubleshoot.
Happy cooking! And I hope your kitchen smells half as good as mine does right now.
Frequently Asked Questions
**Q: Can I use fresh blackberries instead of frozen?**
**A:** Absolutely! Fresh berries work great. Just make sure they’re ripe and sweet. If your berries are a bit tart, add an extra tablespoon of sugar to the filling. Note that fresh berries may release slightly more water, so keep an eye on the baking time.
**Q: Why did my crumble bars turn out mushy?**
**A:** Usually, this means the filling wasn’t thickened enough or the bars were cut too soon. Make sure you use cornstarch, and let the bars cool completely before cutting. If the filling is still runny after cooling, your oven might not have been hot enough. Next time, use an oven thermometer to check.
**Q: Can I make these in a 9×13 pan?**
**A:** Yes, but the bars will be thinner. Reduce the baking time to 15-18 minutes. Keep a close eye on them so they don’t burn. The texture will be more like a crisp than a thick bar.
**Q: Can I substitute the oats?**
**A:** You can use more flour instead, but the texture will be more cookie-like than crumbly. I recommend sticking with rolled oats for that classic crumble texture. If you have oat allergies, use almond flour or gluten-free flour blend.
**Q: How do I store leftovers?**
**A:** Store in an airtight container at room temperature for up to 3 days. For longer storage, freeze them. They reheat beautifully in the microwave.
**Q: Can I use a different fruit?**
**A:** Yes! This recipe works with blueberries, raspberries, strawberries, or even peaches. Just adjust the sugar slightly depending on the fruit’s natural sweetness. For peaches, you might want to add a tablespoon of lemon juice to balance the sweetness.
**Q: Can I double this recipe?**
**A:** Yes! Double everything and use a 9×13 pan. Increase baking time to 25-30 minutes. Check for doneness by looking for bubbling edges and a golden top.
Pin This Recipe!
Buttery Blackberry Crumble Bars
- Total Time: 37 minutes
- Yield: 12 servings 1x
Description
A quick and easy weeknight dessert featuring a buttery oat crumble topping over a sweet and tart blackberry filling. These bars are simple to make, require minimal equipment, and taste even better the next day.
Ingredients
- 1 cup all-purpose flour
- 1/2 cup old-fashioned rolled oats
- 1/2 cup unsalted butter, melted
- 1/2 cup packed brown sugar
- 1/4 cup granulated sugar
- 1 teaspoon cinnamon
- 1/4 teaspoon salt
- 2 cups blackberries (fresh or frozen)
- 1/4 cup granulated sugar (for filling)
- 1 tablespoon cornstarch
- 1 teaspoon lemon juice
Instructions
- Preheat oven to 350°F (175°C). Line an 8×8 inch baking pan with parchment paper, leaving an overhang on the sides for easy removal.
- In a medium bowl, combine flour, rolled oats, brown sugar, granulated sugar, cinnamon, and salt. Pour in the melted butter and mix until the mixture resembles coarse sand with some larger clumps.
- In a separate bowl, toss blackberries with 1/4 cup sugar, cornstarch, and lemon juice until coated.
- Press half of the crumble mixture evenly into the bottom of the prepared pan to form a base layer.
- Pour the blackberry filling over the crumble base.
- Spoon the remaining crumble mixture over the berries to cover them.
- Bake for 20-25 minutes, or until the top is golden brown and the filling is bubbling vigorously. If the top browns too quickly, tent with foil for the last 5 minutes.
- Cool completely in the pan on a wire rack for at least 30 minutes (preferably 1 hour) to allow the filling to set.
- Lift the bars out using the parchment paper handle and slice into 9 or 12 squares.
Notes
For best results, use frozen blackberries directly from the freezer without thawing to prevent mushiness. Press the bottom crumble layer firmly to prevent a soggy bottom. The bars taste better the next day as flavors meld. Can be made gluten-free by using a 1:1 gluten-free flour blend and certified GF oats. Can be made dairy-free by substituting butter with coconut oil or vegan butter.
- Prep Time: 12 minutes
- Cook Time: 25 minutes
- Category: Dessert
- Cuisine: American
Nutrition
- Serving Size: 1 bar
- Calories: 280
- Sugar: 24
- Sodium: 120
- Fat: 12
- Saturated Fat: 7
- Carbohydrates: 42
- Fiber: 3
- Protein: 3
Keywords: blackberry crumble bars, easy dessert, weeknight dessert, frozen berry dessert, buttery crumble, quick baking, gluten-free option