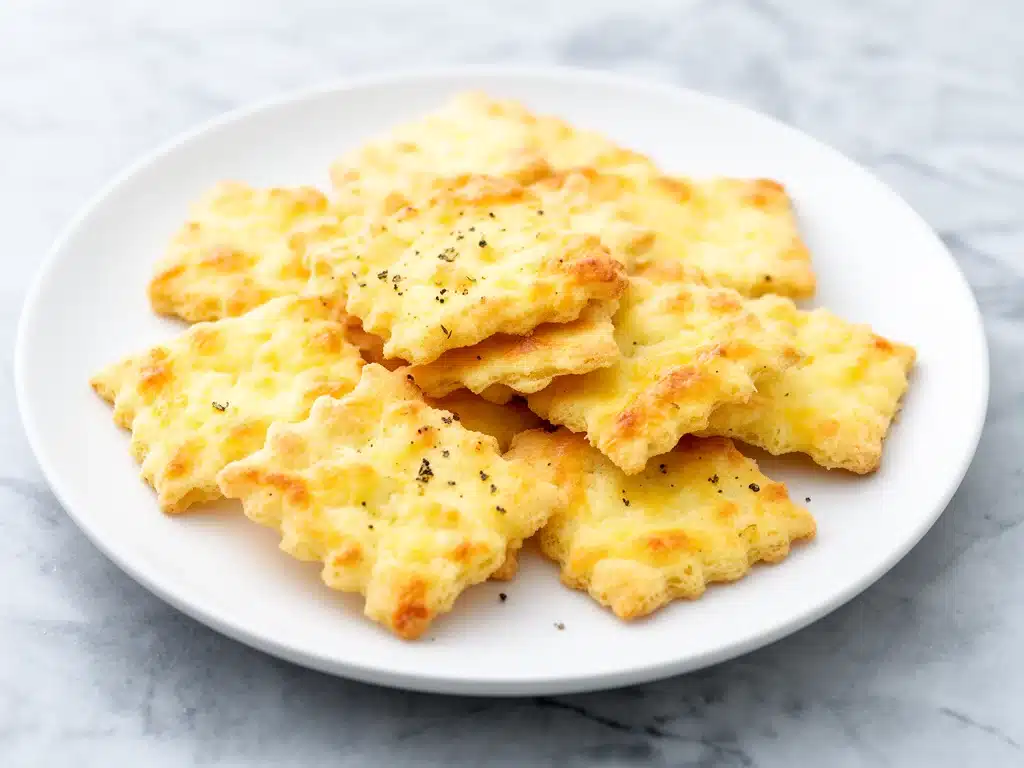
Last Tuesday, I was staring at the clock, panic rising in my chest. It was 7:00 PM on a Sunday, and I still had four lunchboxes to pack for the week. The usual routine—slicing apples, portioning out hummus, finding those little plastic containers that always seem to lose their lids—felt like climbing Mount Everest. And then, I remembered the bag of cheese crackers sitting in the pantry. The ones from the box, with the ingredients list longer than my grocery receipt.
I opened the bag, and honestly, it tasted like cardboard with a hint of artificial cheddar. It wasn’t food; it was a snack substitute. And that’s when it hit me. I’ve been making homemade cheese crackers for my kids for three years now, but I never actually wrote down the process because it seemed too simple. Too easy. Like, “is this even a recipe?” levels of easy.
But here’s the thing: these crackers have saved our back-to-school mornings more times than I can count. They’re the reason we don’t end up buying overpriced, processed snacks on our way out the door. They’re crispy, sharp, and honestly? Better than anything you’ll find in a box. My kids think they’re getting a gourmet treat when I pack them, and I get to know exactly what’s in their lunch. No preservatives, no mystery powders, just real cheese and a few pantry staples.
If you’ve been hunting for a 5-minute back to school snack that actually tastes good and keeps your kids full until dinner, you need to stop scrolling and start rolling out dough. This is the hack that changed our school year routine.
Why You’ll Love This Recipe
There are about ten reasons I keep making these cheese crackers, but if I had to narrow it down to the ones that really matter for busy parents, here they are.
Stupid Simple — Seriously, if you can mix flour and cheese, you can make this. I’ve walked my teenage son through it over FaceTime while I was at work. No kneading, no rising, no complicated techniques. Just mix, roll, cut, and bake.
Lightning Fast — I know the title says 5 minutes, and for the prep, that’s accurate. The actual baking takes about 15 minutes, but the active time is practically zero. You can have these done in under 20 minutes from start to finish. That’s faster than ordering delivery.
Pantry-Friendly — You probably have 90% of these ingredients already. Flour, butter, sharp cheddar, maybe some paprika. If you have those, you’re good to go. I keep a block of cheddar and a bag of flour stocked specifically so I can whip these up on a whim.
Crowd-Pleaser — I’ve served these to my vegetarian sister, my gluten-sensitive neighbor (using GF flour), and my dad who claims he “only likes real food.” Everyone asks for the recipe. They’re addictive in the best way.
Makes Amazing Leftovers — These actually stay crispy for days if stored correctly. I make a double batch every Sunday, and they’re still crunchy by Thursday. No soggy snack syndrome here.
Budget-Smart — Feeds a family of four for under $3. That’s less than the cost of a single box of name-brand crackers at the store. Plus, you’re saving money on the impulse buys we usually grab when we’re tired.
This is my go-to when I need a lunchbox item that feels homemade but requires zero stress. No complicated techniques, no weird ingredients, just reliable, delicious food that makes everyone happy.
Ingredients You’ll Need
Here’s the best part: you probably have most of this already. I’m particular about two things here—the cheese and the butter—but everything else is standard.
For the Dough
Sharp Cheddar Cheese (1 cup / 100g, finely grated) — This is the star. I use extra-sharp cheddar because it has more flavor and less moisture than mild cheddar. Mild cheese has too much water content, which can make the dough soggy. Grate your own from a block. Pre-grated cheese has anti-caking agents that prevent it from melting smoothly into the dough.
All-Purpose Flour (1 cup / 120g) — Standard stuff. I use regular AP flour for the classic texture. If you’re doing gluten-free, see the variations section below. Don’t use whole wheat unless you want a denser, heartier cracker.
Unsalted Butter (½ cup / 115g, cold and cubed) — Cold butter is non-negotiable. You want little peas of butter in the dough to create flaky layers. If the butter is warm, it melts into the flour too early, and you lose that flaky texture. Keep it in the fridge until the last second.
Garlic Powder (½ teaspoon) — Optional, but I love the savory depth. If you’re making these for kids who are picky, you can skip this, but I’d argue it adds a nice background note.
Paprika (½ teaspoon) — Gives them that classic orange hue and a tiny bit of warmth. Smoked paprika is amazing if you want a more complex flavor.
Salt (¼ teaspoon) — Since we’re using sharp cheddar (which is salty) and unsalted butter, you only need a little extra. Taste your dough if you’re unsure.
Ice Water (1-2 tablespoons) — Just enough to bring the dough together. Don’t add too much, or the crackers will spread and lose their shape.
For the Topping
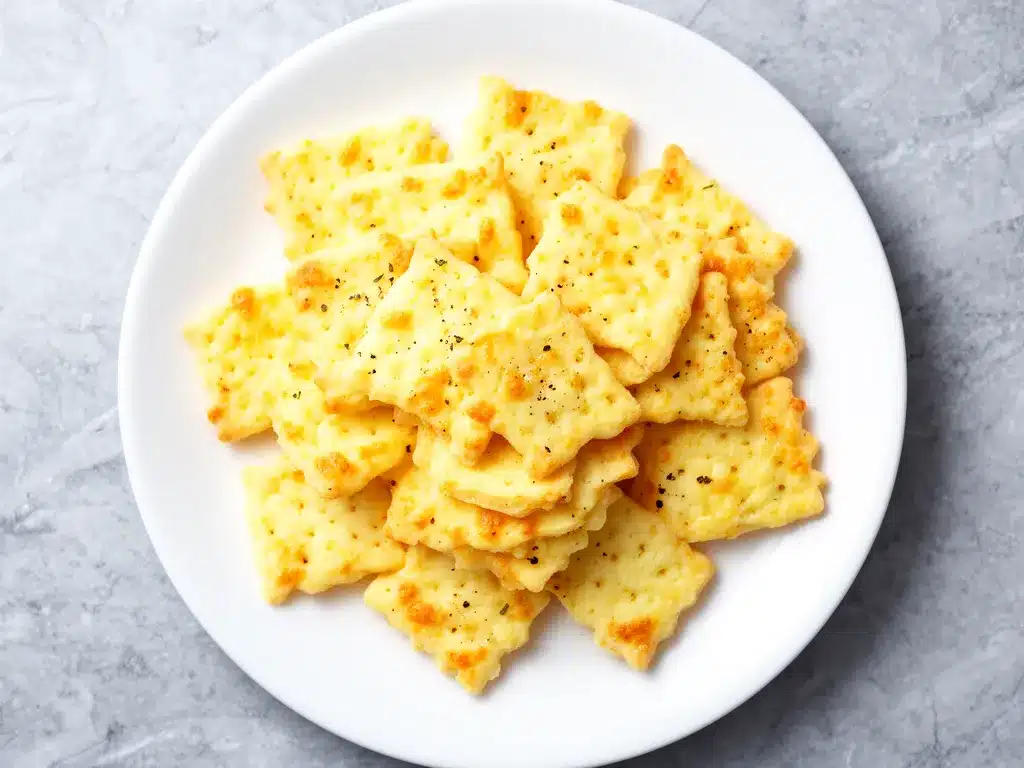
Extra Shredded Cheese (2 tablespoons) — Sprinkle on top before baking for those cheesy, golden bits.
Coarse Sea Salt (for sprinkling) — Adds a nice crunch and visual appeal. Flaky salt like Maldon is perfect here.
Equipment Needed
You don’t need fancy equipment for this. Here’s what I actually use.
Large Bowl — I use a 4-quart mixing bowl. Any size that’s big enough to hold the flour, butter, and cheese works.
Fork or Pastry Cutter — I prefer a fork because it’s faster for this quantity. A pastry cutter works too, but you’re just trying to cut the butter in, not make pie crust.
Cutting Board — Any size works. I use a plastic one for easier cleanup.
Rolling Pin — Standard wooden or marble rolling pin. Marble is nice because it stays cool, which helps keep the butter cold.
Parchment Paper — Essential. Don’t try to bake these directly on the pan; they’ll stick and burn. Parchment paper makes cleanup effortless.
Cookie Cutter or Knife — I use a simple square cutter for uniform shapes, but a sharp knife works just as well for rustic rectangles.
Baking Sheets — Two standard 13×18 inch sheets. If you only have one, you’ll bake in batches.
Optional but nice:
– Cheese Grater — Box grater or microplane. Or food processor if you’re grating lots of cheese.
How to Make It: Step-by-Step
Alright, let’s make these homemade cheese crackers! I’m walking you through exactly how I do it, including the little tricks I’ve picked up so you don’t end up with a crumbly mess.
Step 1: Prep Your Ingredients (5 minutes)
Before you start, cube your butter and put it back in the fridge. Grate your cheese finely. I know it seems fussy, but fine grating ensures the cheese melts evenly into the dough. If you have big chunks, you’ll get uneven flavor and texture. Measure out your spices and flour. Once you start mixing, things move fast.
Step 2: Cut in the Butter (2 minutes)
In your large bowl, combine the flour, garlic powder, paprika, and salt. Add the cold, cubed butter. Using a fork or your fingers, press the butter into the flour until the mixture looks like coarse crumbs with some pea-sized bits of butter remaining. This is crucial. Those butter bits create the flaky layers. Don’t overwork it, or the butter will melt.
Step 3: Add the Cheese (1 minute)
Stir in the grated cheddar cheese. It should be evenly distributed throughout the flour-butter mixture. If the mixture looks too dry and won’t hold together when you pinch it, add ice water, one tablespoon at a time. You only need about 1-2 tablespoons. The dough should come together into a ball.
Step 4: Roll Out the Dough (3 minutes)
Turn the dough out onto a lightly floured surface. Roll it out to about ⅛ inch thickness. Thinner crackers will be crispier; thicker ones will be more biscuit-like. I aim for ⅛ inch for that perfect snap. Use parchment paper on your baking sheet as you roll, then transfer the rolled dough (on the parchment) to the sheet. This saves you from having to move delicate dough around.
Step 5: Cut and Score (2 minutes)
Use a knife or cutter to cut the dough into your desired shapes. Squares, triangles, or circles work great. If you want that classic cracker look, score the dough into squares with a knife but don’t cut all the way through. This makes them easier to break apart later.
Step 6: Top and Bake (15 minutes)
Brush the tops lightly with a little milk or cream (optional, for browning) and sprinkle with extra shredded cheese and coarse salt. Bake in a preheated 350°F (175°C) oven for 12-15 minutes, or until the edges are golden brown. They will firm up as they cool, so don’t worry if they feel soft when you take them out.
Step 7: Cool Completely
Let them cool on the baking sheet for at least 10 minutes. This is the hardest part. They need to cool to become fully crispy. If you try to eat them hot, they’ll be chewy. Patience pays off.
Total Time: About 25 minutes (5 minutes active, 20 minutes baking/cooling)
Expert Tips & Tricks
Here’s everything I’ve learned from making these dozens of times. These tips will save you from my mistakes.
Keep Everything Cold
This is the #1 tip. Cold butter = flaky crackers. If your kitchen is hot, put the dough in the fridge for 10 minutes before rolling. I learned this the hard way when my first batch turned into flat, greasy discs. Now I keep my butter in the freezer for 5 minutes before cubing it.
Grate Your Own Cheese
Pre-grated cheese has cellulose, which prevents it from melting smoothly. This can make your dough gritty. Block cheese grates smoother and melts better. Trust me, your taste buds will notice the difference.
Don’t Skip the Parchment
Cheese crackers stick. Badly. Parchment paper is your best friend here. It ensures even baking and easy cleanup. I’ve tried silicone mats, but parchment is more reliable for these.
Watch the Oven
Ovens vary. Start checking at 12 minutes. You want golden edges, not dark brown. If they burn, they’ll be bitter. If they’re pale, they won’t be crispy. Aim for that perfect golden hue.
Cool Completely
I know it’s tempting to eat them warm, but they need to cool to crisp up. If you store them while warm, they’ll get soggy in the container. Let them cool on a wire rack if you have one.
Variations & Substitutions
Once you’ve nailed the basic version, here’s how you can mix it up. I’ve tried all of these.
Herb & Garlic
Add 1 teaspoon dried parsley and 1 teaspoon fresh minced garlic (or ½ teaspoon garlic powder). This is my favorite variation for adult parties.
Jalapeño Cheddar
Add 1 finely diced jalapeño (seeds removed) and ½ teaspoon cumin. Spicy and savory. Great with salsa.
Rosemary Parmesan
Swap cheddar for Parmesan and add 1 teaspoon dried rosemary. More elegant, less cheesy, but still delicious.
Gluten-Free
Use a 1:1 gluten-free flour blend. The texture might be slightly more crumbly, but it works. I’ve used Bob’s Red Mill and King Arthur GF flour with good results.
Vegan
Use vegan butter and nutritional yeast instead of cheese. It’s different, but still tasty. My lactose-intolerant friend requests this version.
Spicy Kick
Add red pepper flakes or cayenne pepper. Start with ¼ teaspoon and adjust to taste.
Serving & Storage
How to Serve:
I usually serve these straight from the cooling rack at the dinner table—they look rustic and stay warm. But here are other ways I’ve enjoyed them:
Side Dishes:
– Creamy Crockpot Sausage and Peppers (these crackers are perfect for scooping up the juices!)
– Hot Honey Ground Beef and Sweet Potato Bowl (crunchy contrast)
– Simple green salad with balsamic vinaigrette
Toppings Bar:
When I have guests, I put out: extra sharp cheddar, honey, mustard, sliced tomatoes, cucumber rounds. Everyone customizes their snack plate.
Storage Instructions:
Refrigerator:
Store in an airtight container for up to 1 week. They stay crispy if completely cool.
Freezer:
These freeze beautifully! Store in a freezer-safe bag for up to 3 months. No need to thaw; just eat them cold or warm them up in the oven.
Pro tip:
If they ever lose their crunch, pop them in the oven at 300°F for 5 minutes. They’ll crisp right back up.
Nutrition Information
I’m not a nutritionist, but here’s the breakdown if you’re tracking.
Per Serving (based on 20 crackers):
– Calories: 90
– Protein: 3g
– Carbs: 6g
– Fiber: 0g
– Sugar: 0g
– Fat: 6g
– Saturated Fat: 3g
– Cholesterol: 15mg
– Sodium: 120mg
– Calcium: 80mg
What’s Good:
– Decent protein from cheese
– Low sugar
– Simple ingredients
– Can add vegetables to boost nutrition
What to Know:
– Higher in calories from cheese and butter
– Contains dairy and gluten
– Moderate sodium (use low-sodium cheese to reduce)
My Take:
Look, these are cheese crackers. They’re not a diet food. But they’re way better than store-bought, costs less, and I know exactly what’s in them. When I want to make them lighter, I use less butter and more cheese. But usually? I just eat a reasonable portion and enjoy it.
Final Thoughts
So that’s my go-to homemade cheese crackers! I’ve probably talked your ear off at this point, but when you make a recipe this often, you have a lot to say about it.
This has saved back-to-school mornings more times than I can count. It’s my answer to “what’s for lunch?” when I’m tired, don’t want processed snacks, and still want something that tastes really good. My kids are happy, my husband’s happy, and I’m happy because I’m not stressed about cooking.
Make it yours! Try different cheeses, add herbs, adjust the spice. The best recipes are the ones you adapt to your family’s tastes.
If you make this, drop a comment and let me know what you think! I love hearing how recipes turn out in your kitchen. And if something doesn’t work, tell me that too—I’m here to help troubleshoot.
Happy cooking! And I hope your kitchen smells half as good as mine does right now.
Frequently Asked Questions
Can I use pre-shredded cheese?
You can, but I don’t recommend it. Pre-shredded cheese has anti-caking agents that prevent it from melting smoothly. This can make your dough gritty and uneven. Block cheese grates smoother and melts better. If you must use pre-shredded, mix it with a little extra flour to compensate.
Why did my crackers spread in the oven?
This usually means the butter was too warm. Make sure your butter is cold when you mix it, and chill the dough for 10 minutes before rolling. Also, don’t overwork the dough, which can melt the butter into the flour.
Can I make these ahead for the week?
Absolutely! These are perfect for meal prep. Make them on Sunday, let them cool completely, and store in an airtight container. They’ll stay crispy for up to a week. I pack them into lunchboxes on Monday morning, and they’re still crunchy by Thursday.
Can I use different types of cheese?
Yes! Gouda, pepper jack, or even a blend of cheeses work great. Just remember that different cheeses have different moisture contents. If you use a softer cheese like mozzarella, reduce the water in the dough slightly.
How do I store these to keep them crispy?
The key is an airtight container. Once they’re completely cool, store them in a container with a tight-fitting lid. If you store them while warm, the steam will make them soggy. You can also add a piece of bread to the container to absorb excess moisture, but usually, just sealing them tight is enough.
Can I freeze the dough?
Yes! Roll out the dough, cut it into shapes, and freeze on a baking sheet until solid. Then transfer to a freezer bag. Bake from frozen, adding 2-3 minutes to the baking time. This is great for last-minute snacking.
Are these okay for school?
Most schools are nut-free, and these are nut-free, so they’re generally safe. However, always check your school’s specific policy. These are also a great alternative to processed crackers because they’re made with real ingredients.
Pin This Recipe!
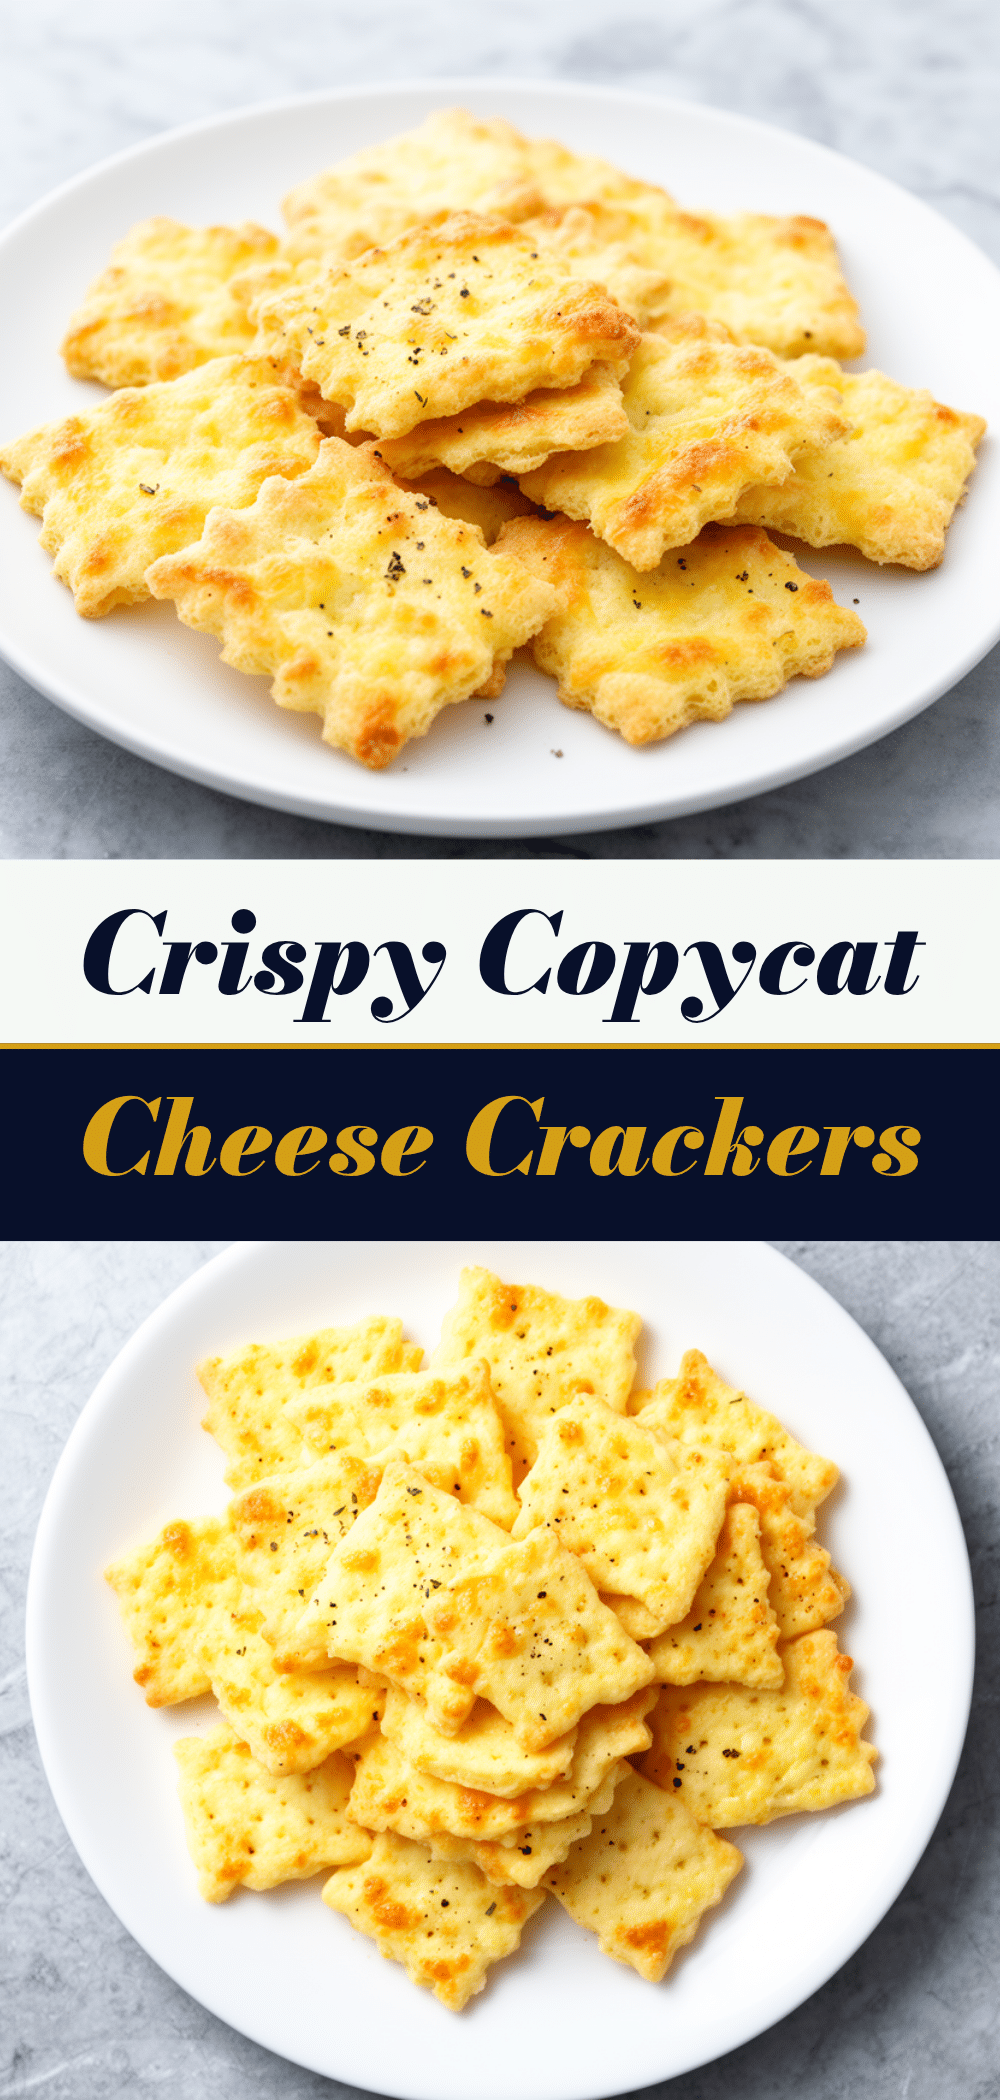
Homemade Cheese Crackers: 5-Minute Back to School Snack
- Total Time: 20 minutes
- Yield: 20 crackers 1x
Description
These homemade cheese crackers are a quick, pantry-friendly snack that takes just 5 minutes of prep and 15 minutes to bake. They are crispy, sharp, and perfect for lunchboxes or after-school snacking.
Ingredients
- 1 cup (100g) finely grated sharp cheddar cheese
- 1 cup (120g) all-purpose flour
- 1/2 cup (115g) unsalted butter, cold and cubed
- 1/2 teaspoon garlic powder
- 1/2 teaspoon paprika
- 1/4 teaspoon salt
- 1–2 tablespoons ice water
- 2 tablespoons extra shredded cheese (for topping)
- Coarse sea salt (for sprinkling)
Instructions
- Preheat oven to 350°F (175°C) and line baking sheets with parchment paper.
- In a large bowl, combine flour, garlic powder, paprika, and salt.
- Add the cold, cubed butter to the flour mixture. Use a fork or pastry cutter to press the butter into the flour until the mixture resembles coarse crumbs with pea-sized bits of butter remaining.
- Stir in the finely grated cheddar cheese until evenly distributed.
- If the mixture is too dry to hold together, add ice water one tablespoon at a time until the dough comes together into a ball.
- Turn the dough out onto a lightly floured surface and roll it out to about 1/8 inch thickness.
- Transfer the rolled dough (on parchment paper) to a baking sheet.
- Cut the dough into squares or desired shapes using a knife or cookie cutter. Optionally, score the dough without cutting all the way through for easier breaking later.
- Brush tops lightly with milk or cream (optional) and sprinkle with extra shredded cheese and coarse sea salt.
- Bake for 12-15 minutes until edges are golden brown.
- Let crackers cool on the baking sheet for at least 10 minutes to become fully crispy before serving.
Notes
Keep all ingredients cold, especially the butter, to ensure flaky crackers. Grate your own cheese from a block rather than using pre-grated cheese to avoid anti-caking agents that can make the dough gritty. Cool crackers completely before storing to maintain crispness. Store in an airtight container for up to 1 week or freeze for up to 3 months.
- Prep Time: 5 minutes
- Cook Time: 15 minutes
- Category: Snack
- Cuisine: American
Nutrition
- Serving Size: 1 serving (approx. 2
- Calories: 90
- Sodium: 120
- Fat: 6
- Saturated Fat: 3
- Carbohydrates: 6
- Protein: 3
Keywords: homemade cheese crackers, back to school snack, 5 minute snack, easy crackers, lunchbox ideas, kid friendly snacks, gluten free option



