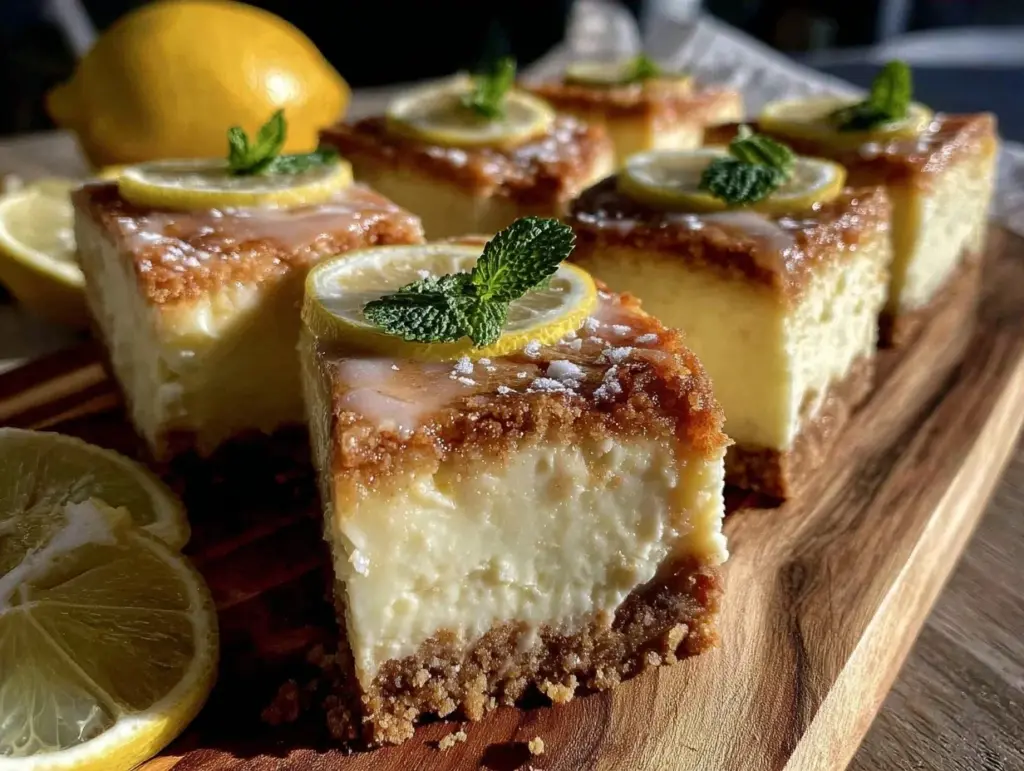
It was a Tuesday afternoon, the kind where the kids are home from school, the house is already a mess, and I’m staring into the fridge wondering if there’s enough to make dinner without ordering takeout. My stomach was growling, but more importantly, my brain was screaming for something sweet. Not a complicated, three-hour project. Not something that required twenty ingredients I didn’t have. Just something bright, creamy, and easy to throw together.
I grabbed some lemons, a block of cream cheese, and a box of graham crackers. I figured, why not? I mixed up a batch of lemon cheesecake bars in about ten minutes of prep time. While they baked, the smell of butter and citrus filled the kitchen, and for a moment, I forgot about the laundry pile and the emails waiting in my inbox. When I cut into them an hour later, the kids devoured them before they even cooled completely.
That was three months ago. Since then, I’ve made these lemon cheesecake bars with buttery graham crust at least a dozen times. They’ve become my go-to solution for “I need to bring something to the PTA meeting,” “I need to celebrate a small win,” or just “I need to feel like I’m not living on cereal for dessert.” And the best part? They’re incredibly budget-friendly. You don’t need fancy ingredients or expensive tools. You just need a few pantry staples and about 45 minutes of active time.
These bars strike that perfect balance between a rich dessert and a light, refreshing treat. The tangy lemon cuts through the sweetness, so you don’t feel heavy after eating them. They’re firm enough to cut into neat squares, portable enough for lunchboxes, and they actually taste better the next day. I’ve tested this recipe with everything from fresh-squeezed lemon juice to bottled (oops), and I’m going to share exactly what works so you can make them perfectly every single time.
Why You’ll Love This Recipe
There are a lot of cheesecake recipes out there, and honestly, some of them are intimidating. They involve water baths, springform pans that leak, and hours of chilling. This recipe is different. It’s designed for real life. Here’s why these lemon cheesecake bars have earned a permanent spot in my rotation:
- Stupid Simple — Seriously, if you can boil water and mix batter, you can make this. No special equipment needed. I’ve made this while my toddler sat on my hip. It’s that easy.
- Lightning Fast Prep — You’re looking at about 15 minutes of hands-on time. The rest is just baking and chilling. I make these on weeknights when I want a treat without spending all evening in the kitchen.
- Budget-Friendly — This feeds a crowd for under $10. That’s less than what I’d spend on a single slice of fancy cheesecake at a restaurant. I keep cream cheese and lemons stocked because this is my emergency dessert fix.
- Kid-Approved — My picky eaters love them. The lemon flavor isn’t too sour, and the graham cracker crust feels like eating a dessert version of a snack. Even my husband, who usually prefers chocolate, asks for these.
- Makes Amazing Leftovers — These actually taste better after sitting in the fridge for a day or two. The flavors meld together, and the texture firms up. I deliberately make a double batch so I have something sweet for the next few days.
- Perfect for Meal Prep — Make them on Sunday, and you have dessert sorted for the week. They store beautifully in the fridge, so you’re never caught off guard when guests pop in.
This is my go-to when I need a dessert that just works. No complicated techniques, no weird ingredients, just reliable, delicious food that makes everyone happy and leaves money in my pocket.
Ingredients You’ll Need
Here’s the best part: you probably have most of this already. I’m not asking you to go to three different specialty stores. This is a pantry-friendly recipe that uses common ingredients. I’m particular about a few things, though, and I’ll tell you exactly why.
For the Buttery Graham Crust
- Graham cracker crumbs (1 ½ cups / 150g) — You can buy pre-crushed crumbs, but I usually just crush a box of graham crackers in a food processor. It’s cheaper and tastes fresher. If you don’t have a processor, put them in a ziplock bag and smash them with a rolling pin.
- Unsalted butter (⅓ cup / 75g, melted) — This binds the crust. Use real butter, not margarine. The flavor makes a huge difference in a simple crust. Melt it in the microwave or a small saucepan.
- Granulated sugar (2 tablespoons / 25g) — Just a little bit to sweeten the crust. Don’t skip it; it helps the crust crisp up slightly.
- Ground cinnamon (½ teaspoon) — Optional, but I love the warm spice note against the lemon. It adds a “cookie” feel to the crust.
For the Lemon Cheesecake Filling
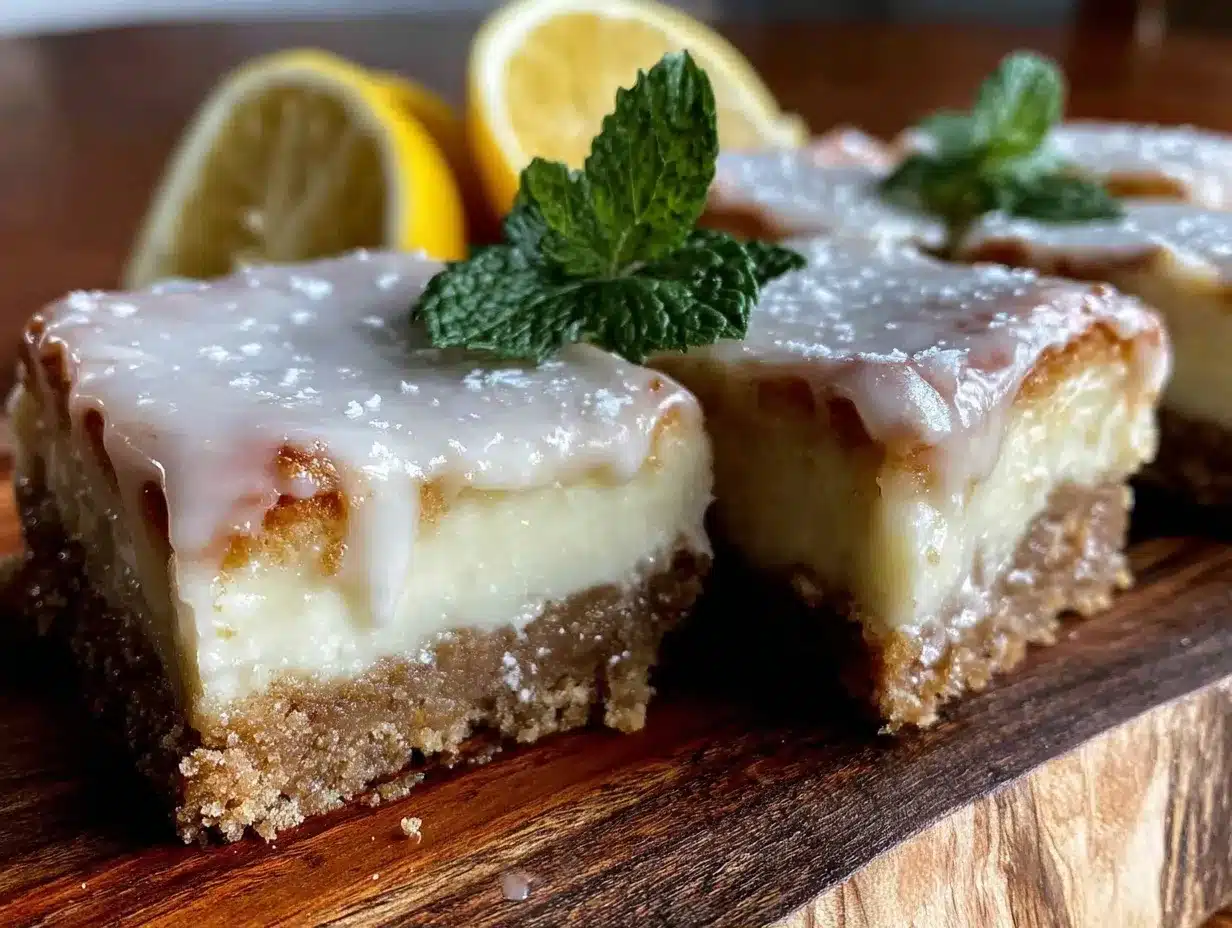
- Full-fat cream cheese (16 oz / 450g) — This is the star. Make sure it’s softened to room temperature. Cold cream cheese leads to lumpy batter. I take it out of the fridge 30 minutes before I start. Do not use the low-fat version; it won’t set right and tastes watery.
- Granulated sugar (1 cup / 200g) — This sweetens the filling. If you like it less sweet, you can reduce to ¾ cup, but the lemon needs that sugar to balance the acidity.
- Eggs (2 large / plus 1 yolk) — I use two whole eggs and one extra yolk for richness. The extra yolk makes the texture super creamy and dense, like a real New York cheesecake, but lighter.
- Sour cream (½ cup / 120g) — This adds tang and moisture. It keeps the cheesecake from being too dense. Full-fat is best here. You can substitute with Greek yogurt if you want a slightly lighter texture.
- Vanilla extract (1 teaspoon) — Pure vanilla. It rounds out the lemon flavor so it’s not one-note.
- Fresh lemon juice (⅓ cup / 80ml) — This is crucial. Freshly squeezed juice has a brightness that bottled juice just can’t match. Bottled juice often tastes metallic or flat. Squeeze two or three lemons to get this amount. If you’re in a pinch, you can use bottled, but the flavor won’t be as vibrant.
- Lemon zest (1 tablespoon) — The oils in the peel give the intense lemon aroma. Use a microplane or fine grater. Make sure to get the yellow part only; the white pith is bitter.
- All-purpose flour (2 tablespoons / 15g) — This is the secret ingredient. A little flour helps stabilize the filling so it doesn’t crack or collapse. It also gives it that bar-like structure.
For the Lemon Glaze (Optional but Recommended)
- Powdered sugar (½ cup / 60g) — Sifted to remove lumps.
- Lemon juice (1-2 teaspoons) — Add gradually until you reach a drizzling consistency.
Personal Tip: I always buy the block cream cheese, not the tub. The tub stuff has stabilizers that can affect the texture. And don’t skimp on the zest. It’s the difference between “lemon flavored” and “actually tastes like lemon.”
Equipment Needed
You don’t need fancy equipment for this. Here’s what I actually use in my everyday kitchen.
- 9×9 inch baking pan — This is the standard size for bars. You can use an 8×8 if you want thicker bars, but they’ll take longer to bake. Line it with parchment paper for easy lifting.
- Mixer — A hand mixer works fine, but a stand mixer is easier. You want the cream cheese smooth and lump-free.
- Zester or microplane — For getting that fine lemon zest. A regular grater works too, but you have to be careful not to get the white pith.
- Spatula — For scraping down the sides of the bowl and smoothing the batter.
- Measuring cups and spoons — Standard stuff. Accuracy matters a bit with baking, so level off your flour.
Tool Tip: Don’t have a 9×9 pan? You can use a 9×13, but the layers will be thinner. You’ll need to reduce the baking time by about 5-10 minutes. Keep an eye on them.
How to Make It: Step-by-Step
Alright, let’s make this! I’m walking you through exactly how I do it, including the little tricks I’ve picked up over the years.
Step 1: Prep Your Pan and Oven (5 minutes)
Preheat your oven to 350°F (175°C). Line your 9×9 inch baking pan with parchment paper, leaving an overhang on the sides. This is your best friend for getting the bars out later. If you don’t have parchment, grease the pan well with butter or cooking spray, but parchment is easier.
Step 2: Make the Crust (5 minutes)
In a medium bowl, mix the graham cracker crumbs, melted butter, sugar, and cinnamon. It should look like wet sand. Press this mixture firmly into the bottom of your prepared pan. Use the bottom of a measuring cup to pack it down tight. You want it even and compact. If it’s loose, the bars will crumble when you cut them. Place the pan in the oven and bake for 8-10 minutes until it’s lightly golden and smells like buttery cookies. Remove and let it cool while you make the filling. You can leave the oven on.
Step 3: Beat the Cream Cheese (3 minutes)
In a large bowl, beat the softened cream cheese with the mixer on medium-high speed until it’s completely smooth and creamy. This is critical. If there are lumps, they’ll show up in the final product. Scrape down the sides of the bowl. This might take 2-3 minutes, so be patient.
Step 4: Add Sugar and Wet Ingredients (2 minutes)
Reduce the mixer speed to low. Add the granulated sugar and beat until combined. Add the sour cream, vanilla extract, and eggs (plus the extra yolk). Beat just until combined. Do not overmix once the eggs are in, or you’ll incorporate too much air, which can cause cracking. Scrape the bowl again.
Step 5: Add Lemon and Flour (1 minute)
Add the lemon zest, lemon juice, and flour. Mix on low speed until just incorporated. The batter will be thick and smooth. Pour it over the pre-baked crust. Use a spatula to spread it evenly. Tap the pan gently on the counter a few times to release any air bubbles.
Step 6: Bake (25-30 minutes)
Return the pan to the oven. Bake for 25-30 minutes. The edges should be set and slightly puffed, but the center should still have a slight jiggle when you shake the pan. It will firm up as it cools. If the top starts browning too quickly, you can tent it with foil.
Step 7: Cool and Chill (4 hours minimum)
Let the bars cool in the pan on a wire rack for 1 hour. Then, refrigerate them for at least 4 hours, or preferably overnight. This chilling time is non-negotiable. It’s what sets the texture and allows the flavors to meld. If you cut them warm, they’ll be a mess.
Step 8: Glaze and Slice (5 minutes)
Once chilled, lift the bars out of the pan using the parchment overhang. Whisk the powdered sugar and lemon juice together until smooth. Drizzle over the top. Let the glaze set for 10 minutes. Use a sharp knife to cut into squares. Wipe the knife clean between cuts for neat edges.
Total Time: About 1 hour active, plus 4+ hours chilling.
Expert Tips & Tricks
Here’s everything I’ve learned from making these dozens of times. These tips will save you from my mistakes.
- Room Temperature Ingredients — This is the #1 rule. Cold cream cheese and cold eggs will create lumps in your batter. Take everything out of the fridge at least 30 minutes before you start. If you forget, you can microwave the cream cheese in 10-second bursts, but be careful not to melt it.
- Don’t Overmix — Once you add the eggs, mix just until combined. Overmixing adds air, which leads to cracks. Cracks aren’t the end of the world, but smooth tops look nicer.
- Fresh Lemon Juice Only — I’ve tried bottled juice, and it just doesn’t compare. The flavor is dull and sometimes has a weird aftertaste. Freshly squeezed is worth the five minutes of effort.
- The “Jiggle” Test — Don’t wait until the center is completely firm. It should still wobble slightly in the middle when you take it out. It will set as it cools. If you bake it until it’s firm in the oven, it will be dry and crumbly.
- Sharp Knife for Cutting — Use a sharp chef’s knife. Dip it in hot water and wipe it dry between cuts. This gives you clean, professional-looking squares. A dull knife will squish the bars.
Common Mistake: Cracking Top
This usually happens if the oven was too hot or if you overmixed the batter. To prevent this, make sure your oven is calibrated correctly (use an oven thermometer) and mix gently.
Pro Trick: Extra Zest
If you’re a huge lemon fan, add an extra tablespoon of zest. It intensifies the flavor without making it sour.
Variations & Substitutions
Once you’ve nailed the basic version, here’s how you can mix it up. I’ve tried all of these.
Berry Swirl
After pouring the cheesecake batter over the crust, drop spoonfuls of raspberry or strawberry jam on top. Use a knife to swirl it into the batter. It looks beautiful and adds a fruity twist.
Blueberry Lemon
Stir 1 cup of fresh or frozen blueberries into the batter after adding the flour. They’ll sink to the bottom, creating pockets of berry goodness.
Coconut Lime
Swap the lemon juice and zest for lime. Use coconut flakes in the crust instead of graham crackers for a tropical vibe. It’s refreshing and different.
Dairy-Free Option
You can use dairy-free cream cheese (like Kite Hill or Miyoko’s) and dairy-free butter. The texture might be slightly different, but it still works. Use maple syrup instead of sugar if you want to avoid refined sugar, though it will change the texture slightly.
Gluten-Free
Use gluten-free graham crackers or crushed gluten-free cookies for the crust. The filling is naturally gluten-free (thanks to the small amount of flour), but double-check your flour if you’re strict. I use King Arthur Gluten-Free Measure for Measure flour.
Serving & Storage
These bars are versatile and easy to store. Here’s how I handle them.
How to Serve
I usually serve these straight from the fridge. They’re firm and refreshing. I pair them with a cup of coffee or tea in the afternoon. They’re also great for potlucks because they travel well. Just make sure they’re fully chilled before transporting.
Storage Instructions
- Refrigerator: Store in an airtight container for up to 5 days. They actually taste better on day 2 or 3. The flavors deepen.
- Freezer: Yes, you can freeze these! Cut them into squares first. Wrap each square tightly in plastic wrap, then place them in a freezer-safe bag or container. They’ll last for up to 2 months. Thaw in the fridge overnight. The texture might be slightly softer, but they still taste great.
Pro Tip: If you’re meal prepping for the week, make a double batch. Freeze half immediately, and keep half in the fridge. This way, you always have a dessert ready to go, whether it’s a busy Tuesday or a weekend gathering.
Nutrition Information
I’m not a nutritionist, but here’s the breakdown if you’re tracking. Keep in mind that this is a dessert, so it’s richer than your average snack.
Per Serving (based on 16 bars):
- Calories: 220
- Protein: 3g
- Carbs: 24g
- Fiber: 0g
- Sugar: 18g
- Fat: 13g
- Saturated Fat: 8g
What’s Good:
It’s a manageable portion size. One square is enough to satisfy a sweet tooth without being overwhelming. The graham cracker crust adds some fiber if you use whole grain crackers.
What to Know:
Higher in sugar and saturated fat due to the cream cheese and butter. If you’re watching your intake, stick to one or two squares. You can also reduce the sugar in the filling by ¼ cup without affecting the texture too much.
Final Thoughts
So that’s my go-to lemon cheesecake bars with buttery graham crust! I’ve probably talked your ear off at this point, but when you make a recipe this often, you have a lot to say about it.
This has saved me more times than I can count. It’s my answer to “what’s for dessert” when I’m tired, don’t want to bake a whole cake, and still want something that tastes really good. My kids are happy, my husband’s happy, and I’m happy because I’m not stressed about cooking.
Make it yours! Try different swirls, add extra zest, or skip the glaze if you’re in a hurry. The best recipes are the ones you adapt to your family’s tastes. If you make these, drop a comment and let me know what you think! I love hearing how recipes turn out in your kitchen. And if something doesn’t work, tell me that too—I’m here to help troubleshoot.
Happy baking! And I hope your kitchen smells half as good as mine does right now.
Frequently Asked Questions
Can I use bottled lemon juice?
You can, but the flavor won’t be as bright or fresh. Bottled juice often has preservatives that give it a slightly metallic taste. If you’re in a real pinch, it will work, but I highly recommend squeezing fresh lemons. It takes about 5 minutes and makes a huge difference in the final taste.
Why did my cheesecake crack?
Cracking usually happens for two reasons: overmixing or oven temperature. If you beat the batter too much after adding the eggs, you incorporate too much air, which expands and then collapses. Also, if your oven runs hot, the edges can cook too fast. Make sure to mix gently and consider using an oven thermometer to check your actual temperature.
Can I make this ahead for a party?
Absolutely. These bars are even better made ahead. You can make them 2-3 days in advance. In fact, I recommend making them the day before so they have plenty of time to chill and set. They travel well too, just keep them refrigerated until serving.
How do I get clean cuts?
Use a sharp knife. Dip it in hot water and wipe it dry between each cut. This prevents the bars from sticking to the knife and getting squished. Also, make sure the bars are fully chilled before cutting. Warm bars will be messy.
Can I freeze these bars?
Yes! Cut them into squares, wrap each one tightly in plastic wrap, and place them in a freezer bag. They’ll last for up to 2 months. Thaw in the fridge overnight. The texture might be slightly softer, but they still taste delicious.
What if I don’t have a 9×9 pan?
You can use an 8×8 pan for thicker bars (increase baking time by 5-10 minutes) or a 9×13 pan for thinner bars (decrease baking time by 5-10 minutes). Just keep an eye on them to ensure they don’t overcook.
Can I reduce the sugar?
You can reduce the sugar in the filling by up to ¼ cup without affecting the texture too much. The crust has very little sugar, so you can’t reduce it much there. If you want a less sweet bar, just cut smaller squares.
Pin This Recipe!
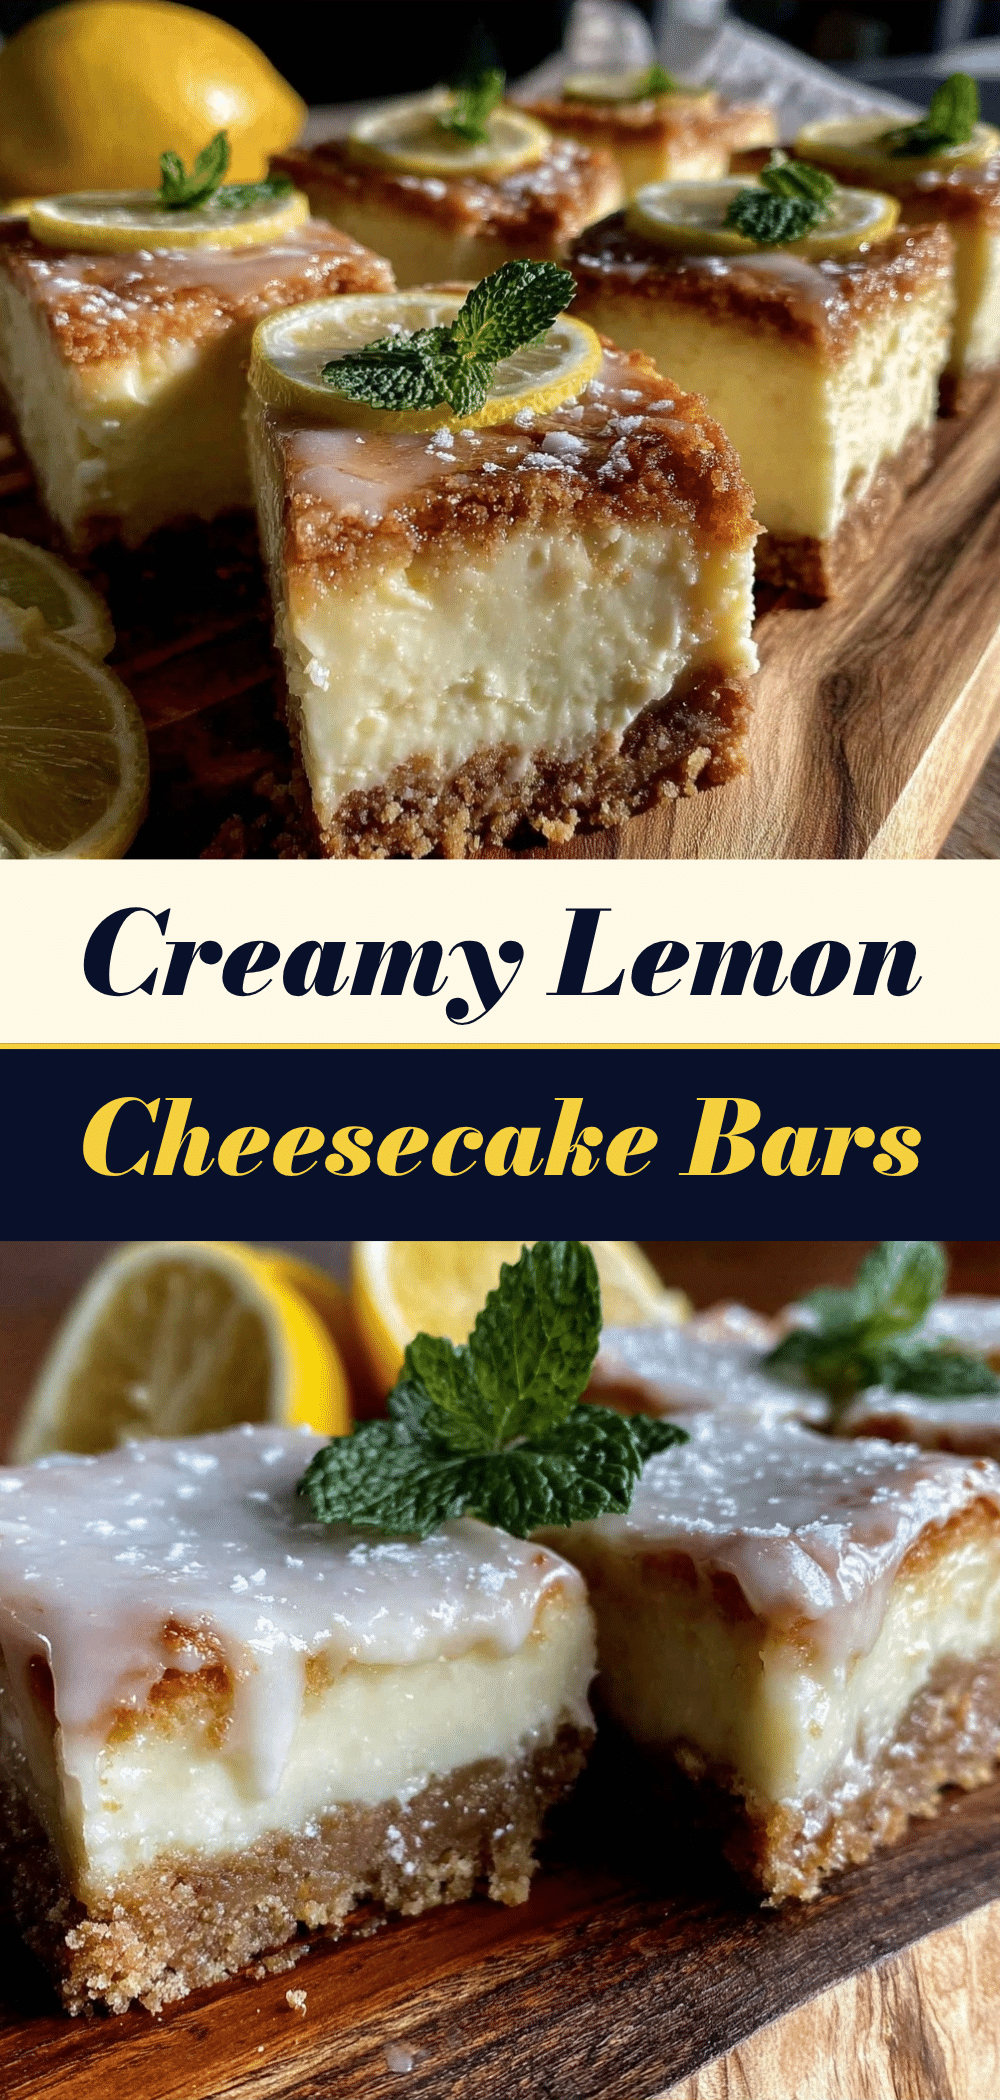

Lemon Cheesecake Bars: Easy, Budget-Friendly Family Treat
- Total Time: 4 hours 45 minutes
- Yield: 16 servings 1x
Description
These easy, budget-friendly lemon cheesecake bars feature a buttery graham cracker crust and a tangy, creamy filling. They are simple to make, kid-approved, and taste even better the next day.
Ingredients
- 1 ½ cups (150g) graham cracker crumbs
- ⅓ cup (75g) unsalted butter, melted
- 2 tablespoons (25g) granulated sugar
- ½ teaspoon ground cinnamon
- 16 oz (450g) full-fat cream cheese, softened to room temperature
- 1 cup (200g) granulated sugar
- 2 large eggs plus 1 egg yolk
- ½ cup (120g) sour cream
- 1 teaspoon vanilla extract
- ⅓ cup (80ml) fresh lemon juice
- 1 tablespoon lemon zest
- 2 tablespoons (15g) all-purpose flour
- ½ cup (60g) powdered sugar (for glaze)
- 1–2 teaspoons lemon juice (for glaze)
Instructions
- Preheat oven to 350°F (175°C). Line a 9×9 inch baking pan with parchment paper, leaving an overhang on the sides.
- In a medium bowl, mix graham cracker crumbs, melted butter, sugar, and cinnamon until it resembles wet sand. Press firmly into the bottom of the prepared pan.
- Bake the crust for 8-10 minutes until lightly golden. Remove and let cool while making the filling.
- In a large bowl, beat the softened cream cheese on medium-high speed until completely smooth and creamy.
- Reduce mixer speed to low. Add granulated sugar and beat until combined. Add sour cream, vanilla extract, and eggs (plus extra yolk). Beat just until combined; do not overmix.
- Add lemon zest, lemon juice, and flour. Mix on low speed until just incorporated.
- Pour batter over the pre-baked crust and spread evenly. Tap the pan gently to release air bubbles.
- Bake for 25-30 minutes. The edges should be set and slightly puffed, but the center should still have a slight jiggle.
- Let bars cool in the pan on a wire rack for 1 hour, then refrigerate for at least 4 hours or overnight.
- Lift bars out of the pan. Whisk powdered sugar and lemon juice together to make a glaze. Drizzle over the top and let set for 10 minutes.
- Cut into squares using a sharp knife dipped in hot water and wiped dry between cuts.
Notes
Ensure all ingredients, especially cream cheese and eggs, are at room temperature to prevent lumps. Do not overmix the batter after adding eggs to avoid cracking. Fresh lemon juice is crucial for bright flavor. Bars taste better after chilling overnight.
- Prep Time: 15 minutes
- Cook Time: 45 minutes
- Category: Dessert
- Cuisine: American
Nutrition
- Serving Size: 1 bar
- Calories: 220
- Sugar: 18
- Fat: 13
- Saturated Fat: 8
- Carbohydrates: 24
- Protein: 3
Keywords: lemon cheesecake bars, easy dessert, budget-friendly, family treat, graham cracker crust, make ahead dessert



