I have a confession to make. Last Saturday, I was supposed to be preparing for a small family gathering. You know the type—people bringing plates, conversation flowing, dessert looking elegant on the counter. Instead, I spent the morning in a panic because I had zero idea what to bake. I wasn’t feeling like whipping up a complex cheesecake from scratch, and I definitely didn’t have the energy for a layered cake that required a mixer and three hours of chilling. I just wanted something sweet, comforting, and stupidly simple. So, I did what I do best when I’m overwhelmed: I raided the pantry and the fridge, threw three ingredients into a pan, and prayed it would work.
It didn’t just work. It was incredible.
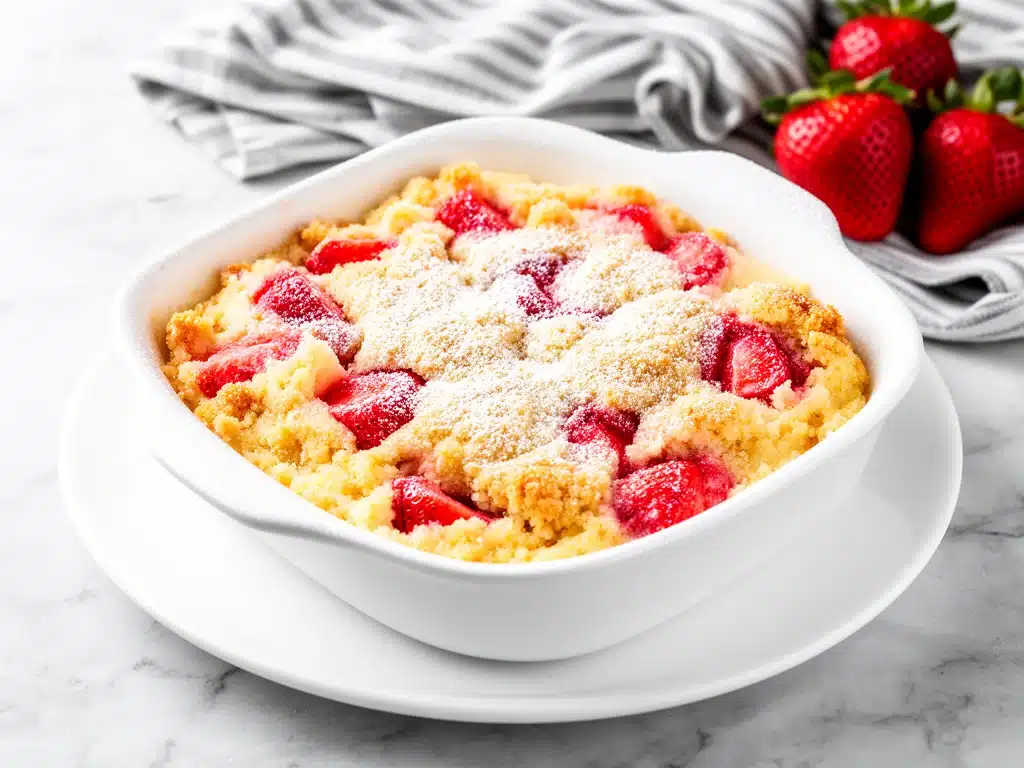
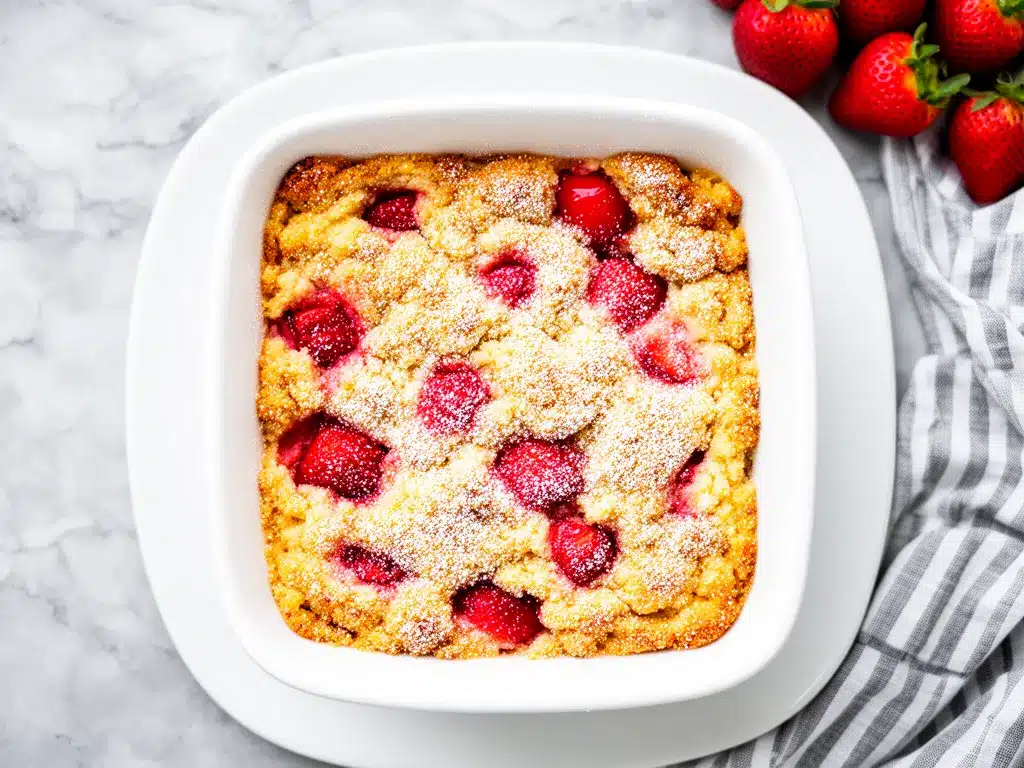
That was the birth of my go-to Strawberry Cheesecake Dump Cake. It’s the kind of recipe that feels like cheating, but tastes like you spent hours in the kitchen. The best part? It literally only takes three main ingredients (plus a little butter and vanilla, which I consider pantry staples). There’s no beating cream cheese until your arm falls off. There’s no water bath for the cheesecake layer. There’s no complicated crust to press into a springform pan. You just dump, sprinkle, and bake. And somehow, you get this gorgeous, golden-brown cobbler topping over a creamy, tangy cheesecake filling studded with juicy strawberries.
I’ve made this Strawberry Cheesecake Dump Cake at least a dozen times since that chaotic Saturday. It’s become my secret weapon for last-minute guests, potlucks, or just when I need a sugar fix that doesn’t require a degree in pastry arts. My kids love it because it tastes like a strawberry shortcake and cheesecake had a baby. My husband loves it because I don’t complain while making it. And honestly? I love it because it proves that sometimes, the simplest recipes are the ones we come back to again and again.
Why You’ll Love This Recipe
If you’re skeptical about “dump cakes,” let me win you over. This isn’t just easy; it’s reliably delicious every single time. Here’s why this Strawberry Cheesecake Dump Cake has earned a permanent spot in my weekly rotation:
- Zero Skill Required — Seriously. If you can open a can and pour batter, you can make this. I’ve made this for my teenage nephew, and he nailed it on his first try without burning the house down.
- 30 Minutes Active Time — The prep is about 10 minutes. The rest is hands-off baking. I can have this ready while I’m folding laundry or answering emails. It’s the ultimate low-effort, high-reward dessert.
- Pantry-Friendly Ingredients — You probably already have cake mix, cream cheese, and strawberry jam in your house. If not, it’s a quick trip to the store. No fancy specialty items needed.
- Texture Heaven — This is the magic of the dump cake method. You get the soft, custardy cheesecake layer at the bottom, the juicy strawberry sauce in the middle, and the crispy, golden crumble on top. Every bite has a different texture. It’s addictive.
- Makes Amazing Leftovers — This actually tastes better the next day. The flavors meld together, the crust soaks up some of the strawberry sauce, and it turns into this incredible, dense, delicious bar. I deliberately make extra for Monday morning coffee.
- Feeds a Crowd — One 9×13 pan serves 12-15 people easily. It’s perfect for potlucks because it travels well and doesn’t need to be refrigerated immediately (though it’s better cold). It’s always the first plate to disappear.
This is my answer to “what’s for dessert?” when I want something special but don’t want to stress. It’s comforting, nostalgic, and tastes like summer, even in the middle of winter.
Ingredients You’ll Need
Here’s the beauty of this Strawberry Cheesecake Dump Cake: the ingredient list is shockingly short. But I’m particular about which ones you use, because small choices make a big difference in the final taste.
For the Strawberry Layer
Strawberry Jam or Preserves (1 cup / 250g) — This is the heart of the fruit flavor. I prefer a high-quality seedless strawberry jam for a smoother texture, but if you have whole berry preserves, chop them up a bit. It adds nice chunks. Avoid jam with added pectin that makes it too gel-like; you want it to spread easily.
Fresh or Frozen Strawberries (1 cup / 150g, sliced) — I use fresh when they’re in season and cheap, but frozen works great too. If you use frozen, don’t thaw them completely before adding, or you’ll get a watery mess. Just chop them up and dump them in. They’ll cook down and blend with the jam.
For the Cheesecake Layer
Cream Cheese (8 oz / 225g, softened) — This needs to be softened to room temperature. If it’s cold and blocky, it won’t mix smoothly with the cake mix. I microwave mine for 15-20 seconds to speed this up. Full-fat only—low-fat versions won’t give you that rich, tangy cheesecake flavor.
Granulated Sugar (¼ cup / 50g) — Just a little bit to sweeten the cream cheese. Don’t skip this, or the cheesecake layer will taste bland compared to the sweet cake and jam.
Vanilla Extract (1 teaspoon) — Pure vanilla makes a huge difference. I use a good quality extract, not the imitation stuff. It adds that classic cheesecake aroma.
For the Cake Topping
Yellow Cake Mix (1 box / 15.25 oz) — This is the base. I always use yellow cake mix for this recipe because it’s sweeter and richer than white cake mix. It pairs perfectly with the strawberries. Don’t use chocolate cake mix unless you want a completely different flavor profile (which, honestly, could be good too, but stick to yellow for the classic taste). Do not use the “instant pudding” mix; use the dry cake mix.
Unsalted Butter (½ cup / 115g, melted) — You’ll drizzle this over the cake mix. Melted butter helps the dry cake mix form that crispy, crumbly topping as it bakes. Use real butter, not margarine. It adds flavor and helps the browning.
Optional Garnish — Whipped cream, fresh strawberries, or a dusting of powdered sugar. I usually just serve it plain, but a dollop of whipped cream makes it feel fancy.
Shopping Tips
I buy my cream cheese in the 8-oz blocks, not the tubs. The block version is denser and holds its shape better. For the cake mix, I keep a box of yellow cake mix in my pantry specifically for dump cakes. It’s one of those things I always have because I make these so often.
Equipment Needed
You don’t need any fancy gadgets for this. Here’s what I actually use:
9×13 Inch Baking Dish — A standard glass or ceramic baking dish works best. Glass distributes heat evenly and gives you a nice crispy bottom. I use my Pyrex dish, and it’s perfect. Make sure it’s clean and dry.
Mixing Bowl — A medium-sized bowl for mixing the cream cheese, sugar, and vanilla. Any bowl works.
Fork or Whisk — To mix the cream cheese filling. A fork is fine; you don’t need an electric mixer for this small amount.
Measuring Cups and Spoons — Standard stuff. I keep a set in my drawer.
Small Saucepan or Microwave-Safe Bowl — For melting the butter. I use a microwave-safe bowl and zap it for 30-45 seconds, stirring halfway through.
Spatula — For spreading the jam and the cream cheese layer. A rubber spatula is best because it gets all the mixture out of the bowl.
Optional: Cooling Rack — If you’re impatient like me, you’ll want to let it cool slightly before serving. A cooling rack helps, but you can also just leave the pan on the counter.
How to Make It: Step-by-Step
Alright, let’s make this Strawberry Cheesecake Dump Cake! I’m walking you through exactly how I do it, including the little tricks I’ve picked up over the years.
Step 1: Prep Your Oven and Pan (5 minutes)
Preheat your oven to 350°F (175°C). Grease your 9×13 inch baking dish with non-stick spray or a little butter. I spray mine well to ensure nothing sticks, especially since the sugar in the jam can caramelize and stick if you’re not careful.
Step 2: Create the Strawberry Layer (5 minutes)
Pour the strawberry jam into the bottom of the prepared baking dish. If you’re using whole strawberries, chop them into small pieces and sprinkle them over the jam. Spread the jam evenly with a spatula. It doesn’t need to be perfect, just cover the bottom. This is the fruit layer that will bubble up and create that juicy sauce.
Step 3: Mix the Cheesecake Filling (3 minutes)
In your mixing bowl, combine the softened cream cheese, granulated sugar, and vanilla extract. Mix with a fork or whisk until smooth and creamy. There shouldn’t be any lumps of cream cheese left. If it’s still too thick, add a teaspoon of milk to loosen it up. You want a thick but spreadable consistency.
Step 4: Add the Cheesecake Layer (3 minutes)
Dollop the cream cheese mixture over the strawberry layer in the pan. Use a knife or spatula to spread it out into an even layer. Try to cover the jam completely, but don’t worry if some small spots show through. It’ll bake into the cake mix on top, so it’s fine.
Step 5: Add the Cake Mix Topping (2 minutes)
Evenly sprinkle the dry yellow cake mix over the cream cheese layer. Do not mix it in! Just sprinkle it like snow. This dry layer will absorb the moisture from the cheesecake and strawberries as it bakes, creating that unique crumbly texture. Spread it out to cover the entire surface.
Step 6: Drizzle the Butter (2 minutes)
Pour the melted butter evenly over the cake mix. Use a spoon or a small pitcher to drizzle it in a crisscross pattern. The butter will soak into the dry cake mix, helping it brown and crisp up in the oven. This is the step that turns dry powder into a golden, buttery crust.
Step 7: Bake Until Golden (45-50 minutes)
Place the pan in the preheated oven and bake for 45-50 minutes. You’ll know it’s done when the top is golden brown and the edges are bubbling with strawberry sauce. The center might look slightly soft, but it will firm up as it cools. Don’t overbake it, or the cheesecake layer will become dry.
Step 8: Cool and Serve
Remove the pan from the oven and let it cool for at least 15-20 minutes before serving. This allows the cheesecake layer to set slightly so it’s easier to cut. Slice into squares and serve warm or at room temperature. Top with whipped cream if you’re feeling fancy.
Total Time: About 1 hour (15 minutes prep, 45 minutes baking)
Expert Tips & Tricks
Here’s everything I’ve learned from making this dozens of times. These tips will save you from my mistakes.
Room Temperature Cream Cheese is Non-Negotiable
If your cream cheese is cold, it will stay lumpy, and you’ll have chunks of cream cheese in your cake. I’ve learned this the hard way. Soften it in the microwave for 15-20 seconds, or leave it out on the counter for 30 minutes. It should be soft enough to press with your finger.
Don’t Skip the Butter Drizzle
It’s tempting to think you can skip the butter, but it’s crucial. The butter helps the cake mix crisp up and brown. Without it, you’ll just have dry cake crumbs on top. Drizzle it evenly to ensure every bite has that buttery flavor.
Let It Cool Before Cutting
I know it’s hard to wait, but cutting into a hot dump cake will result in a mess. The cheesecake layer is soft and needs time to set. If you cut it too soon, it’ll fall apart. Give it 15-20 minutes to cool, and you’ll get clean slices.
Customize the Fruit
While strawberries are classic, you can use other fruits. Blueberry jam and fresh blueberries work great. Raspberry jam is tangy and delicious. Even peach preserves work well. Just keep the ratio the same.
Storage is Easy
Store leftovers in an airtight container in the refrigerator for up to 4 days. It actually tastes better the next day as the flavors meld. You can also freeze individual slices for up to 3 months, though the texture might change slightly.
Variations & Substitutions
Once you’ve nailed the basic version, here’s how you can mix it up. I’ve tried all of these.
Chocolate Strawberry Cheesecake
Swap the yellow cake mix for chocolate cake mix. The combination of chocolate and strawberry is a classic. You can also add a layer of chocolate chips on top of the cream cheese for extra richness.
Butterscotch Delight
Use butterscotch cake mix instead of yellow, and swap the strawberry jam for apple pie filling. It tastes like an apple crumble with a cheesecake center. Surprisingly delicious.
Gluten-Free Option
Use a gluten-free yellow cake mix. Most brands work well in dump cakes because the texture is less important than in a layered cake. Just check the label to ensure it’s a direct substitute.
Dairy-Free Version
Use dairy-free cream cheese (like Tofutti or Kite Hill) and dairy-free butter. The result is still tasty, though the texture might be slightly different. It’s a good option for those with lactose intolerance.
Add Nuts
Before baking, sprinkle ½ cup of chopped pecans or walnuts over the cake mix. It adds a nice crunch and nutty flavor that pairs well with the strawberries.
Serving & Storage
How to serve this Strawberry Cheesecake Dump Cake makes a big difference in how it’s perceived.
Serving Suggestions
I usually serve this straight from the pan at the dinner table. It looks rustic and homemade. But here are other ways I’ve enjoyed it:
- With Whipped Cream — A dollop of freshly whipped cream adds lightness to the dense cake.
- With Vanilla Ice Cream — Warm cake and cold ice cream is a classic combo. The melting ice cream mixes with the strawberry sauce.
- As a Breakfast Treat — Yes, really. I’ve served this for brunch with coffee. It’s sweet, comforting, and feels like a special occasion.
Storage Instructions
Refrigerator: Store in an airtight container for up to 4 days. The cake will firm up in the fridge, which is actually preferred for serving.
Freezing: You can freeze individual slices. Wrap them tightly in plastic wrap and then in foil. Thaw in the fridge overnight. The texture might be slightly softer, but it’s still good.
Reheating: If you like warm cake, microwave a slice for 30 seconds. It softens the crust and warms the cheesecake layer. Don’t overheat it, or the cream cheese will separate.
Nutrition Information
I’m not a nutritionist, but here’s the breakdown if you’re tracking. This is a indulgent dessert, so enjoy in moderation.
Per Serving (based on 12 servings):
- Calories: 320
- Protein: 5g
- Carbs: 45g
- Fiber: 1g
- Sugar: 32g
- Fat: 14g
- Saturated Fat: 8g
- Cholesterol: 35mg
- Sodium: 350mg
What’s Good: It’s quick and easy, and you can control the sugar by using less jam. What to Know: It’s high in sugar and carbs due to the cake mix and jam. It’s not a health food, but it’s a fun treat.
Final Thoughts
So that’s my go-to Strawberry Cheesecake Dump Cake! I’ve probably talked your ear off at this point, but when you make a recipe this often, you have a lot to say about it. This has saved me more times than I can count. It’s my answer to “what’s for dessert?” when I’m tired, don’t want takeout, and still want something that tastes really good. My kids are happy, my husband’s happy, and I’m happy because I’m not stressed about cooking.
Make it yours! Try different fruits, add nuts, or swap the cake mix. The best recipes are the ones you adapt to your family’s tastes. If you make this, drop a comment and let me know what you think! I love hearing how recipes turn out in your kitchen. And if something doesn’t work, tell me that too—I’m here to help troubleshoot.
Happy baking! And I hope your kitchen smells half as good as mine does right now.
Frequently Asked Questions
Can I use fresh strawberries instead of jam?
A: Yes, but you’ll need both. The jam provides the sweetness and liquid that helps the cake mix bake properly. If you only use fresh strawberries, the cake might not cook evenly. I recommend using 1 cup of jam and 1 cup of fresh strawberries for the best balance.
Why did my dump cake turn out dry?
A: This usually happens if you don’t drizzle enough butter or if you overbake it. Make sure the cake mix is evenly coated with butter, and check the cake after 45 minutes. If the top is golden and the edges are bubbling, it’s done. Overbaking dries out the cheesecake layer.
Can I make this ahead of time?
A: You can assemble it ahead and refrigerate it before baking. Cover it tightly with plastic wrap and bake when ready. Just add 5-10 minutes to the baking time since the pan will be cold. Alternatively, bake it ahead and reheat slices before serving.
What if I don’t have yellow cake mix?
A: You can use white cake mix, but it will be less sweet and rich. Vanilla cake mix is a good substitute. Avoid chocolate cake mix unless you want a chocolate-strawberry combination, which is delicious but different.
How do I store leftovers?
A: Store in an airtight container in the refrigerator for up to 4 days. It’s best served cold or at room temperature. Reheat slices in the microwave for 30 seconds if you prefer warm cake.
Can I freeze this dump cake?
A: Yes, you can freeze individual slices. Wrap them tightly in plastic wrap and then in foil. Thaw in the fridge overnight. The texture might be slightly softer, but it’s still good.
Is this recipe gluten-free?
A: The standard recipe contains gluten from the cake mix. To make it gluten-free, use a gluten-free yellow cake mix. Check the labels of your other ingredients to ensure they are also gluten-free.
Pin This Recipe!
Strawberry Cheesecake Dump Cake
- Total Time: 1 hour
- Yield: 12 servings 1x
Description
An incredibly easy 3-ingredient dessert that combines a creamy cheesecake layer with strawberry jam and a buttery cake mix topping. Perfect for last-minute gatherings or when you want a sweet treat without the hassle.
Ingredients
- 1 cup (250g) strawberry jam or preserves
- 1 cup (150g) fresh or frozen strawberries, sliced
- 8 oz (225g) cream cheese, softened to room temperature
- 1/4 cup (50g) granulated sugar
- 1 teaspoon vanilla extract
- 1 box (15.25 oz) yellow cake mix (dry)
- 1/2 cup (115g) unsalted butter, melted
Instructions
- Preheat oven to 350°F (175°C) and grease a 9×13 inch baking dish.
- Pour the strawberry jam into the bottom of the prepared baking dish and spread evenly. Sprinkle sliced strawberries over the jam.
- In a mixing bowl, combine the softened cream cheese, granulated sugar, and vanilla extract. Mix with a fork or whisk until smooth and creamy.
- Dollop the cream cheese mixture over the strawberry layer and spread it into an even layer, covering the jam completely.
- Evenly sprinkle the dry yellow cake mix over the cream cheese layer. Do not mix it in.
- Drizzle the melted butter evenly over the cake mix in a crisscross pattern.
- Bake for 45-50 minutes until the top is golden brown and the edges are bubbling.
- Remove from oven and let cool for at least 15-20 minutes before slicing and serving.
Notes
Ensure cream cheese is softened to room temperature to avoid lumps. Do not skip the butter drizzle as it is crucial for the crispy topping. Let the cake cool for 15-20 minutes before cutting to allow the cheesecake layer to set. Leftovers can be stored in the refrigerator for up to 4 days or frozen for up to 3 months.
- Prep Time: 15 minutes
- Cook Time: 45 minutes
- Category: Dessert
- Cuisine: American
Nutrition
- Serving Size: 1 slice
- Calories: 320
- Sugar: 32
- Sodium: 350
- Fat: 14
- Saturated Fat: 8
- Carbohydrates: 45
- Fiber: 1
- Protein: 5
Keywords: dump cake, strawberry cheesecake, easy dessert, 3 ingredient recipe, last minute dessert, potluck dessert, strawberry cake



