It’s 6:45 AM on a Tuesday. The house is a war zone of mismatched socks, forgotten permission slips, and a half-eaten piece of toast that has been sitting on the counter since yesterday. I am running on three hours of sleep and a terrifying amount of caffeine. My kid, Leo, is standing by the door with his backpack slung over one shoulder, looking at me with that specific expression that says, “I know you forgot something, and I’m not even mad, I’m just disappointed.”
I had forgotten the snack. Again.
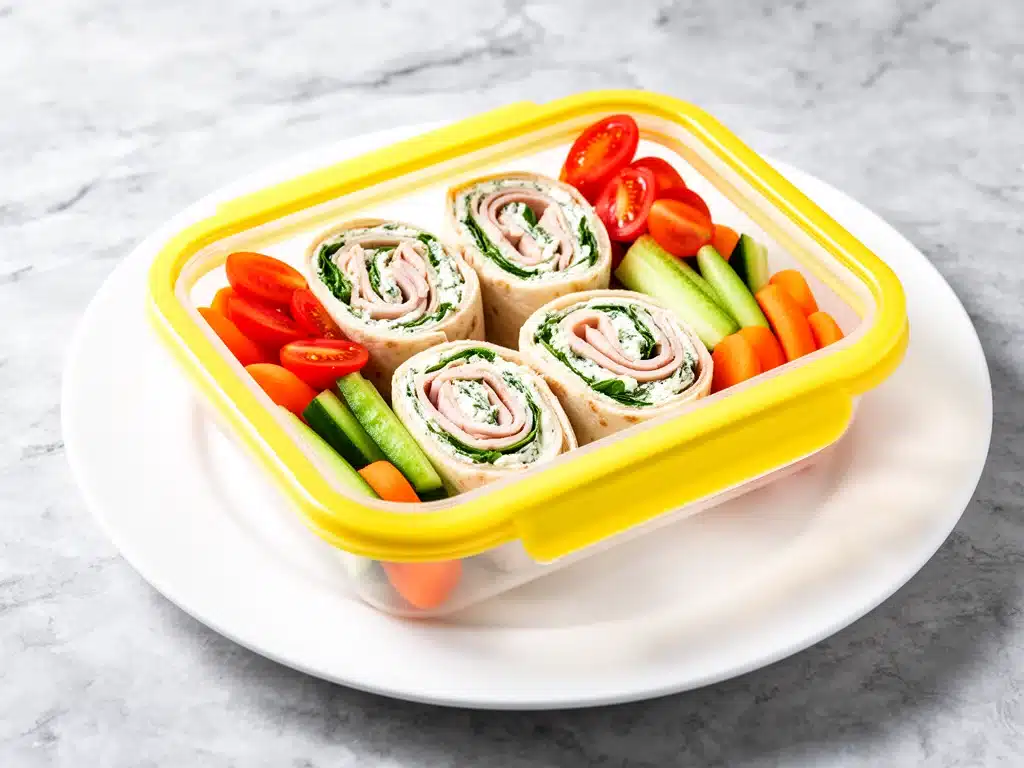
Last year, this moment would have ended with a frantic drive to the corner store, a $5 bag of pretzels, and a lecture about responsibility that neither of us wanted to have. But this year? This year, I have my weapon of choice: the back-to-school turkey pinwheel snack box. It’s not fancy. It doesn’t require a culinary degree or a trip to three different specialty stores. It’s just three main ingredients, a little bit of foresight, and about ten minutes of prep the night before.
I discovered this little trick during the first week of school when I was desperate to stop buying those sad, pre-packaged snack packs that cost more than my morning coffee and contain more preservatives than food. I wanted something that felt special—something that made my kid feel like they were the cool kid with the best lunchbox contents—but I also needed it to be fast enough for a morning that feels like it’s moving in fast-forward.
These pinwheels are the answer. They’re cute without being childish, savory without being heavy, and they hold up perfectly in a lunchbox until noon. Plus, they’re basically impossible to mess up. If you can roll a tortilla, you can make this back-to-school turkey pinwheel snack box. And if you’ve ever stared into a fridge at midnight wondering what to pack for tomorrow, you’re going to love me for this one.
Why You’ll Love This 3-Ingredient Snack Box
Look, I’m not going to pretend that packing lunch is the highlight of my day. It’s usually a chore squeezed between brushing teeth and finding shoes. But this snack box has quietly become my favorite part of the morning routine. Here’s why it’s stuck in our rotation:
It’s Actually Fast — Seriously, if you can open a package of tortillas, you can make this. The prep takes maybe five minutes. The rest is just chilling in the fridge. I throw these together while the coffee brews. If you’re rushing out the door, you don’t even have to think about it.
It’s Not Just Tortillas — I know, I know. Just tortillas and turkey sounds boring. But the cream cheese acts like glue and flavor bomb all in one. It turns a plain sandwich into a roll-up that’s fun to eat. My kids call them “taco spirals,” and they’re way more excited to eat them than they are a standard sandwich.
It’s Mess-Free — This is huge for school. No crumbs falling onto the desk, no soggy bread, no leaking containers. These pinwheels are sturdy. They travel well. I’ve had Leo bring them back from school with maybe one bite taken out of the corner, and the rest still looking perfect. That’s a win in my book.
It’s Cheap — We’re talking about dollar-store ingredients here. A pack of tortillas, a block of cream cheese, and a pack of sliced turkey. It costs less than $4 to make enough for a week of snacks. Compare that to the $3 juice box and $2 cookie combo at the cafeteria, and you’re saving money without sacrificing quality.
It’s Customizable — My daughter hates turkey but loves ham. My son is obsessed with jalapeños. Because this base recipe is so simple, I can swap ingredients in seconds. It’s the ultimate flexible snack for a picky household.
This is my go-to when I need a snack to just work. No complicated techniques, no weird ingredients, just reliable, delicious food that makes everyone happy. It’s the culinary equivalent of a warm hug on a cold morning.
Ingredients You’ll Need
Here’s the best part: you probably have most of this already. I’m particular about three things here, and I’ll tell you exactly why, but honestly, this recipe is very forgiving.
The Core Three
Tortillas (6-inch flour tortillas, 6-8 count) — I use the small 6-inch ones. They’re the perfect size for little hands and roll up tightly without falling apart. Large tortillas make giant pinwheels that are annoying to eat in a lunchbox. I like the Mission brand because they’re soft and pliable. If they’re stiff, microwave them for 10 seconds to soften them up.
Turkey Slices (6 ounces, deli-style) — Look for the oven-roasted turkey breast. It’s lean, flavorful, and doesn’t have that weird processed taste that some cheaper deli meats have. I usually buy the pre-sliced packs, but if your deli counter has good turkey, go for that. Avoid the thick-cut breast slices; they’re too bulky for rolling. You want thin, even slices so the roll is tight.
Soft Cream Cheese (4 ounces, softened) — This is the secret weapon. It acts as the glue that holds the pinwheel together. If your cream cheese is cold and hard, it won’t spread, and your pinwheel will unravel. Let it sit on the counter for 15 minutes before you start. I use regular full-fat cream cheese because it tastes better, but light cream cheese works too if you’re watching calories (though the texture is slightly different).
The Flavor Boosters (Optional but Recommended)
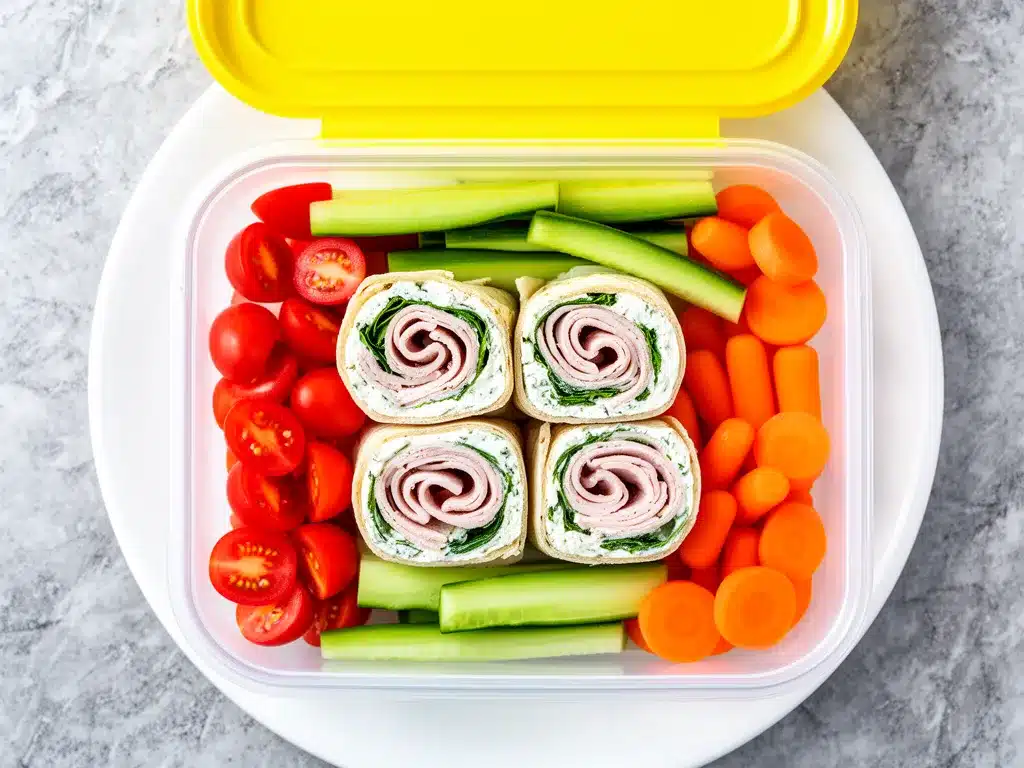
While the base recipe is just those three ingredients, I almost always add one or two extras to keep it interesting. These are pantry staples, so don’t stress if you don’t have them on hand.
Shredded Cheddar Cheese (½ cup) — Sharp cheddar adds a nice tang that cuts through the mild turkey and cream cheese. I shred my own from a block because pre-shredded cheese has anti-caking agents that make it melt weirdly and taste dusty. If you’re in a rush, pre-shredded is fine, but fresh-shredded is better.
Spinach Leaves (2 cups, fresh baby spinach) — I throw in a handful of spinach. It wilts slightly from the warmth of the tortilla and adds a pop of color. My kids don’t even notice it’s there, which is basically a miracle. If they hate greens, skip it, but it adds a nice freshness.
Cucumber Ribbons (½ cup) — I use a vegetable peeler to make long, thin strips of cucumber. It adds crunch and keeps the pinwheel from getting too doughy. If you don’t like cucumber, try thin bell pepper strips or even shredded carrots.
Herbs (1 teaspoon dried dill or chives) — A little dried dill mixed into the cream cheese makes it taste like a fancy bagel spread. It’s a subtle change, but it elevates the whole thing. I keep a jar of dried dill in my spice rack specifically for this.
Black Pepper (freshly cracked) — Just a pinch. It wakes up the turkey flavor.
Shopping Tips
I buy the turkey in bulk when it’s on sale and freeze it in portion-sized bags. That way, I always have turkey ready to go. For the cream cheese, I keep a block in the fridge and let it soften before I cook. And for the tortillas, I keep a pack in the pantry at all times. It’s one of those things I always have because it’s so versatile. You can use these tortillas for creamy crockpot sausage and peppers too, so they’re a great staple to keep on hand.
Equipment Needed
You don’t need fancy equipment for this. Here’s what I actually use.
Flat Surface — A clean countertop or a large cutting board. You need enough space to lay out the tortillas flat. I use my big wooden cutting board because it’s smooth and easy to wipe down.
Butter Knife or Offset Spatula — For spreading the cream cheese. A butter knife works fine, but an offset spatula gives you a smoother, more even layer. I use a cheap plastic one from the dollar store because I don’t mind if it gets stained.
Plastic Wrap — This is crucial. You need plastic wrap to roll the tortillas tightly before chilling. Without it, the pinwheels will unravel. I keep a roll of cling wrap in the front of my fridge, right next to the milk. It’s the first thing I grab when I’m prepping snacks.
Sharp Knife — For slicing the pinwheels. A serrated knife works best because it cuts through the tortilla without squishing it. I learned this the hard way with a dull chef’s knife that turned my beautiful pinwheels into mush. Now I only use the serrated bread knife.
Measuring Cups — Not strictly necessary, but helpful if you’re being precise. I usually eyeball it, but if you’re making a big batch, measuring helps keep things consistent.
Airtight Container — For storing the finished pinwheels in the fridge. I use glass containers with snap lids because they don’t stain and they stack well in the fridge. Plastic containers work too, but I’ve had some retain odors from previous meals.
How to Make It: Step-by-Step
Alright, let’s make this! I’m walking you through exactly how I do it, including the little tricks I’ve picked up over the last few months of back-to-school chaos.
Step 1: Prep Your Workspace (2 minutes)
Clear off a large section of your counter. Lay out a sheet of plastic wrap that’s about 12 inches long. This will be your rolling station. If you’re making a big batch, lay out multiple sheets of plastic wrap side by side so you have room to work. I usually make enough for five days, so I lay out five sheets. It feels like overkill, but it saves time later.
Step 2: Soften the Cream Cheese (1 minute)
If your cream cheese isn’t already soft, take it out of the fridge and let it sit for 15 minutes. You want it to be spreadable, like peanut butter. If you try to spread cold cream cheese, it will tear the tortilla and make a mess. I’ve ruined more tortillas than I can count by rushing this step. Patience pays off.
Step 3: Spread the Cream Cheese (3 minutes)
Lay a tortilla flat on the plastic wrap. Take your softened cream cheese and spread it evenly over the surface, leaving a half-inch border around the edges. Don’t go too thick—a thin, even layer is key. If the layer is too thick, the pinwheel will be bulky and hard to slice. I use the back of my butter knife to smooth it out. It should look like a smooth, white canvas.
Step 4: Layer the Turkey (2 minutes)
Lay the turkey slices over the cream cheese. Overlap them slightly so there are no gaps. You want full coverage because gaps mean the pinwheel will fall apart. I usually use about 4-5 slices per tortilla, depending on how thick they are. Press them down gently so they stick to the cream cheese. If you’re adding cheese or veggies, add them now. I sprinkle shredded cheddar and a few spinach leaves on top. Keep it simple—don’t overload it, or it’ll burst.
Step 5: Roll It Up (2 minutes)
This is the fun part. Lift the edge of the plastic wrap that’s closest to you. Using the plastic wrap to help you, start rolling the tortilla away from you. Roll it tightly. The plastic wrap is your friend here—it keeps the tortilla from sticking and helps you apply even pressure. Roll it until it’s a tight log. Once it’s rolled, use the plastic wrap to twist the ends like a candy wrapper. This locks the shape in place. Do this for all your tortillas.
Step 6: Chill (At least 1 hour)
Place the rolled pinwheels in the fridge. They need to chill for at least one hour. This is non-negotiable. If you skip this step, the cream cheese will be too soft, and your pinwheels will unravel when you slice them. I usually make them the night before, so they chill overnight. It’s the easiest step, but it’s the most important. If you’re in a rush, you can put them in the freezer for 20 minutes, but the fridge is better for even chilling.
Step 7: Slice and Pack (5 minutes)
Take the chilled pinwheels out of the fridge. Remove the plastic wrap. Using a sharp serrated knife, slice the log into 1-inch pieces. Wipe the knife clean between cuts if it gets messy. You should get about 6-8 pinwheels per tortilla. Arrange them in your snack box or container. If you’re packing for school, put them in a container with a lid. They’ll stay fresh for up to three days in the fridge.
Pro Tip for Slicing
If your knife keeps squishing the pinwheels, try dipping it in hot water and drying it off before each cut. The heat helps the knife glide through the tortilla cleanly. It’s a little trick I learned from a professional baker friend, and it works like magic.
Expert Tips & Tricks
Here’s everything I’ve learned from making these dozens of times. These tips will save you from my mistakes.
Don’t Skip the Plastic Wrap
I know it feels wasteful, but it’s essential. Without it, the tortilla sticks to itself and tears. I’ve tried rolling them without it, and the result is a mess of scattered ingredients. Use the plastic wrap to create a tight roll, then twist the ends. It’s the only way to get clean slices.
Keep It Tight
When you’re rolling, apply even pressure. If one end is tighter than the other, the pinwheel will be lopsided and hard to slice. I practice my rolling technique on my kitchen counter—it’s like a muscle memory thing. The tighter the roll, the better the slice.
Chill Longer if It’s Warm
If your kitchen is hot, or if you’re making these in the summer, chill them for longer. The cream cheese needs to be firm enough to hold its shape when sliced. I’ve had disasters where the pinwheels turned into soup in the lunchbox because they weren’t chilled enough. Better safe than sorry.
Use a Serrated Knife
A straight-edged knife will crush the tortilla. A serrated knife cuts through cleanly. I’ve ruined several batches with a dull chef’s knife. Now I only use the bread knife. It’s a small change, but it makes a huge difference in the presentation.
Make Ahead Strategy
You can make these up to three days in advance. I usually make a big batch on Sunday night, slice them, and store them in an airtight container in the fridge. Then, I just grab one or two each morning. It saves so much time during the week. Just make sure the container is airtight to prevent them from drying out.
Flavor Variations
Once you’ve mastered the basic version, here’s how you can mix it up. I’ve tried all of these, and they all work.
Italian Style
Swap the turkey for sliced ham. Add shredded mozzarella and a few slices of pepperoni. It tastes like a mini calzone. My kids love this version.
Mexican Style
Add shredded chicken, black beans, and a little salsa. It’s like a taco pinwheel. I use leftover rotisserie chicken for this. It’s a great way to use up leftovers.
Green Goddess
Add avocado slices and a little ranch dressing to the cream cheese. It’s rich and creamy and tastes like a fancy dip. I use this version when I want to treat myself.
Spicy Kick
Add a few slices of jalapeño or a dash of hot sauce to the cream cheese. It adds a nice heat that balances the mild turkey. I use this version when I need a little extra energy in the morning.
Serving & Storage
How to Serve
I usually serve these straight from the fridge. They’re best cold or room temperature. I don’t recommend heating them up, as the cream cheese can get oily. I pack them in a small container with a lid. If you’re serving them at a party, arrange them on a platter with a side of ranch or salsa for dipping. They’re always a hit at potlucks.
Storage Instructions
Store the sliced pinwheels in an airtight container in the fridge for up to three days. They’ll stay fresh and firm. If you leave them out at room temperature for more than two hours, they’ll start to unravel and the cream cheese will soften. So keep them cold until you’re ready to eat.
Freezing
Honestly, these don’t freeze well. The tortilla gets soggy when thawed, and the cream cheese changes texture. Make them fresh or store in the fridge for up to three days. I’ve tried freezing them, and the result is a mushy mess. Don’t bother.
Meal Prep
Make the rolls the night before, slice them in the morning, and pack them. This is the most efficient method. I do this every Sunday. It takes me about 20 minutes total, and it saves me from scrambling in the morning. If you’re short on time, make the rolls on Sunday, and slice them each morning. It’s still faster than making them from scratch every day.
Nutrition Information
I’m not a nutritionist, but here’s the breakdown if you’re tracking. This is per pinwheel (based on 8 pinwheels per tortilla, using 6-inch tortillas).
| Nutrient | Amount per Pinwheel |
|---|---|
| Calories | 85 |
| Protein | 5g |
| Carbs | 8g |
| Fat | 4g |
| Sodium | 180mg |
What’s Good:
Decent protein from the turkey. Low in sugar. The tortilla provides some fiber, especially if you use whole wheat. It’s a balanced snack that won’t make you crash in the afternoon.
What to Know:
Higher in sodium from the deli turkey and cream cheese. If you’re watching salt, look for low-sodium turkey and use light cream cheese. It’s not a diet food, but it’s not junk food either. It’s a solid, wholesome snack.
Final Thoughts
So that’s my go-to back-to-school turkey pinwheel snack box! I’ve probably talked your ear off at this point, but when you make a recipe this often, you have a lot to say about it.
This has saved me from buying overpriced, unhealthy snacks more times than I can count. It’s my answer to “what’s for snack?” when I’m tired, don’t want to cook, and still want something that tastes good. My kids are happy, I’m happy, and I’m happy because I’m not stressed about packing lunch.
Make it yours! Try different add-ins, swap in your favorite vegetables, adjust the turkey. The best recipes are the ones you adapt to your family’s tastes. If you make this, drop a comment and let me know what you think! I love hearing how recipes turn out in your kitchen. And if something doesn’t work, tell me that too—I’m here to help troubleshoot.
Happy packing! And I hope your kid’s lunchbox smells half as good as mine does right now.
Frequently Asked Questions
Can I use whole wheat tortillas?
Yes, absolutely! I use whole wheat tortillas sometimes because they have more fiber and hold up better. They’re slightly denser, so you might need to spread the cream cheese a little thinner. My kids prefer white tortillas because they’re softer, but whole wheat is a great option if you want a healthier snack.
Why did my pinwheels unravel when I sliced them?
This usually means they weren’t chilled long enough. The cream cheese needs to be firm to hold the shape. If you slice them while the cream cheese is still soft, they’ll fall apart. Make sure to chill them for at least one hour, preferably overnight. Also, make sure you’re rolling them tightly with the plastic wrap.
Can I make these ahead for a week?
You can make the rolls ahead of time, but I recommend slicing them the day you pack them. If you slice them too early, they’ll dry out and lose their texture. I make the rolls on Sunday, and then slice and pack them each morning. This keeps them fresh and firm.
Can I use turkey breast instead of deli turkey?
You can, but deli turkey is thinner and easier to roll. If you use thick slices of turkey breast, you’ll need to pound them flat with a mallet. It’s extra work, and the texture is different. Deli turkey is the best option for pinwheels because it’s thin and flexible.
How do I reheat leftovers without it getting dry?
You shouldn’t reheat these. They’re best served cold or at room temperature. Heating them up will make the tortilla tough and the cream cheese oily. If you have leftovers, just eat them cold the next day. They’re still delicious cold.
Can I add vegetables?
Yes! I often add spinach, cucumber, or bell peppers. Just make sure to pat them dry before adding them, so they don’t make the pinwheel soggy. I also like to add a little shredded cheese for extra flavor. Get creative with what you have in the fridge.
Can I use cream cheese spread instead of block cream cheese?
You can, but block cream cheese is firmer and easier to spread evenly. Cream cheese spread has more air in it, so you might need to use more to get the same coverage. I prefer block cream cheese because it tastes better and has a smoother texture. If you use spread, make sure it’s fully softened before spreading.
Pin This Recipe!
Back-to-School Turkey Pinwheel: 3-Ingredient Snack Box
- Total Time: 1 hour 10 minutes
- Yield: 8 servings (per tortilla) 1x
Description
A quick, mess-free, and customizable 3-ingredient snack box featuring turkey and cream cheese rolled in tortillas. Perfect for busy mornings and school lunches.
Ingredients
- 6–8 small (6-inch) flour tortillas
- 6 ounces deli-style turkey slices (oven-roasted breast)
- 4 ounces soft cream cheese (softened)
- Optional: 1/2 cup shredded cheddar cheese
- Optional: 2 cups fresh baby spinach
- Optional: 1/2 cup cucumber ribbons
- Optional: 1 teaspoon dried dill or chives
- Optional: Freshly cracked black pepper
Instructions
- Prep workspace: Lay out plastic wrap sheets (about 12 inches long) on a clean counter.
- Soften cream cheese: Let cream cheese sit at room temperature for 15 minutes until spreadable.
- Spread cream cheese: Lay a tortilla flat on plastic wrap. Spread a thin, even layer of cream cheese over the surface, leaving a half-inch border.
- Layer turkey: Place turkey slices over the cream cheese, overlapping slightly for full coverage. Add optional cheese or veggies if desired.
- Roll it up: Using the plastic wrap, roll the tortilla tightly away from you into a log. Twist the ends of the plastic wrap to secure the shape.
- Chill: Refrigerate the rolled pinwheels for at least 1 hour (overnight is best) to firm up the cream cheese.
- Slice and pack: Remove plastic wrap. Use a sharp serrated knife to slice the log into 1-inch pieces. Pack in an airtight container.
Notes
Do not skip the chilling step; the cream cheese must be firm to prevent unraveling when slicing. Use a serrated knife for clean cuts. These do not freeze well as the tortilla becomes soggy. Store in the fridge for up to 3 days.
- Prep Time: 10 minutes
- Cook Time: 0 minutes
- Category: Snack
- Cuisine: American
Nutrition
- Serving Size: 1 pinwheel (approx.
- Calories: 85
- Sugar: 1
- Sodium: 180
- Fat: 4
- Saturated Fat: 2
- Carbohydrates: 8
- Protein: 5
Keywords: back-to-school snacks, turkey pinwheels, lunchbox ideas, quick snacks, 3-ingredient recipes, kid-friendly snacks, meal prep



