I still remember the Sunday night panic that defined my first month of back-to-school. It was August, the air was still thick and sticky, and my kitchen counter was covered in a chaotic spread of bento boxes, fruit cups, and juice boxes. I was trying to pack lunches for two kids who had already declared that school food was “gross” and that they only wanted nuggets. I looked at the pile of sad, pre-packaged snacks I’d bought in a last-ditch effort to avoid cooking, and I knew something had to change. I needed a lunch that felt like a treat, not a chore. Something my kids would actually fight over, but that I could prep on Sunday without losing my mind.
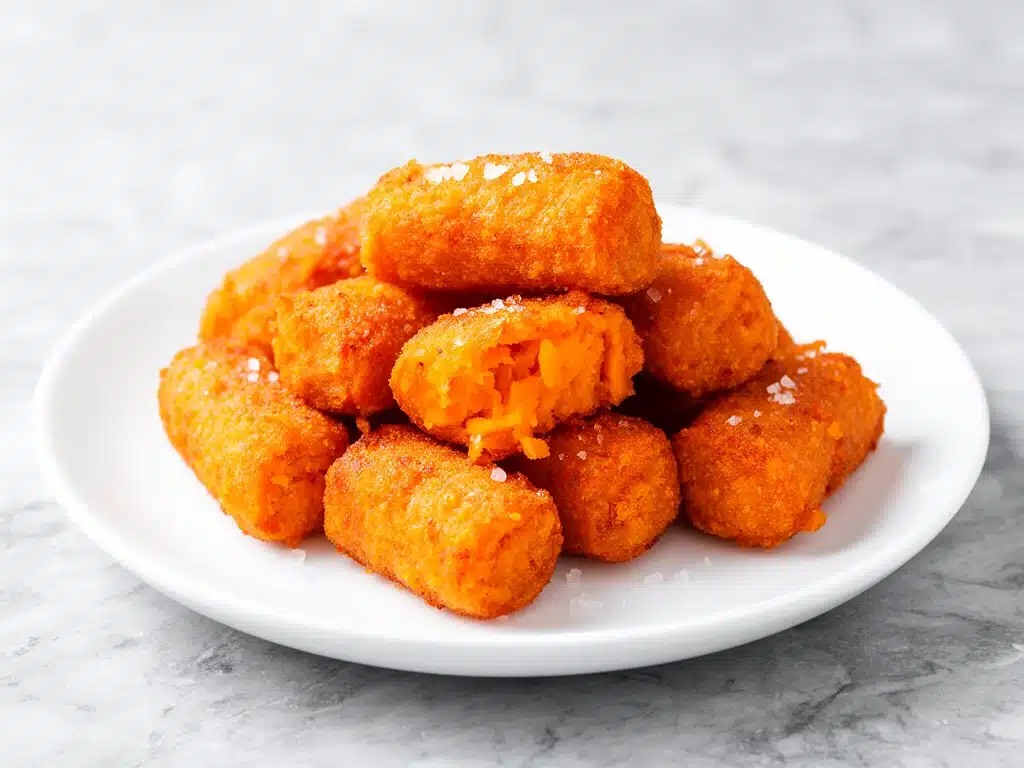
That’s when I decided to make baked sweet potato tots. Not the frozen kind from the grocery store aisle (which are basically just salt and preservatives), but real, homemade, crispy-on-the-outside-soft-on-the-inside sweet potato tots. I had seen recipes online that involved soaking potatoes for hours, grating them with expensive tools, and squeezing them in cheesecloth until my hands hurt. I wasn’t interested in a science project for my kid’s lunchbox. I wanted something fast, forgiving, and genuinely delicious.
So I experimented. I tested three different binding agents. I tried baking at 350°F, then 400°F, then 425°F. I burned a batch that stuck to the pan so badly I had to scrape it off with a butter knife. I made a batch that was soggy in the middle because I didn’t space them out enough. But after about five iterations, I cracked the code. These baked sweet potato tots are sturdy enough to survive a backpack ride, flavorful enough to get picked out of the lunchbox first, and healthy enough that I don’t feel guilty packing them. They’ve become the anchor of our weekly meal prep, and honestly, they’re the reason my kids actually ask me to pack lunch instead of begging for the cafeteria pizza. If you’re tired of the same old sandwich routine, this recipe is your new best friend.
Why You’ll Love This Recipe
There are a dozen reasons these tots have taken over our house, but if I had to narrow it down, it’s because they solve the biggest problem of back-to-school lunches: the boredom factor. Kids get bored. They get picky. They want food that’s fun to eat. Here’s why this recipe works so well for busy families:
- Sturdy Enough for a Backpack — Most veggie-based lunch items turn to mush by 10:30 AM. These tots hold their shape. I’ve checked my kids’ lunchboxes after a full day of school, and these are still crisp and intact. They don’t get soggy from condiments or other foods in the container.
- Meal Prep Friendly — You can make a huge batch on Sunday, store them in the fridge, and just grab a handful during the week. Or, better yet, bake them, let them cool, and freeze them. They reheat perfectly in a toaster oven or air fryer, so you can pack them cold or warm depending on what your kid prefers.
- Pick-Eater Approved — My son, who usually pushes anything orange off his plate, asks for these specifically. They taste like fries but feel like a “healthy” treat. It’s a win-win. I’ve even packed these for my vegetarian friend’s kids, and they loved them just as much.
- Quick and Simple — No fancy equipment needed. No soaking overnight. No complicated spice blends. Just sweet potato, a little binder, some seasoning, and an oven. You can have dinner-ready tots in under an hour if you’re rushing.
- Versatile Flavor Profile — The base recipe is mild and sweet, which means you can change the spices up every week. Do you like spicy? Add cayenne. Do you like herby? Add dried oregano. Do you like savory? A little garlic powder goes a long way. They’re a blank canvas for whatever flavor your family is craving.
- Budget-Friendly — Sweet potatoes are cheap, especially in season. You can feed a family of four for under $5. That’s cheaper than buying processed snacks, and way better for their energy levels during third period.
This recipe has saved my sanity. It’s my go-to when I’m tired, when I’m traveling, or when I just need a reliable, crowd-pleasing lunch component that doesn’t require reheating or special handling. It’s simple, it’s tasty, and it works.
Ingredients You’ll Need
Here’s the best part: you probably have most of this already in your pantry. I’m not asking for anything obscure. The magic here is in the ratio of potato to binder, so let’s break down exactly what you need and why it matters.
For the Tots
Sweet Potatoes (2 large, about 1.5 lbs / 680g) — Look for firm, smooth-skinned sweet potatoes. Garnet or Jewel varieties are great because they’re moist and sweet. Avoid the dry, hard ones. You’ll need to peel them and grate them. You can use a box grater or a food processor with a grating attachment. The food processor is faster, but be careful not to over-process them into mush.
Yellow Onion (½ medium, finely grated or minced / about 50g) — This adds savory depth to balance the sweetness. I grate it so it disappears into the tot, but you can finely mince it if you want texture. Don’t skip this; it prevents the tots from tasting one-note.
Garlic (2 cloves, minced / about 1 tablespoon) — Fresh garlic only. No jarred stuff here. It adds that essential aromatic punch that makes these tots smell amazing while they bake.
Egg (1 large / about 50g) — This is your binder. It holds the grated potato together so the tots don’t fall apart in the oven. If you’re dairy-free or vegan, you can substitute with a flax egg (1 tablespoon ground flaxseed mixed with 3 tablespoons water, let sit for 5 minutes), but the texture is slightly different.
Almond Flour or Panko Breadcrumbs (¼ cup / 30g) — This is the second binder and adds crunch. Almond flour makes them gluten-free and slightly nutty. Panko makes them crispier and more traditional. I use almond flour for our family, but breadcrumbs work just as well if you have them.
Old Bay Seasoning or Garlic Powder (1 teaspoon) — Old Bay is my secret weapon. It adds a savory, slightly spicy kick that mimics the flavor of traditional potato tots. If you don’t have it, garlic powder, onion powder, or even just salt and pepper works fine.
Salt and Black Pepper (½ teaspoon each, or to taste) — Sweet potatoes need salt to bring out their flavor. Don’t be shy with it. Taste the mixture before baking and adjust if needed.
Oil (2 tablespoons, divided) — I use avocado oil or olive oil. Avocado oil has a higher smoke point, which helps with browning. You’ll brush the tops with oil before baking to get them crispy.
For the Dipping Sauce (Optional but Recommended)
Greek Yogurt (½ cup / 120g) — Plain or vanilla? Go plain. It’s tangy and creamy. If you want a healthier dip, this is it. It’s also a great way to use up leftover yogurt from breakfast, like these Greek yogurt blueberry muffins which I make all the time.
Honey (1 tablespoon) — Balances the tang of the yogurt. Adjust to taste.
Lemon Juice (1 teaspoon) — Brightens up the dip. Adds a little zing.
Dill or Parsley (1 teaspoon, chopped) — Fresh herbs make the dip feel fancy. If you don’t have fresh, dried works too.
Common Substitutions
No Almond Flour? Use oat flour, regular flour, or even crushed crackers. Just make sure it’s finely ground.
Not a Fan of Onion? Skip it or use onion powder instead. The flavor will be milder, but still good.
Egg Allergy? Use a flax egg or 2 tablespoons of mashed banana (though this will add sweetness). Chickpea flour mixed with water also works as a binder.
Equipment Needed
You don’t need fancy gadgets for this. Here’s what I actually use, and what you can skip if you’re short on space.
Box Grater or Food Processor — A box grater works, but it’s a workout. I use the large holes on a box grater for speed. A food processor with the grating disk is faster but can make the potato too wet if you’re not careful. If you use a food processor, pulse in short bursts.
Cheesecloth or Clean Kitchen Towel — This is crucial. Grated sweet potato releases a lot of water. You need to squeeze it out, or your tots will be soggy. I use a clean cotton kitchen towel. It’s reusable and doesn’t fall apart like some cheesecloths.
Baking Sheet — A standard half-sheet pan (18×13 inches) is perfect. Make sure it’s rimmed so the oil doesn’t run over the edge.
Parchment Paper or Silicone Mat — I line my baking sheet with parchment paper. It makes cleanup instant. Silicone mats work too, but parchment is easier for sticky tots.
Mixing Bowl — A medium bowl to mix the potato, binder, and spices. Any size works as long as you can mix comfortably.
Spoon or Small Cookie Scoop — To shape the tots. A tablespoon measure works, but a small cookie scoop is faster and gives you uniform sizes, which helps them bake evenly.
Pastry Brush — For brushing the tops with oil. You can also just drizzle oil and toss with your hands, but a brush gives more control.
How to Make It: Step-by-Step
Alright, let’s make these! I’m walking you through exactly how I do it, including the little tricks I’ve picked up to ensure crispy, non-soggy tots every time.
Step 1: Prep and Grate the Potatoes (10 minutes)
Peel the sweet potatoes. If you’re using a box grater, hold the potato firmly and grate it on the large holes. If you’re using a food processor, use the grating disk. You want fine shreds, not big chunks. The goal is to release the starch and water so you can squeeze it out.
Step 2: Squeeze Out the Moisture (5 minutes)
This is the most important step. Place the grated potato in the center of your cheesecloth or kitchen towel. Gather the corners and twist it tight over the sink. Squeeze as hard as you can. You’ll see a lot of water come out. Keep squeezing until the potato feels dry to the touch. This can take a few minutes, but it’s worth it. If you skip this, your tots will steam instead of bake, and they’ll be mushy. I learned this the hard way with my first batch. Don’t be lazy here.
Step 3: Mix the Ingredients (5 minutes)
Transfer the dried potato to a mixing bowl. Add the grated onion, minced garlic, egg, almond flour (or breadcrumbs), Old Bay seasoning, salt, and pepper. Mix everything together with a spoon or your hands until it’s well combined. The mixture should be damp but not wet. If it feels too loose, add a little more flour. If it’s too dry, add a splash of water or another egg.
Step 4: Shape the Tots (5 minutes)
Preheat your oven to 400°F (200°C). Line a baking sheet with parchment paper. Take about 2 tablespoons of the mixture and roll it into a log shape, about 2-3 inches long. You can make them thick or thin, but keep them uniform so they bake evenly. Place them on the baking sheet, leaving about an inch of space between each one. They don’t spread much, but they need room for air circulation.
Step 5: Oil and Bake (20-25 minutes)
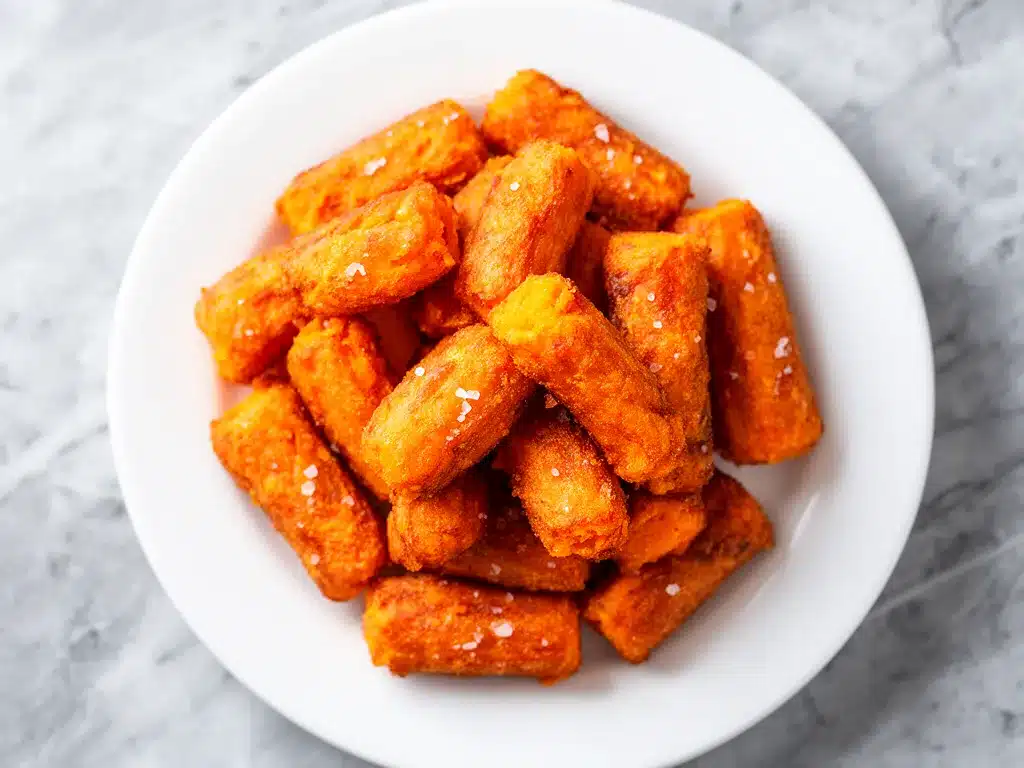
Brush the tops of the tots lightly with oil. This helps them brown. Bake for 20-25 minutes, flipping them halfway through. You want them to be golden brown and crispy on the outside. If they’re not brown enough after 25 minutes, broil them for 1-2 minutes, but watch them closely so they don’t burn. The exact time depends on your oven and how thick you made the tots.
Step 6: Cool and Serve
Let the tots cool on the baking sheet for 5 minutes. They’ll firm up as they cool. Serve with your favorite dipping sauce. I love them with the honey-yogurt dip, but ketchup, ranch, or spicy mayo all work great too.
Expert Tips & Tricks
Here’s everything I’ve learned from making these dozens of times. These tips will save you from my mistakes.
Squeeze, Squeeze, Squeeze
I can’t stress this enough. The moisture content in sweet potatoes varies, but you need to get as much water out as possible. If the mixture is wet, the tots will fall apart. Use a clean towel, not a paper towel (which disintegrates). Twist tight and squeeze hard.
Uniform Size Matters
Try to make the tots the same size. If some are big and some are small, the small ones will burn before the big ones are cooked. Use a cookie scoop or a measuring spoon to keep them consistent.
Don’t Crowd the Pan
Give the tots space. If they’re touching, they’ll steam each other and get soggy. If you’re making a big batch, use two baking sheets or bake in batches. It’s better to bake twice than to have soggy tots.
Flip Midway
Halfway through baking, flip the tots. This ensures even browning on all sides. If you don’t flip them, one side might be golden and the other pale.
Freeze for Later
These freeze beautifully. Bake them, let them cool completely, then freeze them in a single layer on a baking sheet. Once frozen, transfer to a freezer bag. They’ll last for up to 3 months. Reheat in the oven or air fryer at 350°F for 10 minutes. No need to thaw.
Try Different Binders
If you’re gluten-free, almond flour is great. If you want more crunch, use panko. If you’re vegan, use a flax egg. The base recipe is flexible, so experiment to find what your family likes.
Variations & Substitutions
Once you’ve nailed the basic version, here’s how you can mix it up. I’ve tried all of these, and they’re all delicious.
Spicy Tots
Add ½ teaspoon cayenne pepper or a diced jalapeño to the mixture. Serve with a spicy mayo dip. My husband loves these with a side of hot honey ground beef and sweet potato bowl components for a spicy dinner.
Herb Tots
Add 1 tablespoon of fresh chopped parsley, cilantro, or chives. Great with a yogurt-dill dip.
Cheese Tots
Mix in ¼ cup of shredded cheddar or parmesan cheese. This adds richness and helps with binding. Great with ketchup.
Breakfast Tots
Add a little cooked bacon or sausage to the mixture. Serve with a maple-yogurt dip. Perfect for a savory breakfast lunch.
Vegan Option
Use a flax egg and almond flour or oat flour. The texture is slightly denser, but still tasty. Serve with a vegan mayo or tahini dip.
Gluten-Free Option
Use almond flour or certified gluten-free breadcrumbs. The base recipe is naturally gluten-free if you use almond flour.
Serving & Storage
How to Serve:
I usually pack these in a bento box with some fruit, a cheese stick, and a dipping sauce. They’re great for parties too—serve them with toothpicks and a variety of dips. My kids love to dip them in everything: ketchup, ranch, honey mustard, even apple sauce.
Storage:
Store leftovers in an airtight container in the fridge for up to 4 days. They’re best reheated in the oven or air fryer to keep them crispy. Microwave them, and they’ll get chewy.
Reheating:
Oven: 350°F for 10 minutes.
Air Fryer: 350°F for 5-7 minutes.
Microwave: 30 seconds (but they won’t be crispy).
Freezing:
As mentioned, freeze baked tots in a single layer, then transfer to a bag. Reheat from frozen in the oven or air fryer. They taste almost as good as fresh.
Nutrition Information
I’m not a nutritionist, but here’s the breakdown if you’re tracking. This is per serving (based on 4 servings, 10 tots per serving).
Per Serving:
Calories: 180
Protein: 5g
Carbs: 28g
Fiber: 4g
Sugar: 8g
Fat: 6g
Saturated Fat: 1g
Cholesterol: 35mg
Sodium: 250mg
Calcium: 60mg
What’s Good:
High in fiber and vitamins from the sweet potatoes. Good source of protein from the egg and almond flour. Lower in sugar than traditional potato tots.
What to Know:
Contains egg and nuts (if using almond flour). Adjust sodium by reducing salt. Sweet potatoes are naturally sweet, so the sugar content is from the vegetable, not added sugar.
My Take:
These are a healthy, satisfying snack or lunch component. They’re not a diet food, but they’re much better than processed alternatives. I pack them because I know my kids will eat them, and I feel good about what’s in them.
Final Thoughts
So that’s my baked sweet potato tots recipe! I’ve probably talked your ear off at this point, but when you make a recipe this often, you have a lot to say about it. These tots have saved our back-to-school lunches. They’re my answer to “what’s for lunch” when I’m tired, don’t want to make a full meal, and still want something that tastes really good. My kids are happy, my husband’s happy, and I’m happy because I’m not stressed about packing lunch.
Make it yours! Try different spices, swap in your favorite binders, adjust the size. The best recipes are the ones you adapt to your family’s tastes. If you make this, drop a comment and let me know what you think! I love hearing how recipes turn out in your kitchen. And if something doesn’t work, tell me that too—I’m here to help troubleshoot.
Happy cooking! And I hope your kitchen smells half as good as mine does right now.
Frequently Asked Questions
Q: Can I use regular potatoes instead of sweet potatoes?
A: Yes, but the flavor and texture will be different. Regular potatoes are starchier and less sweet. You might need to add a little more binder (egg or flour) because regular potatoes don’t hold together as well. Sweet potatoes are stickier, which helps. I recommend sticking with sweet potatoes for this specific recipe.
Q: Why did my tots fall apart?
A: Usually, this means there was too much moisture. Did you squeeze the grated potato enough? Or did you not use enough binder (egg or flour)? Make sure to squeeze out as much water as possible, and add a little more flour if the mixture feels loose.
Q: Can I make these ahead of time?
A: Absolutely. You can mix the potato mixture and store it in the fridge for up to 24 hours. Shape the tots right before baking for best results. Or, bake them and freeze them for later.
Q: Do I need to flip them halfway through?
A: Yes, flipping ensures even browning. If you don’t flip them, one side might be pale and soft while the other is crispy.
Q: Can I use frozen sweet potatoes?
A: No, frozen sweet potatoes are too wet and mushy. You need fresh sweet potatoes for this recipe. If you don’t have fresh, try using canned sweet potato puree, but you’ll need to adjust the binder ratio significantly.
Q: How do I reheat leftovers?
A: Oven or air fryer is best. 350°F for 10 minutes in the oven, or 5-7 minutes in the air fryer. Microwave them, and they’ll get chewy. Don’t microwave if you want them crispy.
Q: Can I double this recipe?
A: Yes, double everything. Use two baking sheets or bake in batches. Make sure not to crowd the pan, or the tots will steam instead of bake.
Pin This Recipe!

Baked Sweet Potato Tots: Best Kids Lunch Ideas
- Total Time: 50 minutes
- Yield: 4 servings 1x
Description
Crispy-on-the-outside, soft-on-the-inside homemade sweet potato tots that are sturdy enough for lunchboxes, easy to meal prep, and perfect for picky eaters.
Ingredients
- 2 large sweet potatoes (about 1.5 lbs / 680g), peeled and grated
- ½ medium yellow onion (about 50g), finely grated or minced
- 2 cloves garlic, minced
- 1 large egg (or 1 flax egg for vegan option)
- ¼ cup almond flour or panko breadcrumbs (30g)
- 1 teaspoon Old Bay seasoning or garlic powder
- ½ teaspoon salt
- ½ teaspoon black pepper
- 2 tablespoons oil (avocado or olive oil), divided
- For Dipping Sauce (Optional): ½ cup plain Greek yogurt, 1 tablespoon honey, 1 teaspoon lemon juice, 1 teaspoon chopped fresh dill or parsley
Instructions
- Preheat oven to 400°F (200°C). Line a rimmed baking sheet with parchment paper.
- Peel sweet potatoes and grate them using a box grater or food processor.
- Place grated potatoes in a cheesecloth or clean kitchen towel and squeeze tightly to remove as much moisture as possible. This step is crucial for crispiness.
- Transfer dried potatoes to a mixing bowl. Add grated onion, minced garlic, egg, almond flour (or breadcrumbs), Old Bay seasoning, salt, and pepper.
- Mix until well combined. The mixture should be damp but not wet.
- Shape the mixture into logs about 2-3 inches long using about 2 tablespoons per tot. Place on the baking sheet, leaving 1 inch of space between each.
- Brush the tops of the tots lightly with oil.
- Bake for 20-25 minutes, flipping halfway through, until golden brown and crispy.
- Let cool on the baking sheet for 5 minutes before serving with dipping sauce.
Notes
Ensure you squeeze out all excess moisture from the grated potatoes to prevent soggy tots. Uniform sizing helps them bake evenly. They can be frozen after baking and reheated in an oven or air fryer.
- Prep Time: 25 minutes
- Cook Time: 25 minutes
- Category: Side Dish
- Cuisine: American
Nutrition
- Serving Size: 10 tots per serving
- Calories: 180
- Sugar: 8
- Sodium: 250
- Fat: 6
- Saturated Fat: 1
- Carbohydrates: 28
- Fiber: 4
- Protein: 5
Keywords: sweet potato tots, kids lunch ideas, meal prep, healthy snacks, baked vegetables, gluten-free options, vegetarian lunch



