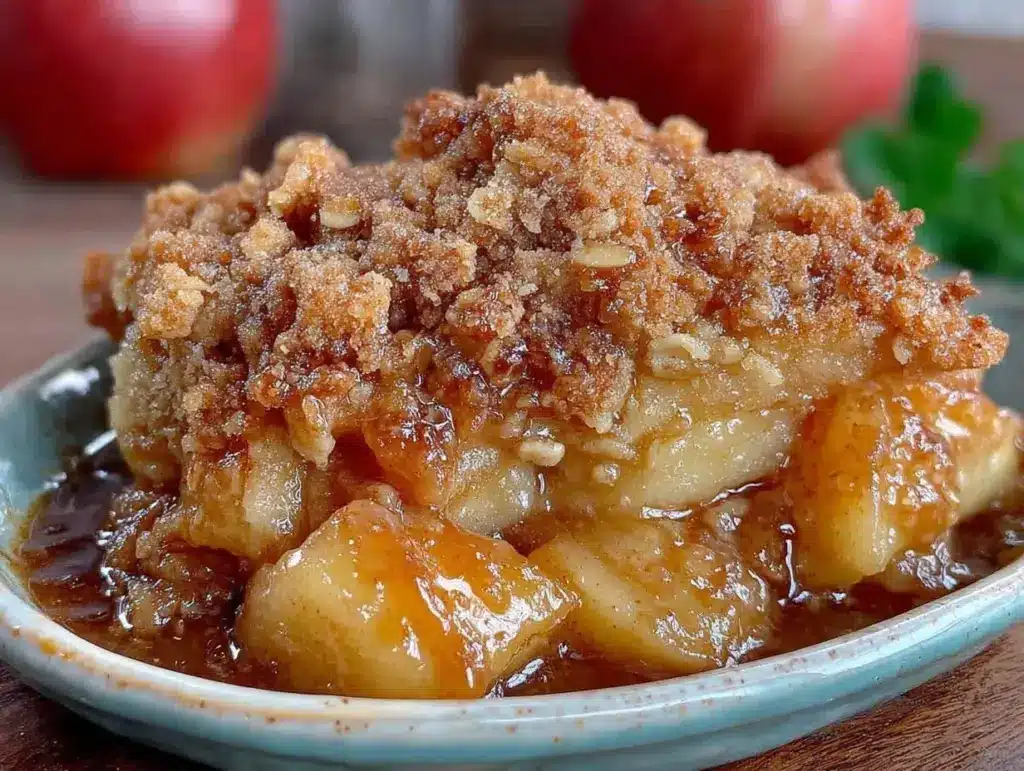
There is a specific smell that hits my kitchen in late October that instantly makes me feel safe. It’s the scent of cinnamon, brown sugar, and apples baking slowly in the oven. For years, I tried to make elaborate pies for fall gatherings, spending hours rolling dough and worrying about crusts that would crumble or get soggy. I was stressed, I was broke, and my kids just wanted something sweet.
Then I stumbled onto this easy apple crisp recipe. It changed everything. Instead of buying expensive pre-made pie crusts or stressing over perfect lattice work, I started using pantry staples I already had: oats, flour, butter, and whatever apples were on sale. The result? A dessert that tastes like a hug from your grandma but costs a fraction of what you’d pay at a bakery. It’s sticky, it’s warm, and it’s stupidly easy to make.
I’ve made this budget-friendly fall dessert at least a dozen times since that first accidental success. It’s become our go-to when we need something comforting after a long day, or when I need to bring a dish to a church potluck without breaking the bank. The buttery oat crumble topping is the star here—crunchy, golden, and incredibly satisfying against the soft, spiced apples. It’s the kind of dessert that makes people ask for the recipe, not because it’s fancy, but because it tastes so damn good.
If you’re tired of complicated dessert recipes that require a trip to the specialty store, this is your answer. It’s practical, it’s delicious, and it’s perfect for feeding a crowd on a budget. Let’s get into why this crisp is worth your time (and your money).
Why You’ll Love This Apple Crisp
There are about ten reasons I keep making this, but here are the big ones that keep it in my regular rotation:
Stupid Simple — Seriously, if you can chop an apple and mix dry ingredients, you can make this. I’ve walked my teenage son through it over FaceTime while I was at work. No special skills required.
Lightning Fast Prep — It takes about 15 minutes to prep and 45 minutes to bake. That’s it. I can throw this together after getting the kids home from soccer practice and still have dinner on the table.
Pantry-Friendly — You probably have 80% of these ingredients already. Flour, sugar, oats, butter, cinnamon. I don’t even need to go to the store unless I’m out of apples.
Crowd-Pleaser — I’ve served this to my picky eater nephew, my foodie sister-in-law, and my dad who thinks desserts are “too much sugar.” Everyone loved it. The crunch factor wins everyone over.
Makes Amazing Leftovers — Actually tastes better the next day. The flavors meld together, and the oats get even chewier. I deliberately make extra for breakfast with a dollop of Greek yogurt.
Budget-Smart — Feeds 6-8 people for under $10 (depending on apple prices). That’s less than one meal at a fast-food place, and it’s way more satisfying.
This is my go-to when I need a dessert to just work. No complicated techniques, no weird ingredients, just reliable, delicious food that makes everyone happy. It pairs perfectly with a warm cup of coffee or, if you’re feeling fancy, a scoop of vanilla ice cream.
Ingredients You’ll Need
Here’s the best part: you probably have most of this already. I’m particular about two things here—the type of apples and the quality of the butter—but everything else is basic pantry stuff.
For the Apple Filling:
Apples (6-7 medium, about 3 lbs / 1.4 kg) — This is the main event. I use a mix of Granny Smith and Honeycrisp. Granny Smith gives that tart punch, while Honeycrisp adds sweetness and holds its shape. If apples are super cheap, buy a mix. Avoid Red Delicious—they turn to mush.
Granulated Sugar (½ cup / 100g) — Helps draw out the juices and caramelize. Don’t skip it, but you can reduce to ⅓ cup if you prefer less sweet.
Apple Cider (2 tablespoons / 30ml) — Adds that deep, fall flavor. If you don’t have it, apple juice works, or just use a splash of water with a little extra cinnamon.
Lemon Juice (1 tablespoon / 15ml) — Keeps the apples from browning and brightens the flavor. Fresh is best, but bottled works in a pinch.
Ground Cinnamon (1 teaspoon) — The soul of this recipe. Use good-quality cinnamon if you can find it.
Nutmeg (¼ teaspoon) — Just a pinch. Don’t overdo it, or it’ll taste like pumpkin pie.
All-Purpose Flour (1 tablespoon) — Helps thicken the apple juices so you don’t get a soupy bottom.
Salt (¼ teaspoon) — Enhances the sweetness. Always salt your desserts.
For the Buttery Oat Crumble:
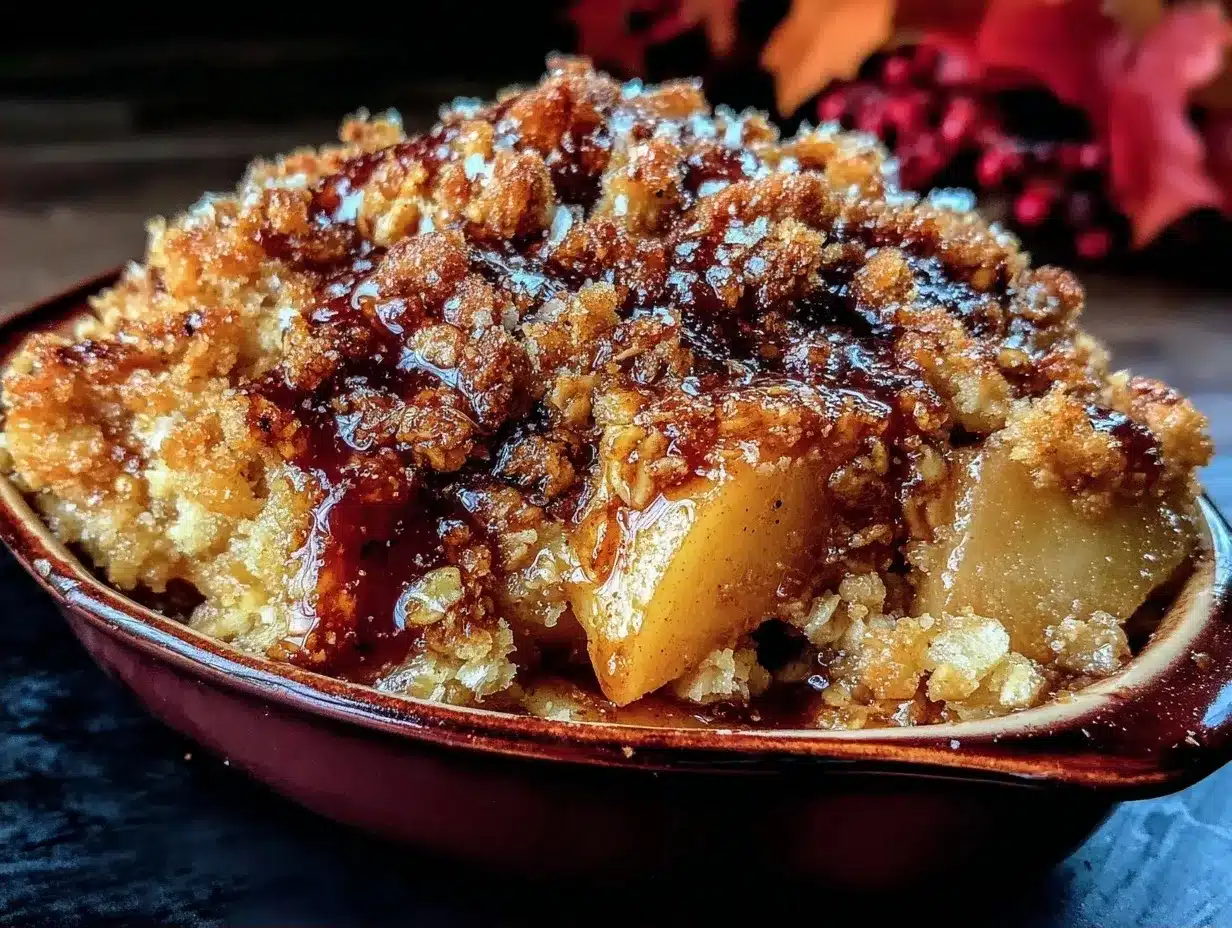
Old-Fashioned Rolled Oats (1 cup / 90g) — Not instant oats! Instant oats get mushy. Old-fashioned oats give that perfect crunch. Gluten-free oats work if needed.
All-Purpose Flour (1 cup / 120g) — The base for the crumble. Keeps it from being just pure butter and sugar.
Brown Sugar (1 cup / 200g, packed) — Adds moisture and a deep, molasses flavor. Light or dark both work; I use dark for richer flavor.
Unsalted Butter (½ cup / 115g, cold and cubed) — This is crucial. Cold butter creates flaky, crunchy bits. If you melt it, you get a cakey topping. Cold is better.
Cinnamon (1 teaspoon) — Double the cinnamon love.
Salt (½ teaspoon) — Balances the sweetness.
Optional Add-ins:
– Chopped Walnuts or Pecans (½ cup) — Adds texture and richness. I buy them on sale and freeze them.
– Chopped Dark Chocolate (¼ cup) — Apple and chocolate is a weirdly good combo. Try it once.
Equipment Needed
You don’t need fancy equipment for this. Here’s what I actually use:
9×13 Inch Baking Dish — A standard glass or ceramic dish works best. I like Pyrex because I can see the browning on the bottom. Metal works too, but watch the edges so they don’t burn.
Large Mixing Bowl — For tossing the apples with sugar and spices. Any big bowl will do.
Medium Mixing Bowl — For the crumble topping. Keep it separate to avoid confusion.
Pastry Cutter or Fork — To cut the butter into the dry ingredients. I use a fork because it’s easier to clean, but a pastry cutter is faster.
Peeler and Knife — For prepping the apples. A Y-peeler is nice, but any sharp knife works.
Cutting Board — Any size. I use plastic for easier cleanup.
Measuring Cups and Spoons — Pretty standard stuff. Dollar store versions work fine.
Aluminum Foil — Optional, but useful if your crumble is browning too fast.
Optional but nice:
– Food Processor — If you’re making a double batch, this speeds up the crumble. But honestly, a fork works just fine.
How to Make It: Step-by-Step
Alright, let’s make this! I’m walking you through exactly how I do it, including the little tricks I’ve picked up over the years.
Step 1: Prep Your Oven and Dish (5 minutes)
Preheat your oven to 350°F (175°C). Grease your 9×13 baking dish with a little butter or non-stick spray. I use butter because it adds flavor. If you’re feeling lazy, cooking spray works, but butter tastes better.
Step 2: Prep the Apples (10 minutes)
Peel, core, and slice the apples into about ¼-inch thick slices. I don’t worry about perfect uniformity—rustic looks better. Toss them in a large bowl with the granulated sugar, apple cider, lemon juice, 1 teaspoon cinnamon, nutmeg, flour, and salt. Let them sit for 10 minutes while you make the topping. This draws out the juices and flavors the apples.
Step 3: Make the Crumble Topping (5 minutes)
In a medium bowl, whisk together the rolled oats, flour, brown sugar, 1 teaspoon cinnamon, and salt. Add the cold, cubed butter. Use a pastry cutter or your fingers to work the butter into the dry ingredients until it looks like coarse crumbs with some pea-sized chunks. Don’t overmix—you want those crunchy bits.
Step 4: Assemble the Crisp (2 minutes)
Spread the apple mixture evenly into the prepared baking dish. Sprinkle the crumble topping evenly over the apples. Press down gently so it sticks a bit. If you’re adding nuts or chocolate, sprinkle them on top now.
Step 5: Bake Until Golden (45-50 minutes)
Bake for 45-50 minutes, or until the topping is golden brown and the apples are bubbly around the edges. If the topping is browning too fast, loosely tent with aluminum foil for the last 10 minutes. The center should be soft but not mushy.
Step 6: Cool and Serve (10 minutes)
Let it cool for at least 10 minutes before serving. This lets the juices thicken slightly so it’s not soup. Serve warm with vanilla ice cream or whipped cream. Trust me, the ice cream melting into the warm crisp is the best part.
Expert Tips & Tricks
Here’s everything I’ve learned from making this dozens of times. These tips will save you from my mistakes.
Use Cold Butter — This is the #1 tip. Cold butter creates those flaky, crunchy bits. If you melt it, you get a cakey topping. Cube it straight from the fridge.
Mix Your Apples — Don’t use just one type. A mix of tart and sweet apples creates the best balance. Granny Smith and Honeycrisp is my go-to. Fuji or Gala work too if you like sweeter apples.
Don’t Skip the Rest Time — Letting the apples sit with the sugar and spices for 10 minutes before baking draws out moisture and intensifies flavor. It’s worth the wait.
Check for Doneness — The crisp is done when the topping is golden and the juices are bubbling. If you poke an apple slice with a fork, it should go in easily.
Double the Batch — This recipe doubles easily. Use two 9×13 dishes or one 9×13 and one 8×8. Great for meal prep or freezing.
Common Mistakes:
– Soggy Bottom: Make sure your apples are drained slightly if they release too much liquid. Or add a tablespoon more flour to the filling.
– Hard Topping: If your topping is too hard, you might have used too much flour or not enough butter. Aim for coarse crumbs, not a dough.
– Undercooked Apples: If the topping browns before the apples are soft, tent with foil and bake longer.
Pro Tricks:
– For Extra Crunch: Toast the oats in a dry skillet for 2-3 minutes before adding to the crumble. It adds a nutty flavor.
– For Better Flavor: Add a pinch of cardamom or allspice to the apples. It’s subtle but amazing.
– Make-Ahead: Assemble the crisp the night before and refrigerate. Bake in the morning for a fresh breakfast dessert.
Variations & Substitutions
Once you’ve nailed the basic version, here’s how you can mix it up. I’ve tried all of these.
Pear Crisp — Swap apples for pears. Pears are softer, so reduce baking time by 5-10 minutes. Add a tablespoon of lemon juice to prevent browning.
Blackberry Crisp — Use 6 cups of fresh or frozen blackberries. Add 2 tablespoons of cornstarch to thicken the juices. Tart and sweet!
Apple Pie Crisp — Add ½ cup of chopped pecans and a splash of bourbon to the filling. Feels fancy but is still budget-friendly.
Gluten-Free — Use gluten-free rolled oats and gluten-free flour. Everything else is naturally gluten-free. I use Bob’s Red Mill GF flour—it works great.
Dairy-Free — Replace butter with cold vegan butter or coconut oil. The texture will be slightly different but still good. Use maple syrup instead of brown sugar for a vegan-friendly option.
Lower Sugar — Reduce granulated sugar to ¼ cup and brown sugar to ½ cup. Use unsweetened applesauce to replace some of the moisture. It’s less sweet but still tasty.
Spiced Variations:
– Ginger Snap: Add 1 teaspoon of ground ginger to the crumble.
– Cinnamon Roll: Add ½ cup of raisins to the apples and a drizzle of cream cheese icing after baking.
Serving & Storage
How to Serve:
I usually serve this straight from the baking dish at the dinner table—it looks rustic and stays warm. But here are other ways I’ve enjoyed it:
Side Dishes:
– Vanilla Ice Cream — Non-negotiable. The cold cream against the warm crisp is perfection.
– Whipped Cream — For a lighter option.
– Crème Fraîche — Adds a tangy contrast that’s delicious.
Wine Pairing:
Not a wine expert, but my wine-snob friend says a crisp Riesling or a light Pinot Noir works great with this. For non-alcoholic, apple cider or spiced chai tea is perfect.
Storage Instructions:
Refrigerator:
Store in an airtight container or cover tightly with plastic wrap for up to 4 days. The topping will soften in the fridge—totally normal.
Reheating:
Best method: Reheat individual portions in the microwave for 1-2 minutes. Or reheat the whole dish in the oven at 350°F for 15-20 minutes to crisp up the topping.
Microwave method: Works for single servings. Add a splash of milk if it’s too dry.
Never works: Trying to reheat in the toaster oven without covering. It’ll dry out the edges. Ask me how I know.
Freezing:
Yes, this freezes well! Wrap the baked crisp tightly in plastic wrap and then foil. Freeze for up to 3 months. Thaw in the fridge overnight and reheat in the oven. Or freeze unbaked—just add 10-15 minutes to the baking time if baking from frozen.
Meal Prep:
Make the crisp on Sunday, store in the fridge. Reheat individual portions for a quick weekday dessert. It’s like having a mini bakery at home.
Pro tip: If leftovers are drying out, sprinkle a tablespoon of water over the top before reheating. It creates steam and keeps it moist.
Nutrition Information
I’m not a nutritionist, but here’s the breakdown if you’re tracking. This is comfort food, so enjoy it in moderation!
Per Serving (based on 8 servings):
– Calories: 320
– Protein: 3g
– Carbs: 52g
– Fiber: 4g
– Sugar: 32g
– Fat: 12g
– Saturated Fat: 7g
– Cholesterol: 30mg
– Sodium: 180mg
– Calcium: 20mg
What’s Good:
– Fiber from the oats and apples
– Vitamin C from the apples
– Can add nuts to boost protein and healthy fats
What to Know:
– Higher in sugar from the brown sugar and apples
– Contains dairy (butter)
– Moderate calories, but very filling
My Take:
Look, this is a dessert. It’s not a health food. But it’s made with real ingredients, no artificial flavors, and it’s way better than store-bought pie. When I want to make it lighter, I use less butter and add more oats and nuts. But usually? I just eat a reasonable portion and enjoy it.
Final Thoughts
So that’s my go-to easy apple crisp! I’ve probably talked your ear off at this point, but when you make a recipe this often, you have a lot to say about it.
This has saved dessert nights more times than I can count. It’s my answer to “what’s for dessert?” when I’m tired, don’t want to bake a complicated pie, and still want something that tastes really good. My kids are happy, my husband’s happy, and I’m happy because I’m not stressed about cooking.
Make it yours! Try different apple mixes, swap in your favorite nuts, or add a dash of bourbon. The best recipes are the ones you adapt to your family’s tastes. And if you’re looking for more budget-friendly fall recipes, check out my fall crockpot chicken and dumplings for a hearty main course, or try my brown sugar peach caramel coffee cake for a sweet breakfast treat.
If you make this, drop a comment and let me know what you think! I love hearing how recipes turn out in your kitchen. And if something doesn’t work, tell me that too—I’m here to help troubleshoot.
Happy baking! And I hope your kitchen smells half as good as mine does right now.
Frequently Asked Questions
Can I use frozen apples?
You can, but thaw them first and drain off excess liquid. Frozen apples release more water, so you might need to add an extra tablespoon of flour to the filling. They’ll be softer, so reduce baking time by 5-10 minutes.
Why did my topping turn out soggy?
Usually means the butter was too warm or you mixed it too much. Make sure the butter is cold and cubed, and mix until it looks like coarse crumbs. Also, make sure your oven is preheated properly. A cold oven leads to soggy toppings.
Can I make this ahead for a dinner party?
Absolutely! Assemble the crisp the night before and refrigerate. Bake it the next day—just add 10-15 minutes to the baking time since it’s cold from the fridge. This is a lifesaver for hosting.
Can I use instant oats instead of rolled oats?
I don’t recommend it. Instant oats get mushy and don’t provide that crunchy texture. Old-fashioned rolled oats are the way to go. If you only have instant, you can pulse them in a food processor a few times to break them up, but they’ll still be softer.
How do I reheat leftovers without it getting dry?
Add a splash of water or milk to the individual portion before microwaving. Or reheat in the oven at 350°F for 10-15 minutes. The oven helps crisp up the topping again.
Can I double this recipe?
Yes! Double all ingredients and use two 9×13 dishes or one 9×13 and one 8×8. Baking time stays the same. Great for meal prep or freezing.
What’s the best type of apple for this?
A mix of tart and sweet apples works best. Granny Smith (tart) and Honeycrisp (sweet/crisp) is my favorite. Avoid Red Delicious—they turn to mush. Fuji, Gala, and Pink Lady are also good options.
Pin This Recipe!

Easy Apple Crisp: Budget-Friendly Fall Dessert
- Total Time: 60 minutes
- Yield: 8 servings 1x
Description
A simple, budget-friendly apple crisp made with pantry staples like oats, flour, and butter. This dessert features a buttery oat crumble topping over spiced apples, offering a comforting, crunchy texture that is easy to prepare and perfect for fall gatherings.
Ingredients
- 6–7 medium apples (about 3 lbs), peeled, cored, and sliced (mix of Granny Smith and Honeycrisp)
- ½ cup granulated sugar
- 2 tablespoons apple cider
- 1 tablespoon lemon juice
- 1 teaspoon ground cinnamon
- ¼ teaspoon nutmeg
- 1 tablespoon all-purpose flour
- ¼ teaspoon salt
- 1 cup old-fashioned rolled oats
- 1 cup all-purpose flour
- 1 cup packed brown sugar
- ½ cup unsalted butter, cold and cubed
- 1 teaspoon cinnamon
- ½ teaspoon salt
- Optional: ½ cup chopped walnuts or pecans
- Optional: ¼ cup chopped dark chocolate
Instructions
- Preheat oven to 350°F (175°C) and grease a 9×13 inch baking dish with butter or non-stick spray.
- In a large bowl, toss sliced apples with granulated sugar, apple cider, lemon juice, 1 teaspoon cinnamon, nutmeg, 1 tablespoon flour, and ¼ teaspoon salt. Let sit for 10 minutes.
- In a medium bowl, whisk together rolled oats, 1 cup flour, brown sugar, 1 teaspoon cinnamon, and ½ teaspoon salt.
- Add cold, cubed butter to the dry ingredients and use a pastry cutter or fingers to work it in until the mixture resembles coarse crumbs with pea-sized chunks.
- Spread the apple mixture evenly into the prepared baking dish.
- Sprinkle the crumble topping evenly over the apples and press down gently. Add optional nuts or chocolate if desired.
- Bake for 45-50 minutes until the topping is golden brown and apples are bubbly. Tent with foil if browning too quickly.
- Let cool for at least 10 minutes before serving to allow juices to thicken.
Notes
Use cold butter for a crunchy topping. A mix of tart and sweet apples provides the best flavor balance. Letting the apples sit with sugar draws out moisture and intensifies flavor. For extra crunch, toast oats before adding to the crumble. Can be made ahead and refrigerated overnight before baking.
- Prep Time: 15 minutes
- Cook Time: 45 minutes
- Category: Dessert
- Cuisine: American
Nutrition
- Serving Size: 1 slice
- Calories: 320
- Sugar: 32
- Sodium: 180
- Fat: 12
- Saturated Fat: 7
- Carbohydrates: 52
- Fiber: 4
- Protein: 3
Keywords: apple crisp, budget dessert, fall recipes, easy baking, oat crumble, gluten-free option, dairy-free option



