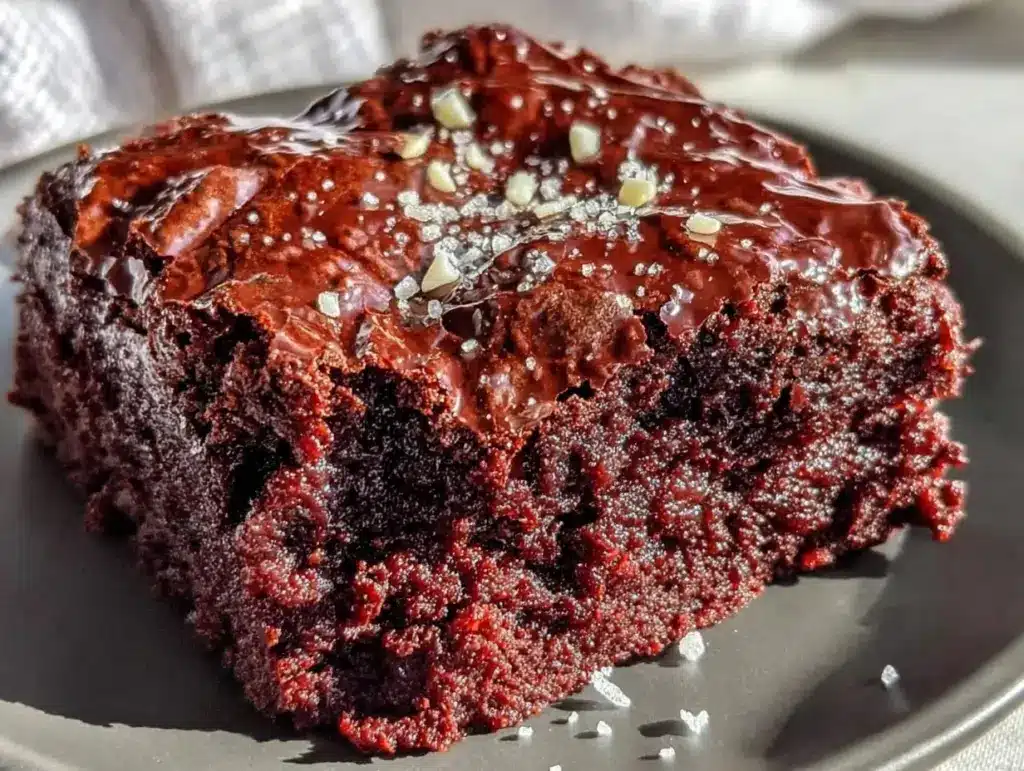
Last Tuesday, I was standing in my kitchen at 7:45 PM, staring into the fridge like it held the secrets to the universe. I had just dropped off the kids at soccer practice, my husband was running late from work, and I was starving. But not just hungry—I was that specific kind of exhausted where the idea of chopping vegetables or managing a stove felt like climbing Mount Everest.
I didn’t want salad. I definitely didn’t want to order takeout. I wanted chocolate. Dense, gooey, melt-in-your-mouth chocolate that would make the next 30 minutes feel like a vacation from reality.
I reached for the almond flour. You know how it is with almond flour—it’s expensive, it sits in the back of the pantry, and it usually ends up becoming sad, dry almond flour pancakes. But I remembered a trick I’d learned from a friend who bakes for a living: when you treat almond flour right, it doesn’t just work. It shines.
I whipped up these Gluten-Free Fudgy Almond Flour Brownies in about 20 minutes. No mixer. No complicated sifting. Just melted chocolate, butter, eggs, sugar, and a cup of that pricey almond flour. By the time the timer went off, the house smelled like a high-end chocolate shop, and I had a plate of warm, fudgy squares ready to go.
My husband walked in, saw the plate, and literally sighed with relief. “You saved my life,” he said, taking a bite before I even put it on the counter. And honestly? He wasn’t wrong. These brownies are so rich, so intensely chocolatey, and so satisfying that I’ve made them four times in the last month. They’re perfect for when you need a sweet fix but don’t have the energy to fuss.
What’s even better is that they’re naturally gluten-free. I don’t always cook gluten-free, but I love that these brownies deliver that same chewy, fudgy texture you get from traditional recipes, without the wheat. If you’re watching your grains or just want a lighter-feeling dessert that still hits the spot, this is the one.
So, if you’re tired of dry, crumbly gluten-free baked goods and want something that actually tastes indulgent, stick around. I’m going to walk you through exactly how I make these, including the little tips that keep them moist and fudgy every single time.
Why You’ll Love This Recipe
There are about ten reasons I keep coming back to these brownies, but here are the big ones that make them worth the trip to the grocery store.
They’re Actually Fudgy — I’ve tried so many almond flour brownie recipes that came out more like dense biscuits or dry cakes. Not these. The ratio of wet to dry ingredients is spot-on, giving you that center-pull, gooey fudgy texture that makes you close your eyes when you bite into it. It’s the kind of brownie that stains your fingers with chocolate.
Zero Gluten-Free Grittiness — One of the biggest complaints about gluten-free baking is that weird sandy or gritty texture from rice flour or tapioca starch. Because almond flour is ground nuts, it’s naturally fine and creamy. These brownies have a smooth, tender crumb that feels luxurious, not gritty. My kids can’t even tell they’re gluten-free.
Lightning Fast — Seriously, if you can melt butter and mix eggs, you can make this. From start to finish, it’s about 25 minutes. That includes the baking time, but the active work is maybe 10 minutes. I make these on weeknights when I want dessert but don’t want to spend my evening at the oven.
Pantry Staples (Mostly) — You probably have the chocolate, butter, sugar, and eggs already. The only specialty item is almond flour, which I keep stocked specifically for things like these gluten-free almond flour fudgy brownie bites. It’s worth having because it changes everything.
Perfectly Sweet — These aren’t cloyingly sweet. The bitterness of the dark chocolate balances the sugar, giving you a sophisticated flavor that doesn’t leave you with a sugar crash. It’s rich, but in a good way.
These brownies have become my go-to when I need a win in the kitchen. No stress, no fancy equipment, just reliable, delicious food that makes everyone happy. If you love the chewy texture of chewy iced oatmeal cookies but want something chocolatey, this is your new obsession.
Ingredients You’ll Need
Here’s the best part: this recipe is incredibly simple. You don’t need a dozen weird ingredients. Just good quality basics. I’m particular about three things here, and I’ll tell you exactly why.
Almond Flour (2 cups / 200g) — This is the star. Use finely ground almond flour, not almond meal. Almond meal has the skins on and is coarser, which will make your brownies grainy. I buy mine in bulk and store it in the freezer to keep it fresh. Look for “super fine” or “blanched” almond flour.
Dark Chocolate (8 oz / 225g) — I use 60-70% dark chocolate. It gives that deep, rich chocolate flavor without being too sweet. You can use chocolate chips, but I prefer chopping a bar into chunks. It melts more evenly and gives you those little pools of chocolate in every bite. If you’re in a pinch, semi-sweet chips work, but the flavor won’t be as intense.
Unsalted Butter (½ cup / 115g) — Use real butter. Margarine or oil won’t give you the same rich, fudgy texture. I like to use European-style butter if I have it, because it’s richer, but regular unsalted butter works perfectly fine.
Eggs (3 large) — Room temperature eggs are best. They emulsify better with the melted chocolate and butter, creating a smoother batter. If you forget, just drop them in warm water for 5 minutes.
Sugar (1 cup / 200g) — I use granulated white sugar. It creates that shiny, crackly top on the brownies. You can use brown sugar for a deeper molasses flavor, but it will make them cakier rather than fudgy. For this recipe, white sugar is the way to go.
Vanilla Extract (1 teaspoon) — Good quality vanilla makes a huge difference. I use pure vanilla extract, not imitation. It adds a warm, aromatic note that complements the chocolate.
Salt (½ teaspoon) — Even though these are sweet, salt is crucial. It enhances the chocolate flavor and balances the sweetness. Don’t skip it. I use fine sea salt.
Optional Add-ins — I love adding ½ cup of chopped walnuts or pecans for crunch. Or a handful of chocolate chips on top before baking. Sometimes I even swirl in a spoonful of Nutella for an extra decadent twist.
Tip: If you’re worried about almond flour going rancid (it has high fat content), keep it in an airtight container in the fridge or freezer. It stays fresh for months.
Equipment Needed
You don’t need fancy equipment for this. Here’s what I actually use.
9×9 Inch Baking Pan — I line it with parchment paper, leaving an overhang on the sides. This is crucial for lifting the brownies out once they cool. Grease the parchment lightly so it stays in place.
Heatproof Bowl — For melting the chocolate and butter. I use a glass bowl over a saucepan of simmering water (bain-marie method) for gentle, even melting. You can also use the microwave in 30-second intervals, stirring in between.
Mixing Bowls — One medium bowl for the dry ingredients, one larger bowl for the wet. I like using stainless steel bowls because they’re sturdy and easy to clean.
Fork or Whisk — You don’t need a mixer. A simple fork or whisk is all you need to mix the eggs and sugar until combined. Overmixing can make the brownies tough, so gentle is better.
Spatula — A silicone spatula is great for folding in the almond flour. It scrapes the bowl clean and incorporates the dry ingredients without overworking the batter.
Cooling Rack — Let the brownies cool in the pan for 10 minutes, then transfer to a rack to cool completely. This helps them set properly so they’re easier to cut.
How to Make It: Step-by-Step
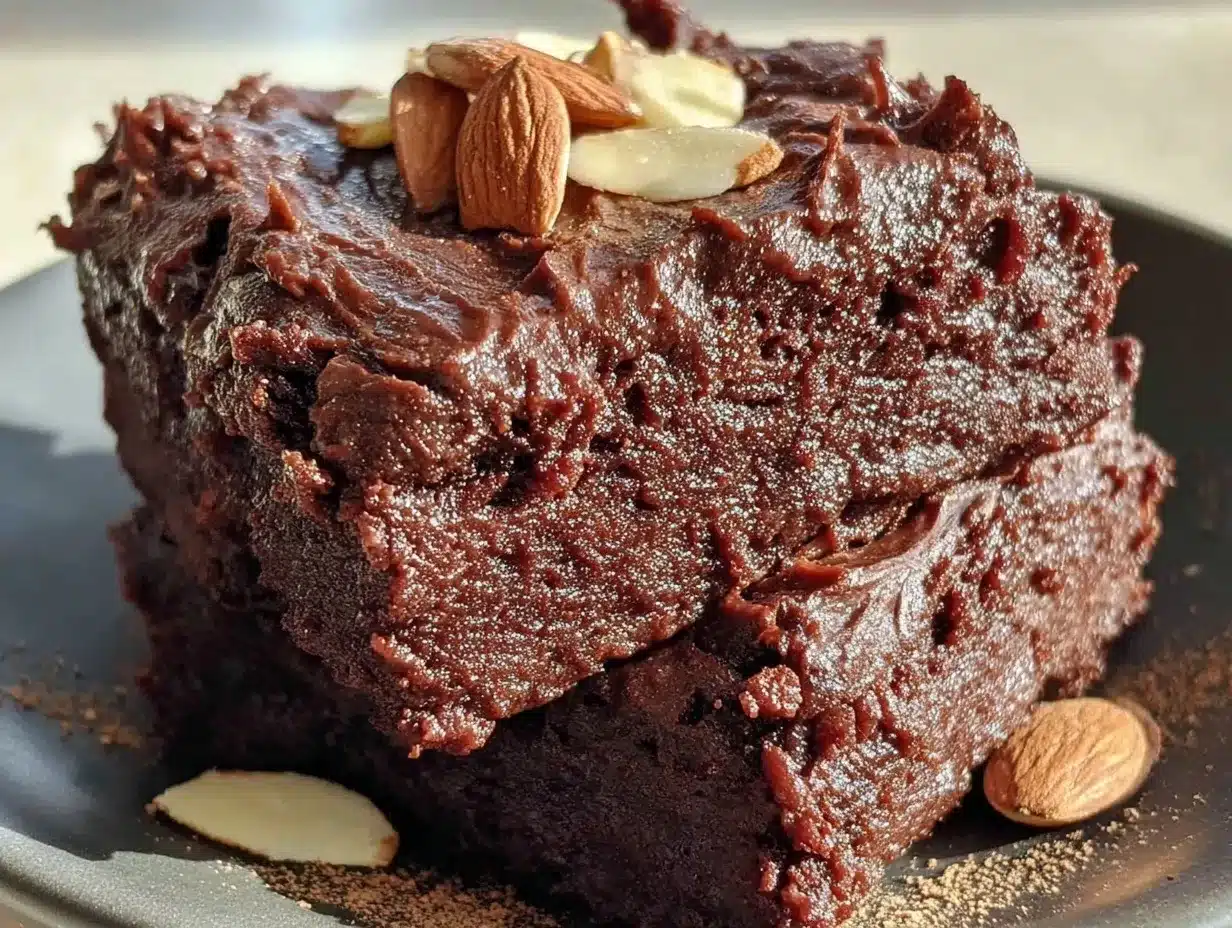
Alright, let’s make these! I’m walking you through exactly how I do it, including the little tricks I’ve picked up.
Step 1: Prep Your Pan and Oven (5 minutes)
Preheat your oven to 350°F (175°C). Line your 9×9 inch baking pan with parchment paper. Leave a few inches of overhang on the long sides—this is your handle for lifting the brownies out later. Lightly spray the parchment with non-stick spray or brush with a little melted butter.
Step 2: Melt the Chocolate and Butter (5 minutes)
Chop your dark chocolate into small pieces. Place them in a heatproof bowl with the cubed butter. Melt them together over a saucepan of simmering water (make sure the bowl doesn’t touch the water) or in the microwave in 30-second bursts, stirring well between each burst. You want it smooth and glossy, not burnt. Set aside to cool slightly.
Step 3: Mix the Wet Ingredients (3 minutes)
In a medium bowl, whisk the eggs and sugar together vigorously. You don’t need to whip them until fluffy, but whisk for about a minute to dissolve the sugar slightly. This helps create that shiny crust. Add the melted chocolate-butter mixture and the vanilla extract. Whisk until everything is combined and smooth.
Step 4: Fold in the Dry Ingredients (2 minutes)
Add the almond flour and salt to the wet mixture. Use a spatula to gently fold them together. Stop as soon as you no longer see streaks of almond flour. Overmixing can make the brownies dense and tough. The batter will be thick and gooey.
Step 5: Add Mix-ins (Optional)
If you’re adding nuts or extra chocolate chips, fold them in now. Don’t overdo it—a handful is plenty. The batter is already rich!
Step 6: Bake (20-25 minutes)
Pour the batter into your prepared pan and spread it out evenly. Bake for 20-25 minutes. The key to fudgy brownies is to slightly underbake them. The edges should be set, but the center should still look slightly soft and jiggly when you shake the pan. A toothpick inserted into the center should come out with moist crumbs, not clean.
Step 7: Cool and Slice (30 minutes)
Let the brownies cool in the pan for at least 10 minutes. Then, use the parchment overhang to lift them out onto a cooling rack. Let them cool completely before slicing. This step is hard, but it’s necessary for clean cuts. If you cut them warm, they’ll be messy and gooey in a bad way.
Expert Tips & Tricks
Here’s everything I’ve learned from making these dozens of times. These tips will save you from my mistakes.
Don’t Overbake — This is the #1 mistake. Almond flour brownies continue to cook a bit after you take them out of the oven. If you wait until the toothpick comes out clean, they’ll be dry. Pull them when the center is still slightly underdone.
Use Good Chocolate — Since almond flour is mild, the chocolate flavor really shines through. Don’t use cheap baking chips. Use a good quality bar of dark chocolate. It makes a world of difference.
Room Temperature Eggs — Cold eggs can cause the melted chocolate to seize up. Make sure your eggs are at room temperature before you start. It ensures a smooth, emulsified batter.
Chill for Better Texture — If you have time, chill the batter in the fridge for 15 minutes before baking. It helps the almonds hydrate and can lead to a chewier texture.
Storage is Key — These brownies actually taste better the next day. The flavors meld together overnight. Store them in an airtight container at room temperature for up to 4 days, or in the fridge for up to a week.
Common Mistake: Grainy Texture — This happens if you use almond meal instead of almond flour. Make sure you’re using finely ground, blanched almond flour. If your almond flour is too coarse, pulse it in a food processor for a few seconds before using.
Pro Trick: The Crackly Top — To get that signature shiny, crackly top, make sure you whisk the eggs and sugar really well before adding the chocolate. The friction helps dissolve the sugar, which creates the crust as it bakes.
Variations & Substitutions
Once you’ve nailed the basic version, here’s how you can mix it up. I’ve tried all of these.
Chocolate Chip Version — Add ½ cup of semi-sweet chocolate chips to the batter. Or sprinkle them on top before baking for a pretty presentation.
Walnut or Pecan — Fold in ½ cup of toasted walnuts or pecans. The nuttiness pairs beautifully with the almond flour. Toasting the nuts first brings out their flavor.
Espresso Boost — Add 1 teaspoon of instant espresso powder to the dry ingredients. It enhances the chocolate flavor without making the brownies taste like coffee. Perfect if you’re a coffee lover.
Gluten-Free Flour Blend — If you don’t have almond flour, you can use a 1:1 gluten-free baking flour blend. The texture will be slightly different (more cake-like), but it will still be delicious. I’ve tested this with gluten-free pumpkin bread blends, and it works well.
Dairy-Free — Swap the butter for coconut oil. Use dark chocolate that’s certified dairy-free. The texture will be slightly softer, but still fudgy.
Sugar-Free — Use a granulated sugar substitute like erythritol or monk fruit. Note that these don’t create the same crackly top, and the texture may be slightly different. I’ve used Swerve in these, and they’re still tasty.
Mini Brownies — Pour the batter into a mini muffin tin and bake for 12-15 minutes. Perfect for portion control or lunchboxes. These blackberry crumble bars are also great for portioning, but these brownies are easier to make in bulk.
Serving & Storage
How to Serve: I usually serve these brownies plain, but they’re amazing with a scoop of vanilla ice cream or a dollop of whipped cream. For a fancy touch, dust them with powdered sugar or sea salt flakes right before serving.
Side Dishes: These pair beautifully with a cup of hot coffee or tea. They’re also great alongside a glass of cold milk. If you’re serving them at a party, they travel well in a box, making them perfect for potlucks or office treats.
Storage Instructions: Store in an airtight container at room temperature for up to 4 days. They will stay moist and fudgy. If your kitchen is very warm, store them in the fridge to prevent melting.
Reheating: Warm a brownie in the microwave for 15-20 seconds for a gooey, fresh-baked texture. Or toast it in a toaster oven for a crispy edge.
Freezing: Yes, these freeze well! Wrap individual brownies in plastic wrap, then place them in a freezer-safe bag. They’ll keep for up to 3 months. Thaw at room temperature for 30 minutes before eating. I make a double batch and freeze half for those days when I need a quick dessert fix.
Pro Tip: If you’re meal prepping, these are great for breakfast if you’re into sweet breakfasts. Pair with a piece of fruit and some yogurt for a balanced start to the day. They’re also a great snack for kids’ after-school hunger.
Nutrition Information
I’m not a nutritionist, but here’s the breakdown if you’re tracking. These are rich, so a little goes a long way.
Per Serving (based on 16 brownies):
- Calories: 180
- Protein: 5g
- Carbs: 12g
- Fiber: 2g
- Sugar: 9g
- Fat: 14g
- Saturated Fat: 5g
- Cholesterol: 35mg
- Sodium: 45mg
What’s Good: High in healthy fats from the almonds. Good source of protein. Naturally gluten-free. Lower in carbs than traditional brownies.
What to Know: Higher in calories due to the almond flour and chocolate. Contains nuts. Moderate sugar content.
My Take: Look, these are brownies. They’re meant to be indulgent. But compared to a slice of moist chocolate sheet cake, these are a lighter option. I enjoy them as a treat, not a health food. When I want to make it lighter, I stick to one square and pair it with a green tea.
Dietary Notes: Contains: nuts, eggs, dairy. Can be made: gluten-free, dairy-free, nut-free (with substitution). Not suitable for: nut allergies, vegan (without modifications).
Final Thoughts
So that’s my go-to Gluten-Free Fudgy Almond Flour Brownies! I’ve probably talked your ear off at this point, but when you make a recipe this often, you have a lot to say about it.
These have saved my weeknight dessert routine more times than I can count. They’re my answer to “what’s for dessert” when I’m tired, don’t want to order out, and still want something that tastes really good. My kids are happy, my husband’s happy, and I’m happy because I’m not stressed about cooking.
Make it yours! Try different add-ins, swap in your favorite nuts, or adjust the chocolate. The best recipes are the ones you adapt to your family’s tastes. If you try this recipe, I’d love to hear how it turns out. Drop a comment and let me know what you think!
Happy baking! And I hope your kitchen smells half as good as mine does right now.
Frequently Asked Questions
Can I use almond meal instead of almond flour?
You can, but the texture will be different. Almond meal is coarser and has the skins on, so your brownies will be grittier and slightly darker. For the best fudgy texture, use finely ground blanched almond flour. If you only have almond meal, pulse it in a food processor to grind it finer.
Why are my brownies dry?
This usually means they were overbaked. Almond flour brownies continue to cook after you take them out of the oven. Pull them when the center is still slightly jiggly. Also, make sure you’re using the correct amount of almond flour. If you scoop it directly from the bag, you might pack it in, leading to a dry result. Spoon it into the measuring cup and level it off.
Can I make these ahead of time?
Absolutely! These brownies taste even better the next day. You can make them up to 2 days ahead and store them in an airtight container. For longer storage, freeze them for up to 3 months. Thaw at room temperature before eating.
Can I use a different type of chocolate?
Yes! You can use semi-sweet, milk, or dark chocolate. Just keep in mind that milk chocolate is sweeter and may make the brownies cloying. Dark chocolate (60-70%) gives the best balance of sweetness and richness. You can also use chocolate chips, but chopping a bar gives a more even melt.
How do I store these brownies?
Store in an airtight container at room temperature for up to 4 days. If your kitchen is warm, store them in the fridge. They can also be frozen for up to 3 months. Wrap individual brownies in plastic wrap for easy freezing and thawing.
Are these brownies keto-friendly?
They’re low in carbs, but not strictly keto due to the sugar content. If you’re keto, swap the sugar for a keto-friendly sweetener like erythritol or monk fruit. You may need to adjust the liquid content slightly, as sugar adds moisture.
Can I add protein powder?
You can, but it will change the texture. Add ¼ cup of whey or plant-based protein powder, but be careful not to add too much, as it can make the brownies dry. You may need to add a little extra egg or milk to compensate.
Pin This Recipe!
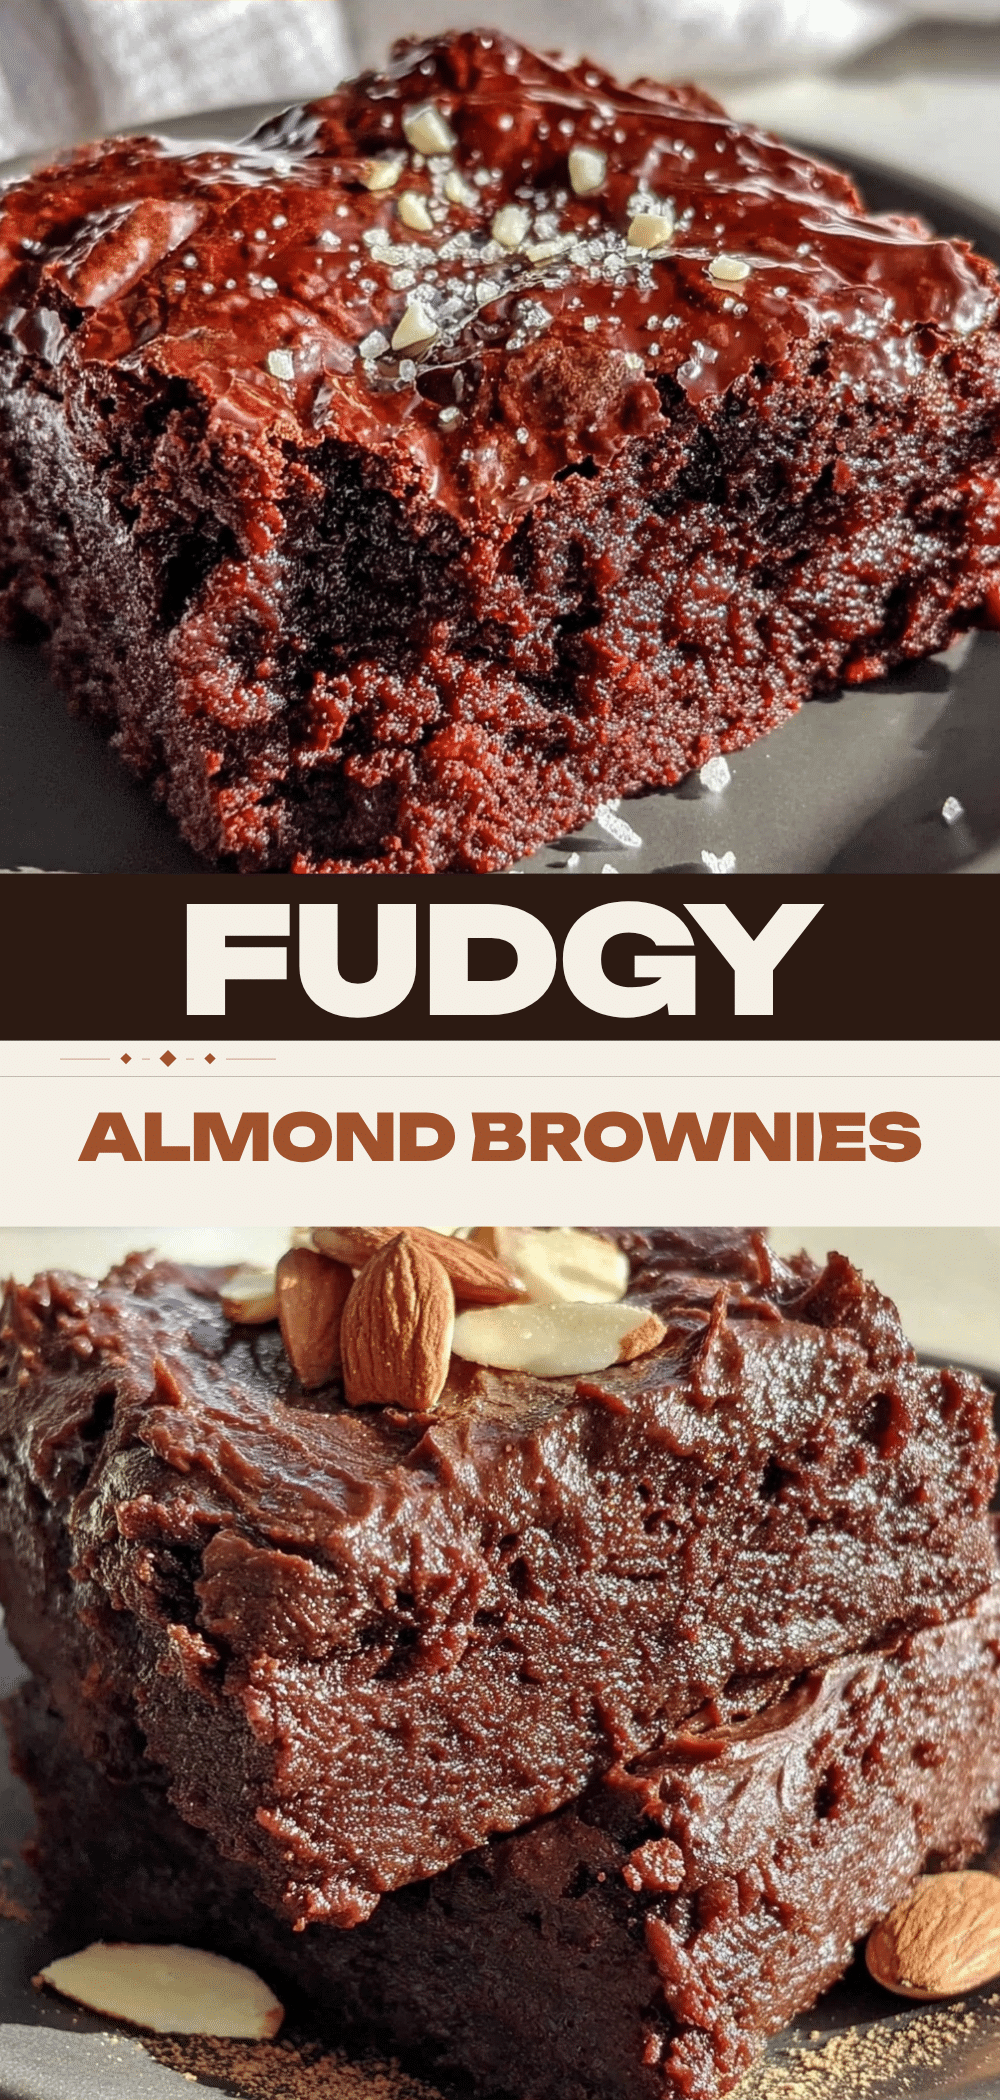
Gluten-Free Fudgy Almond Flour Brownies
- Total Time: 25 minutes
- Yield: 16 servings 1x
Description
Rich, fudgy, and naturally gluten-free brownies made with almond flour. These easy-to-make treats require no mixer and come together in about 25 minutes for a satisfying chocolate fix.
Ingredients
- 2 cups (200g) finely ground blanched almond flour
- 8 oz (225g) dark chocolate (60-70%), chopped
- 1/2 cup (115g) unsalted butter
- 3 large eggs, room temperature
- 1 cup (200g) granulated white sugar
- 1 teaspoon pure vanilla extract
- 1/2 teaspoon fine sea salt
- Optional: 1/2 cup chopped walnuts or pecans
- Optional: 1/2 cup chocolate chips
Instructions
- Preheat oven to 350°F (175°C). Line a 9×9 inch baking pan with parchment paper, leaving an overhang on the sides, and lightly grease.
- Chop dark chocolate into small pieces. Melt chocolate and butter together in a heatproof bowl over simmering water or in the microwave in 30-second intervals, stirring until smooth. Set aside to cool slightly.
- In a medium bowl, whisk eggs and sugar vigorously for about a minute to dissolve the sugar. Add the melted chocolate-butter mixture and vanilla extract; whisk until combined and smooth.
- Add almond flour and salt to the wet mixture. Gently fold with a spatula until just combined and no streaks of flour remain. Do not overmix.
- Fold in optional nuts or chocolate chips if using.
- Pour batter into prepared pan and spread evenly. Bake for 20-25 minutes. The edges should be set, but the center should still look slightly soft and jiggly. A toothpick should come out with moist crumbs.
- Let brownies cool in the pan for 10 minutes, then lift out using parchment overhang and transfer to a cooling rack. Cool completely before slicing.
Notes
Use finely ground blanched almond flour, not almond meal, to avoid a gritty texture. Do not overbake; the center should remain slightly soft for fudgy results. Room temperature eggs help create a smooth emulsion. For a crackly top, whisk eggs and sugar thoroughly. Store in an airtight container at room temperature for up to 4 days or freeze for up to 3 months.
- Prep Time: 10 minutes
- Cook Time: 20-25 minutes
- Category: Dessert
- Cuisine: American
Nutrition
- Serving Size: 1 brownie square
- Calories: 180
- Sugar: 9
- Sodium: 45
- Fat: 14
- Saturated Fat: 5
- Carbohydrates: 12
- Fiber: 2
- Protein: 5
Keywords: gluten-free, almond flour, brownies, fudgy, chocolate, dairy-free option, nut-free option, easy dessert, weeknight baking



